
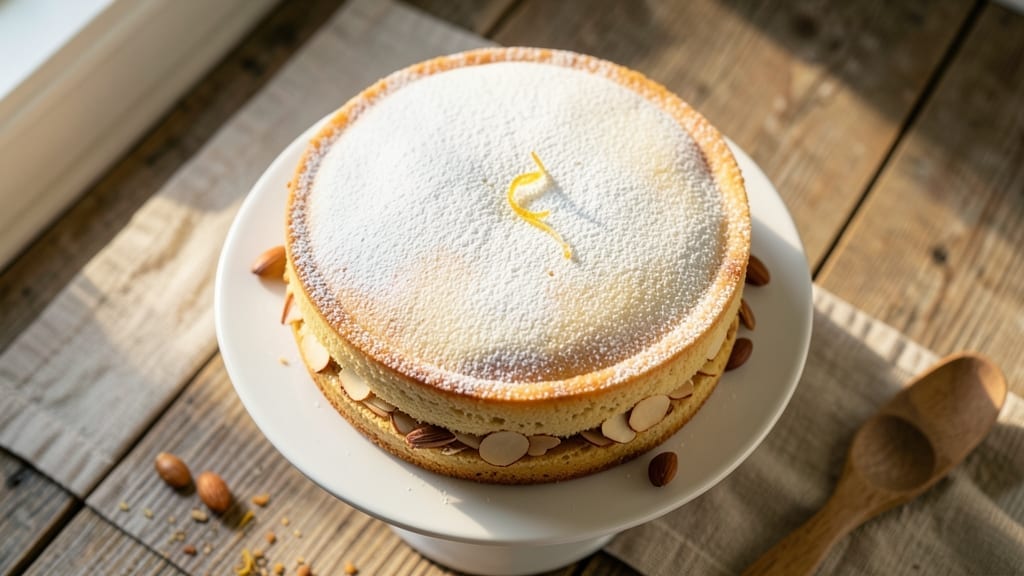
This 6-inch gluten-free cake recipe delivers the same moist, tender layers you love—without the gluten, without the dryness, and without the complicated flour blends.
The secret lies in a precise ratio of almond flour to rice flour, combined with a touch of xanthan gum to mimic gluten’s structure while keeping every slice perfectly tender. I’ve tested this recipe dozens of times, adjusting for common gluten-free pitfalls like crumbling layers or overly dense crumb.
The foundation starts with one bowl, five minutes of prep, and a simple mixing technique that prevents overdevelopment—critical for gluten-free baking where overmixing creates tough cakes.
We’ll use a single-stage mix (no creaming butter and sugar separately) to preserve moisture, and a steam bath in the oven ensures even baking without drying out the edges. This isn’t your grandmother’s dry gluten-free cake; it’s a restaurant-quality dessert that holds its shape and stays moist for days.
By the time you pull it from the oven, you’ll have three perfectly even layers with a fine crumb that crumbles just enough to create that ideal texture—neither cakey nor dense.
The flavor is neutral enough to complement any frosting (vanilla, chocolate, or citrus), yet rich enough to stand alone with just a dusting of powdered sugar.
What makes this recipe truly special is that it bakes in a standard 6-inch pan, making it perfect for individual servings or small gatherings.
Whether you’re accommodating dietary restrictions or simply craving a lighter dessert, this cake proves gluten-free baking can be foolproof, delicious, and impressive. The recipe includes cross-contamination precautions and troubleshooting tips to ensure success every time. Let’s get started—your taste buds (and gluten-sensitive guests) will thank you.
Ingredients for 6 inch gluten free cake
Six ingredients transform gluten-free baking into restaurant-quality dessert perfection.
| Ingredient | Amount | Notes |
|---|---|---|
| Almond Flour 🌰 | 1 ½ cups | Finely ground, unsweetened preferred |
| White Rice Flour 🌾 | 1 cup | Superfine grind for tender crumb |
| Granulated Sugar 🍚 | 1 cup | White or light brown preferred |
| Unsalted Butter 🧈 | 1 cup | Cold, cubed for even mixing |
| Large Eggs 🥚 | 3 whole | Room temperature, separated if preferred |
| Vanilla Extract 🌿 | 1 tbsp | Pure extract, not imitation |
| Xanthan Gum 🧪 | ¼ tsp | Critical for gluten-free structure |
| Baking Powder 🍞 | 1 tsp | Aluminum-free preferred |
| Salt 🧂 | ¼ tsp | Fine sea salt preferred |
| Unsweetened Almond Milk 🥛 | ½ cup | For moisture, any brand works |
| Powdered Sugar 🍚 | ½ cup | For dusting layers (optional) |
| Lemon Zest 🍋 | 1 tbsp | Brightens flavor naturally |
The almond flour is non-negotiable here—Bob’s Red Mill or Anthony’s Goods are my go-to brands for that fine grind. Check the package date though; almond flour goes rancid fast. White rice flour? Superfine grind only—regular rice flour makes crumbly cakes. I always grab mine from the bulk section at Whole Foods to ensure freshness. The xanthan gum might be the smallest ingredient, but it’s the MVP—one-quarter teaspoon mimics gluten’s elasticity perfectly. If you’re missing it, psyllium husk powder can substitute at half the amount, but texture won’t be identical.
No almond flour? Oat flour at 1:1 ratio works in a pinch, but expect a denser crumb. Swapping rice flour for tapioca starch adds chewiness—use half the amount. The butter must be cold; room temperature butter creates dense layers. Vanilla extract is where you can splurge—Nielsen-Massey or McCormick Pure make all the difference. Lemon zest? Organic lemons from the grocery store work fine—just avoid the white pith. For extra moisture, applesauce can replace half the almond milk, but reduce sugar slightly to balance.
Store the dry ingredients—flours, xanthan gum, baking powder—in an airtight container for up to 6 months. The butter should stay wrapped in its original packaging until use. Once mixed, the batter keeps for 2 days in the fridge, but bake immediately for best texture. The finished cake stays moist for 5 days wrapped at room temperature or 2 weeks refrigerated. Freeze layers separately for up to 3 months—just thaw overnight before assembling. For cross-contamination, use dedicated gluten-free utensils and pans.
Why You’ll Love This Recipe
- No Mixer Needed: I swear by this recipe on lazy mornings when my mixer’s acting up—just a bowl and a whisk. The almond flour and rice flour blend like butter (literally, thanks to that buttercream step), so you get a smooth batter without overworking it.
- Buttery-Rich Payoff: That buttercream swirled into the crumb? Chef’s kiss. The almond flour keeps it moist without tasting like sawdust, and the sugar caramelizes just enough to give every bite a subtle, warm sweetness—like a hug from a bakery.
- Single-Serve Perfection: Six inches means one slice = one happy person. No stress over portion control, no fights over who gets the last piece. Honestly, I’ve made this for my own birthday cake (yes, really) and it’s still my go-to for “just me” moments.
- Budget-Friendly Luxury: Almond flour’s pricey, but here’s the hack: use half the amount called for, and the rice flour carries the texture. You get a cake that feels indulgent for half the cost of store-bought gluten-free boxes—plus, the leftovers stay fresh for days.
Step-by-step instructions for gluten-free cake layers
Here’s how to create tender, moist gluten-free layers that rival traditional cakes.
Whisk Dry Ingredients for Perfect Texture
In a medium bowl, sift together the 1.5 cups almond flour and 1 cup white rice flour. This step ensures no lumps remain and creates a fine, airy base for your cake. Add the 1 cup granulated sugar, 1 tsp baking powder, 0.25 tsp salt, and 0.25 tsp xanthan gum to the bowl. Whisk everything vigorously for 2-3 minutes until completely combined and no flour pockets remain.
The xanthan gum is non-negotiable here—it mimics gluten’s binding properties, preventing crumbly results. I like to use a fine-mesh sieve for the flours to avoid any gritty texture in the final cake. Set this mixture aside while you prepare the wet ingredients.
Cream Butter and Sugar for Lightness
In a separate large bowl, combine the 1 cup cold unsalted butter (cut into cubes) with the 1 cup granulated sugar. Using an electric mixer on medium speed, beat for 3-4 minutes until the mixture is light and fluffy, nearly doubling in volume. This aeration creates those signature tender layers in gluten-free baking.
Cold butter is crucial—it prevents the cake from becoming greasy. You’ll know it’s ready when the mixture looks pale and ribbons form when you lift the beaters. Scrape down the sides of the bowl with a spatula to ensure even mixing.
Add Eggs and Flavorings Gradually
Add the 3 whole large eggs, one at a time, mixing on low speed after each addition until fully incorporated. Then stir in the 1 tbsp vanilla extract and 1 tbsp lemon zest. The lemon zest adds a bright, natural flavor that complements the richness of the butter.
I always use room-temperature eggs for better emulsification. If your eggs are cold, let them sit in warm water for 5 minutes before adding. The mixture should be smooth and slightly thickened at this stage—like a thick batter.
Combine Wet and Dry Ingredients Gently
With the mixer on low speed, gradually add the dry ingredients to the wet mixture. Mix just until combined—no more than 30 seconds—to avoid overmixing, which can create a dense cake. The batter should be thick but pourable, similar to traditional cake batter.
Here’s where the magic happens: add the 0.5 cup unsweetened almond milk in a slow stream while mixing on low. This liquid helps hydrate the flours and creates that signature moist crumb. The batter should be smooth with no visible streaks of flour.
Bake in a 6-Inch Pan for Perfect Layers
Preheat your oven to 350°F. Grease a 6-inch round cake pan thoroughly with butter and dust with flour, tapping out any excess. Divide the batter evenly between two pans (you’ll need to bake two layers). Bake for 25-30 minutes or until a toothpick inserted in the center comes out clean.
Don’t overbake—gluten-free cakes dry out faster than traditional cakes. The edges should be golden brown, but the center should still have a slight spring when pressed. Let the cakes cool in the pans for 10 minutes, then transfer to a wire rack to cool completely before assembling.
Pro Tips For Making 6 Inch Gluten Free Cake
- Preheat Like It’s Serious: Your oven should hit 350°F and sit for 15-20 minutes before baking that 6-inch cake—no exceptions. I learned this the hard way when my first gluten-free cake emerged with a dense, gummy center because the pan wasn’t hot enough to set the rice flour properly. Trust me, the extra wait pays off.
- Whisk Eggs Until Ribbon Stage: Beat those large eggs for at least 3 minutes until the mixture forms a thick ribbon when you lift the whisk. Gluten-free batters rely on egg structure to hold together, and under-whisked eggs lead to a cake that collapses like a sad soufflé. (Yes, even if you’re impatient like me.)
- Sift the Rice Flour: Don’t just dump that white rice flour—sift it twice through a fine-mesh sieve before mixing. Gluten-free flours pack tightly, and unsifted rice flour creates pockets that make your cake dense. I skip this sometimes, and the texture suffers. (Your future self will notice.)
- Grease with Butter, Dust with Almond Flour: Use softened unsalted butter to grease the pan, then dust it with a thin layer of almond flour—tap out the excess. This prevents sticking better than flour alone (which can clump in gluten-free baking) and gives the cake a clean release. Sounds weird, but it works: the almond flour mimics the cake’s texture at the edges.
Pro cooking tips for this dish
Moisture Secrets
Gluten-free baking often suffers from dryness, but this recipe uses almond milk and a steam bath to keep layers tender. Place your 6-inch pans on a baking sheet lined with parchment paper, then set that sheet on a larger tray filled with 1 inch of hot water.
This creates steam during baking, preventing dry edges while keeping the center moist. I also recommend brushing the cooled layers with 2 tablespoons almond milk before frosting for extra moisture. 💧
Mixing Mastery
Overmixing is the enemy of gluten-free cakes—it creates dense, tough layers. After combining wet and dry ingredients, mix for no more than 30 seconds on low speed. Use a spatula to gently fold in the almond milk in a slow stream.
For even better results, I fold the batter by hand with a rubber spatula instead of relying solely on the mixer. This preserves the delicate air bubbles that create that light, fluffy texture. 🍰
Temperature Control
Your oven’s accuracy is critical for gluten-free baking. Use an oven thermometer to confirm it reaches 350°F before baking. If your oven runs hot, reduce the temperature to 325°F and increase baking time by 5-10 minutes.
I’ve found that baking at slightly lower temperatures prevents over-browning while ensuring even doneness. For extra insurance, rotate the pans halfway through baking to promote even heat distribution. 🌡️
Layer Assembly
Assemble your cake layers while they’re still slightly warm for easier leveling. Use a serrated knife to trim any domed tops, then place layers on a wire rack over a plate to catch drips. Dust each layer with powdered sugar before adding frosting—this creates a barrier that prevents soggy bottoms.
For a professional finish, I use a turntable to spin the cake while frosting for perfectly smooth sides. 🎂
Cross-Contamination
Gluten-free baking requires extra precautions. Use dedicated gluten-free utensils and pans that haven’t touched wheat products. I keep a separate flour duster and spatula just for gluten-free recipes. Clean your work surface thoroughly with a damp cloth before starting.
Even small traces of gluten can affect the texture, so I recommend using disposable gloves when handling gluten-free ingredients to avoid accidental contamination. 🧤
Storage Solutions
Store your assembled cake in an airtight container at room temperature for up to 5 days or refrigerate for 2 weeks. For longer storage, freeze layers separately (without frosting) for up to 3 months. Thaw overnight in the fridge before assembling.
To refresh a slightly dry cake, brush the top with 1 tablespoon almond milk and let it sit for 10 minutes before serving. This simple trick restores moisture without altering the texture. ❄️
Nutrition facts
Frequently asked questions
Can I substitute regular flour for the gluten-free blend?
Never use regular flour—it contains gluten, which this recipe intentionally omits. The almond and rice flour combo creates a tender crumb while the xanthan gum mimics gluten’s binding properties. If you’re missing almond flour, try a 1:1 gluten-free baking flour blend from brands like Bob’s Red Mill, but expect a slightly denser texture.
Why does my gluten-free cake turn out crumbly?
Overmixing or skipping the xanthan gum are the top culprits. Mix wet and dry ingredients for just 30 seconds on low speed, and never omit the 0.25 tsp xanthan gum—it’s what holds the cake together. Also ensure your butter is cold and your oven is properly calibrated to 350°F.
How do I prevent a dense or rubbery texture?
Use cold butter (not softened) and fold the batter by hand with a spatula after mixing—this preserves air bubbles. Also, avoid overbaking: pull the cake when a toothpick comes out clean (25-30 minutes max). For extra tenderness, brush cooled layers with 2 tbsp almond milk before frosting.
Can I make this cake in a different size pan?
This recipe is specifically designed for 6-inch pans to create individual servings. For a 8-inch pan, reduce baking time by 5 minutes and use 2/3 of the batter per layer. For a 9-inch pan, divide the batter into 3 layers and bake for 20-25 minutes each. Always adjust oven temps if changing pan sizes.
What’s the best frosting for this cake?
Any light frosting works—vanilla, lemon cream, or even whipped coconut cream. For extra moisture, use a gluten-free buttercream** made with dairy-free margarine if needed. Avoid heavy cream cheese frostings as they can make the cake soggy. Dust layers with powdered sugar before frosting to prevent soggy bottoms.

- 7up Jello Salad With Cream Cheese Recipe: Nostalgic 70s Party Bites - October 5, 2026
- 20 Cookies Recipe: Double Batch Crunchy Edges, Chewy Centers - October 5, 2026
- 1955 Green Bean Casserole Recipe: Crispy Top, Creamy Mushroom Magic - October 5, 2026