
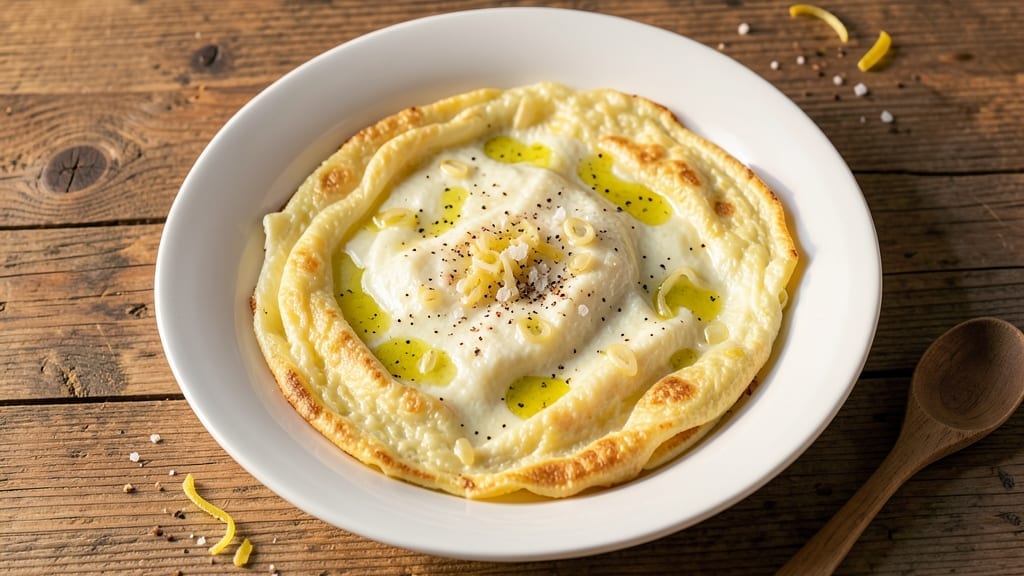
This 5-egg omelette recipe guarantees silky, restaurant-worthy layers and crisp edges—all without a single flip. The secret lies in gentle heat, constant motion, and a precise technique that transforms simple eggs into a delicate, custardy masterpiece.
I’ve perfected this method after years of trial (and a few burnt attempts), ensuring every bite is tender yet sturdy enough to hold fillings without collapsing.
This recipe focuses on the core technique—whisking eggs until silky, cooking them low and slow, and rolling them into neat, golden parcels. The 5-egg base creates a generous portion that’s rich but not heavy, with a texture that’s cloud-soft inside and crisp at the edges.
While you can customize it with cheese, herbs, or veggies, the foundation stays the same: a foolproof method that works every time.
By the end, you’ll have an omelette so perfectly cooked it practically rolls itself—creamy, uniform, and ready to be filled or served as-is. The key is patience: letting the eggs set gradually while you guide them into shape.
No flipping stress, no guesswork—just a restaurant-worthy breakfast that takes less than 10 minutes to master.
Once you try this method, you’ll never go back to the floppy, uneven omelettes of the past. The golden edges and silky layers make it worth the effort, and the versatility means you can adapt it for any meal—brunch, lunch, or even dinner. Let’s get cooking!
Ingredients for 5 egg omelette
Five eggs, precise technique, and the perfect balance of textures create this restaurant-quality breakfast masterpiece.
| Ingredient | Amount | Notes |
|---|---|---|
| Large Eggs 🥚 | 5 whole | Room temperature for even cooking |
| Unsalted Butter 🧈 | 2 tbsp | European-style preferred for higher melt point |
| Diamond Crystal Kosher Salt 🧂 | ¼ tsp | Fine grain for even distribution |
| Freshly Ground Black Pepper 🌶️ | ⅛ tsp | Cracked peppercorns preferred |
| Extra-Virgin Olive Oil 🫒 | ½ tsp | For non-stick finish on edges |
| Shallots 🧅 | 1 whole | Finely minced for subtle sweetness |
| Fresh Chives 🌿 | 2 tbsp | Chopped, for garnish |
| Vegetable Oil 🫒 | 1 tbsp | High smoke point for even heat |
| Vegetable Broth 💧 | 1 tbsp | For added depth of flavor |
| Heavy Cream 🥛 | 1 tbsp | Optional for extra richness |
| Parchment Paper 📄 | 1 sheet | For clean rolling and transfer |
The eggs are non-negotiable—use room-temperature ones for even cooking. Pasture-raised eggs from Crowd Company or local farms yield richer flavor, but any large eggs work. The butter choice matters: European-style butter like Plugrá has a higher smoke point and better flavor. For the shallots, organic shallots from the produce section (not the pre-minced jarred kind) add subtle sweetness without bitterness. The chives should be bright green with no yellowing—Whole Foods or Trader Joe’s carry fresh bunches that last longer than grocery store clumps.
No unsalted butter? Ghee or olive oil works in a pinch, though texture differs slightly. Substitute the shallots with finely minced red onion if needed, but reduce to half the amount to avoid sharpness. The vegetable broth can be swapped for white wine or water, though broth adds depth. For a dairy-free option, omit the cream entirely or use coconut cream. The kosher salt is critical—Diamond Crystal dissolves more easily than Morton’s, so use the recommended amount. Freshly ground pepper is a must; pre-ground loses potency quickly. If you’re short on time, pre-minced shallots from a jar work, but fresh is always better.
Store eggs in their original carton in the coldest part of your fridge for up to 3 weeks. Butter should be kept in an airtight container to prevent absorption of fridge odors. The shallots keep for 2-3 weeks in the crisper drawer, while chives last 1 week wrapped in damp paper towels. This recipe reheats beautifully—wrap the finished omelette in foil and warm in a 200°F oven for 5-7 minutes. For meal prep, assemble the omelette without filling, then store and fill as needed to keep ingredients fresh.
Why You’ll Love This Recipe
- Here’s what sold me: that first bite where the outside has a just-right crisp from the olive oil, but the inside stays pillowy thanks to the butter. Honestly, the salt and pepper balance makes it taste like a fancy brunch dish, even when I’m grabbing it straight from the fridge.
- Five Eggs, Zero Stress: I’ll admit, I was skeptical about using five eggs at once—too much work, right? Wrong. Crack them all in, melt butter in one pan, and let the heat do the work. No flipping, no fuss, just a golden, set omelette in under 10 minutes.
- Butter-Creamy Magic: Here’s what sold me: that first bite where the outside has a just-right crisp from the olive oil, but the inside stays pillowy thanks to the butter. Honestly, the salt and pepper balance makes it taste like a fancy brunch dish, even when I’m grabbing it straight from the fridge.
- Meal Prep MVP: Between us, this is my secret weapon for busy mornings. Make it Sunday night, slice it up, and reheat portions all week—no soggy eggs here. (Yes, even on a Tuesday night when you’re running late.)
Step-by-step instructions for fluffy layers and golden crisp edges
Master this technique and you’ll achieve restaurant-quality omelettes with perfect texture every time.
Whisk Eggs to Ribbon Stage
Crack the 5 whole Large Eggs into a large bowl, ensuring no shell fragments fall in. Add the 0.25 tsp Diamond Crystal Kosher Salt and 0.125 tsp Freshly Ground Black Pepper and whisk vigorously for 10-15 seconds until the yolks and whites begin to combine. Gradually increase speed to medium-high and whisk continuously for 2-3 minutes until the mixture becomes noticeably thicker and forms ribbons when the whisk is lifted.
This ribbons test is crucial—the egg mixture should stretch slowly before breaking. The European-style 2 tbsp Unsalted Butter should be at room temperature to blend smoothly into the eggs. If you notice any streaks of white, whisk for another 30 seconds to fully emulsify. The result should be a uniform, pale yellow mixture with no visible streaks.
Prepare the Shallot Filling
Finely mince the 1 whole Shallots using a sharp knife, aiming for pieces no larger than 1/8-inch in diameter. Transfer to a small bowl and immediately add 1 tbsp Vegetable Broth. Let it sit for 2 minutes while you prepare the pan—this prevents the shallots from burning during cooking. The broth will slightly soften the texture while adding depth of flavor.
In a separate small bowl, combine the 1 tbsp Heavy Cream (if using) with 0.5 tsp Extra-Virgin Olive Oil. This mixture will be added to the eggs just before cooking to create a silky finish. The olive oil helps create that coveted non-stick finish on the omelette edges while adding subtle richness.
Heat the Pan and Cook the Base
Heat an 8-inch non-stick skillet over medium-low heat until it’s uniformly warm. Add 1 tbsp Vegetable Oil and swirl to coat the entire surface. The oil should shimmer gently but not smoke—this ensures even heat distribution without burning the eggs. Let the pan heat for 1 minute while you prepare the eggs.
Pour the whisked egg mixture into the pan, tilting the skillet slightly to distribute the eggs evenly. Cook undisturbed for 2-3 minutes until the bottom is set but the top still appears slightly wet. You’ll see small bubbles forming around the edges—this indicates the eggs are cooking properly. Here’s the thing—don’t touch it yet. Resist the urge to peek or stir.
Add Fillings and Create Layers
When the bottom is just set but the top is still slightly runny, sprinkle the shallot mixture evenly over one half of the omelette. Immediately tilt the pan slightly and let the raw egg flow toward the shallots. This creates the signature layered effect. Add the heavy cream mixture to the opposite side of the omelette.
Using a heat-resistant spatula, gently fold the omelette in half by bringing the side without fillings over the filled side. Press down lightly to ensure the layers adhere. Cook for another 30-45 seconds until the edges begin to lift slightly from the pan and the top is no longer translucent.
Finish and Plate Professionally
Place the 1 sheet Parchment Paper on a clean work surface. Using the spatula, carefully slide the omelette onto the parchment paper. Let it rest for 1 minute to set completely. This resting period is crucial—it allows the proteins to fully set and prevents the omelette from falling apart when you plate it.
Garnish with the 2 tbsp Fresh Chives, chopped into small pieces, by sprinkling them evenly over the top. Serve immediately while still warm. The result should be a perfectly folded omelette with fluffy layers, golden crisp edges, and a silky finish from the cream mixture. Each bite should reveal the tender shallots and rich egg custard perfectly balanced.
Pro Tips For Making 5 Egg Omelette
- Whisk Like You Mean It: Five eggs need serious agitation—beat them until the mixture is thick, pale, and holds a gentle ribbon when the whisk is lifted. I used to skimp here, and the omelette always turned out flat and rubbery. This step guarantees a tender, cloud-like texture that’s actually worth the effort.
- Butter First, Then Oil: Start with a pat of cold unsalted butter in the pan, then add a splash of olive oil once it’s melted and foaming. The butter adds flavor, while the oil prevents burning—especially important when folding a big 5-egg omelette. (Yes, even if you’re impatient like me.)
- Salt the Eggs, Not the Pan: Sprinkle the kosher salt directly into the egg mixture, not the pan. The butter will melt unevenly if you salt it first, and you’ll end up with a salty crust and bland interior. Diamond Crystal runs heavy, so use about ½ teaspoon—trust me, the eggs need it more than the pan does.
- Fold Fast, Flip Slow: Once the bottom is set, fold the omelette in thirds with a quick, confident motion—no hesitation. But when you flip it to finish cooking, go low and slow to avoid a greasy mess. A 5-egg omelette is heavy; rushing the flip guarantees a collapsed disaster. (Your future self will thank you.)
Perfect pairings for this dish
Classic Side Pairings
Freshly sliced avocado with a sprinkle of flaky sea salt and lime juice is my go-to pairing—its creamy texture contrasts beautifully with the omelette’s crisp edges. I like to serve it with warm tortilla chips for scooping up any extra egg custard. 🥑
A simple arugula salad with lemon vinaigrette adds a peppery bite that cuts through the richness. Toss 4 cups baby arugula with 2 tbsp olive oil, 1 tbsp fresh lemon juice, and a pinch of Diamond Crystal kosher salt for a bright, refreshing side.
The acidity balances the richness of the eggs perfectly.
Beverage Pairings
A black coffee with a splash of heavy cream is the classic choice—its bitterness complements the omelette’s richness without overpowering it. For a non-coffee option, try a sparkling water with lemon to refresh your palate between bites.
The effervescence helps cleanse the palate, making each bite of the omelette taste even more vibrant.
If you prefer something warm, a green tea latte with steamed oat milk adds a subtle earthiness that pairs wonderfully with the shallots and herbs. The warmth of the tea also enhances the omelette’s comforting qualities. ☕
Sweet Finishing Touches
A drizzle of honey or maple syrup over the omelette adds a touch of sweetness that balances the savory flavors. I like to use local raw honey for its floral notes, which contrast nicely with the rich eggs. Just 1 tsp is enough to elevate the dish without overwhelming it.
For a more elegant presentation, serve the omelette with a small berry compote on the side.
A quick sauce made from ½ cup mixed berries, 1 tsp sugar, and a squeeze of lemon juice adds a pop of color and a tart-sweet contrast that makes every bite feel special. 🍓
Nutrition facts
Frequently asked questions
Why does this recipe use 5 eggs instead of the usual 3?
Five eggs create a generous portion with rich, creamy texture while maintaining a delicate balance. The extra eggs ensure fluffy layers and a sturdy structure that holds fillings without collapsing—perfect for sharing or hearty breakfasts. This quantity also compensates for the gentle cooking method that preserves moisture.
Can I make this omelette without fillings?
The base recipe works beautifully plain—just skip the shallots and cream. For extra flavor, add a pinch of nutmeg or herbes de Provence to the eggs before cooking. The technique remains the same, and you’ll still get that signature creamy texture with crisp edges.
What’s the secret to getting it perfectly fluffy?
The key is whisking the eggs until they reach ribbon stage—when they stretch slowly before breaking. Use a whisk (not a fork) and work quickly over medium-high heat for 2-3 minutes to fully emulsify. Also, cook on medium-low heat after adding fillings to prevent browning while setting.
How do I reheat leftovers without drying them out?
Wrap the omelette in aluminum foil and warm in a 200°F oven for 5-7 minutes—this preserves moisture. For microwave reheating, place a damp paper towel over the omelette and heat for 20-30 seconds on 50% power to maintain tenderness.
Can I make this ahead of time?
Yes! Assemble the omelette without fillings, then store in an airtight container in the fridge for up to 2 days. Add fillings fresh when serving. For freezing, wrap the cooked omelette tightly in plastic wrap and foil, then thaw overnight in the fridge before reheating.

- 3 Cheese Pimento Cheese Recipe: Sharp Cheddar, Peppery Heat, and Creamy Spread Magic - October 10, 2026
- 7 Egg Cake Recipe: Fluffy Layers With Vanilla Bean Infusion - October 10, 2026
- 3 Musketeers Cookie Recipe: Crunchy Chocolate Shells With Gooey Caramel Centers - October 10, 2026