
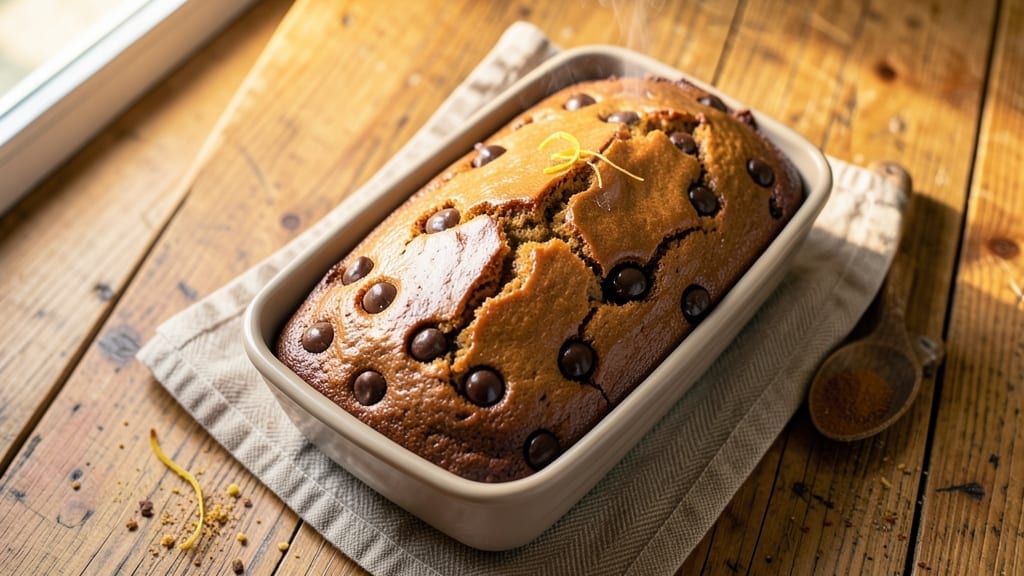
This 5-ingredient flourless loaf cake delivers restaurant-quality fudgy richness without the fuss of traditional baking. The secret lies in a simple yet powerful combination of chocolate, eggs, and butter that transforms into a dense, moist cake with minimal effort.
No flour, no measuring cups—just one bowl and a 350°F oven for a dessert that tastes like it took hours to make.
The beauty of this recipe is its foolproof simplicity: melt chocolate and butter together, whisk in eggs, and pour into a loaf pan. Baking time is just 35 minutes, but the result is a cake with deep chocolate flavor and a crackly top that begs to be broken.
The texture stays moist for days, making it perfect for meal prep or last-minute dessert cravings.
What makes this cake truly special is how it satisfies without the guilt. Each slice delivers rich, chocolatey depth with a velvety crumb that melts in your mouth. The lack of flour means no dry, cakey texture—just pure, indulgent chocolate goodness.
It’s the kind of dessert that feels like a treat but comes together in under 15 minutes of active time.
Whether you’re baking for a crowd or treating yourself to a single serving, this loaf cake is a game-changer. Serve it warm with a scoop of vanilla ice cream or enjoy it at room temperature for a satisfying, chocolatey bite. Here’s how to make it perfectly every time.
Ingredients for 5 ingredient flourless loaf cake
Five simple ingredients transform into a decadent loaf cake with rich chocolate flavor and velvety texture.
| Ingredient | Amount | Notes |
|---|---|---|
| Semi-Sweet Chocolate Chips 🍫 | 8 oz | High-quality for best melt |
| Unsalted Butter 🧈 | ½ cup | Cold, cut into pieces |
| Large Eggs 🥚 | 4 whole | Room temperature preferred |
| Granulated Sugar 🍚 | ¼ cup | For subtle sweetness balance |
| Vanilla Extract 🌿 | 1 tsp | Pure, high-quality preferred |
The chocolate chips make this cake—Ghirardelli or Guittard are my go-tos for that perfect balance of sweet and bitterness. The butter should be cold when you measure it; this prevents the mixture from getting too warm too fast. Eggs at room temperature blend more smoothly, so take them out of the fridge 30 minutes before you start. The sugar is just enough to complement the chocolate without overpowering it, so don’t be tempted to add more. Vanilla extract? Pure Madagascar bourbon if you’re feeling fancy, but the cheap stuff works fine too.
No vanilla extract? 1 tsp vanilla sugar or even a pinch of vanilla bean paste will work in a pinch. Running short on sugar? Maple syrup at half the amount adds moisture but changes the texture slightly. For a deeper chocolate flavor, swap half the chocolate chips for dark chocolate bars (70% cocoa or higher). The butter can be substituted with coconut oil, but it will give a slightly different texture—more cake-like than fudgy. If you’re concerned about the cake being too rich, reduce the butter to 0.375 cup and add 1 tbsp cocoa powder.
This cake is best made fresh, but it keeps well for 3-4 days in an airtight container at room temperature. For longer storage, wrap tightly and refrigerate for up to 1 week. If you make it ahead, bring it to room temperature before serving—it reheats beautifully in the microwave for 10-15 seconds. The crackly top is best when the cake is warm, so serve it straight from the oven if you can. Leftovers? Slice and freeze for up to 3 months—just thaw at room temperature before serving.
Why You’ll Love This Recipe
- No Mixing Madness: I swear by this one—just melt butter, toss in eggs and sugar, fold in chocolate, and boom. No sifting, no measuring cups, no waiting for dough to rest. The eggs do all the heavy lifting while you stir for two minutes flat.
- Rich Without Effort: That first bite? Pure chocolatey bliss with a crackly top and a molten center. The semi-sweet chips melt into the eggy custard, and the vanilla ties it all together like a secret handshake. Honestly, it tastes like a bakery dessert—but I’m the one who made it.
- Weeknight Hero: Slice it warm for breakfast, pack it for lunch, or serve it at 8 PM when you’re starving and too tired to care. It keeps for days in the fridge, reheats in seconds, and even my picky teenage nephew asks for seconds. (Yes, even on a Tuesday night.)
- Pantry Staple Magic: Five ingredients? You’re already halfway there. Butter, eggs, sugar—stuff you buy every week—and chocolate chips that rarely last past the first bag. No specialty items, no last-minute grocery runs. My go-to when I’ve got nothing but a loaf pan and a craving.
Step-by-step instructions for flourless chocolate loaf cake
This one-bowl wonder delivers rich, fudgy perfection with just five ingredients.
Melt Chocolate and Butter Together
Place the 8 oz semi-sweet chocolate chips and ½ cup cold unsalted butter (cut into pieces) in a microwave-safe bowl. Microwave on high for 1 minute, then stir vigorously with a silicone spatula. Return to microwave for 30-second intervals until completely melted and smooth, stirring after each interval. The mixture should be glossy and homogeneous—no grainy chocolate bits should remain.
Here’s the thing—don’t rush this step. If you force it, you’ll end up with separated chocolate. The heat should gently melt everything together. Let the mixture cool slightly for 2 minutes while you prepare the eggs and sugar. This prevents scrambling when you combine everything later.
Whisk Eggs and Sugar Until Ribbon Stage
In a separate large bowl, whisk the 4 whole large eggs and ¼ cup granulated sugar together until the mixture lightens in color and forms ribbons when the whisk is lifted. This should take about 3-4 minutes of vigorous whisking. You’ll notice the mixture will nearly triple in volume and become pale yellow—this is crucial for a light, airy texture despite being flourless.
I like to use a stand mixer for this step because it’s easier to achieve the proper consistency. If you’re whisking by hand, work in a figure-eight motion to incorporate air efficiently. The eggs should coat the back of the spoon and leave a clear trail when you run your finger through the mixture—that’s your ribbon stage signal.
Combine Mixtures and Add Vanilla
Pour the melted chocolate-butter mixture into the egg mixture while whisking continuously on low speed. Add the 1 teaspoon vanilla extract and mix just until fully combined—you should still see some streaks of egg mixture. Overmixing at this stage can introduce too much air, which might cause the cake to sink in the middle.
This is where the magic happens. The warmth from the chocolate mixture will gently thicken the egg mixture, creating a smooth batter that’s thick but still pourable. The batter should coat the back of a spoon but still flow when poured. If it’s too thick, let it sit for 5 minutes to cool slightly before proceeding.
Bake Until Springy and Set
Preheat your oven to 350°F and grease a 9×5-inch loaf pan thoroughly with butter or nonstick spray. Pour the batter into the prepared pan and smooth the top with a spatula. Bake for 45-50 minutes until the edges are set and the center springs back gently when touched. A toothpick inserted in the center should come out with moist crumbs—not wet batter, but not completely dry either.
Don’t open the oven door during the last 20 minutes of baking. The temperature fluctuations can cause the cake to sink or develop a dome. If the top starts to brown too quickly, tent loosely with aluminum foil. The cake is done when it’s firm to the touch but still fudgy—this is the hallmark of perfect flourless chocolate cake.
Rest and Serve for Maximum Fudginess
Remove the cake from the oven and let it cool in the pan for 10 minutes. Then transfer it to a wire rack to cool completely. This resting period allows the cake to set properly and prevents it from being too dense when sliced. The cake will continue to firm up as it cools, developing that signature fudgy texture.
Slice when completely cool for clean cuts. Each serving should have a rich, chocolatey flavor with a tender crumb and just a hint of sweetness from the sugar. Serve at room temperature with a dusting of powdered sugar or a dollop of whipped cream for an elegant touch. The simplicity of this recipe belies its impressive depth of flavor—trust the process!
Pro Tips For Making 5 Ingredient Flourless Loaf Cake
- Preheat Pan First: Slap that loaf pan in the oven for 5 minutes before pouring in the batter—yes, even if it’s not on the recipe. I learned this the hard way when my cake stuck like glue and tore apart when I tried to flip it. The extra heat helps the edges set faster, so you don’t end up with a sad, crumbly bottom.
- Melt Butter Slowly: Don’t nuke that butter. Melt it in the microwave in 20-second bursts, stirring between each, until it’s just liquid—not steaming. Overheating turns it greasy, and your cake will taste like a sad, buttery puddle instead of rich, fudgy perfection. Trust me, the extra 30 seconds saves you from regret.
- Whisk Eggs Like Your Life Depends On It: Beat those eggs until the mixture is thick, pale, and ribbon-like—no streaks, no yellow yolks. Use a hand mixer or whisk for at least 3-4 minutes. I used to skimp here, and my cake turned out dense and bland. This step unlocks the fluffy, melt-in-your-mouth texture you’re after.
- Fold in Chocolate Gently: After mixing everything else, gently fold in the chocolate chips with a spatula—don’t stir like you’re making pancake batter. Overmixing incorporates air, which can cause the cake to sink in the middle. Think “light touch,” like you’re tucking in a baby, not kneading dough. It’s weirdly satisfying when it works.
Pro cooking tips for great 5 ingredient flourless loaf cake
Chocolate Melting Mastery
Never microwave chocolate and butter together on high without stirring—this is the #1 way to end up with separated chocolate. I use 30-second intervals with vigorous stirring between each to ensure even melting.
For a smoother finish, let the melted mixture cool for 2 minutes before combining with eggs. This prevents scrambling and keeps your batter silky. 🍫
Egg Whisking Secrets
Reaching ribbon stage is non-negotiable for that perfect flourless texture. Use a stand mixer on medium-high for 3-4 minutes—hand whisking works but requires serious elbow grease. The mixture should triple in volume and leave clear streaks when you lift the whisk.
Pro tip: If your eggs are cold, whisk them for 1 extra minute to incorporate more air.
Batter Consistency Check
Your batter should be thick but pourable—like heavy pudding. If it’s too thin, your cake will sink; too thick, and it’ll be dense. I test consistency by running my finger through the batter: it should leave a clear trail but still flow when poured.
Need to adjust? Let it sit 5 minutes to cool slightly before proceeding.
Oven Temperature Control
Preheat your oven for at least 15 minutes before baking—this ensures even heat distribution. Use an oven thermometer to verify it’s actually 350°F (many ovens run hot or cold).
The last 20 minutes of baking are critical: don’t open the door or your cake will develop a dome. If the top browns too quickly, tent loosely with foil.
Loaf Pan Prep
Grease your 9×5-inch loaf pan with butter (not oil spray) for the best release. I also line the bottom with parchment paper cut to fit—this prevents sticking and makes removal effortless.
Tap the pan gently on the counter 3 times after pouring the batter to eliminate air bubbles. This gives you a smooth, professional-looking top.
Doneness Test Done Right
The toothpick test is key: insert it in the center and pull out moist crumbs—not wet batter, not dry cake. The edges should be set but the center should still jiggle slightly. For extra accuracy, use your finger: press gently—if it springs back, it’s done.
Overbaking dries out flourless cakes, so pull it out when it’s just slightly underdone. It’ll firm up as it cools. ✨
Nutrition facts
Frequently asked questions
Why does this recipe only use 5 ingredients?
The magic happens with high-quality components! Chocolate and butter provide rich depth, while eggs create structure without flour. Sugar balances bitterness, and vanilla adds warmth—no fillers needed. This minimalist approach ensures maximum flavor with minimal effort.
Can I substitute dark chocolate for semi-sweet chocolate chips?
Yes, but adjust for intensity! Use 70% cocoa dark chocolate and reduce to 6 oz total. For every 2 oz of dark chocolate, add 1 tsp extra sugar to maintain sweetness balance. The texture stays fudgy, but flavor becomes more complex.
What if my cake sinks in the middle?
This usually means the batter was too thin or the oven wasn’t hot enough. Next time, let the melted chocolate cool 3 minutes before mixing with eggs, and verify your oven reaches 350°F with a thermometer. Also, don’t overmix after combining ingredients—just until smooth.
How do I make this cake gluten-free?
This recipe is naturally gluten-free! Just ensure your chocolate chips, sugar, and vanilla extract contain no gluten additives. The eggs and butter are always gluten-free. For extra insurance, use certified gluten-free chocolate brands. The texture remains identical to the original.
Can I bake this in a different pan shape?
Yes, but adjust baking time! A 9-inch round pan requires 35-40 minutes, while a 9×9-inch square pan needs 30-35 minutes**. For odd shapes, check doneness with a toothpick. The cake will spread slightly, so don’t overfill the pan.

- 6 Oz Chocolate Chip Cookie Recipe: Perfectly Balanced Crispy Edges and Chewy Hearts - September 25, 2026
- 6-Inch Coffee Cake Recipe: Vanilla Bean Swirls and Buttery Streusel Topping - September 25, 2026
- 1 Hour Soup Recipe: Velvety Richness Without the Wait - September 25, 2026