
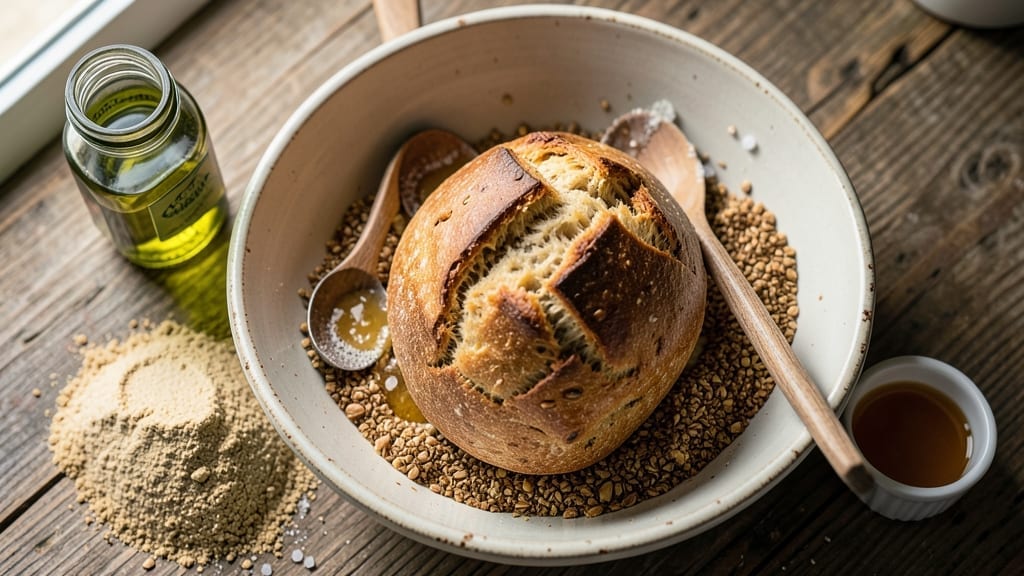
A 5-ingredient whole wheat bread recipe that delivers restaurant-quality crust without kneading, shaping, or special equipment—just one bowl and 30 minutes of hands-off time. This no-knead method transforms basic pantry staples into a loaf with crispy golden crust and tender crumb, proving you don’t need fancy techniques for professional results.
The secret lies in overnight fermentation, which develops deep flavor and creates that signature open crumb structure without any effort on your part.
What makes this recipe truly remarkable is its simplicity: whole wheat flour, water, yeast, salt, and oil (or honey) are all you need to create a loaf that rivals artisanal bakery bread.
The dough comes together in minutes, then ferments slowly in the fridge overnight—no active rising required. This approach eliminates common pitfalls like dense texture or uneven baking, making it perfect for beginners while still impressing experienced bakers.
By morning, you’ll have a dough ready to bake into a loaf with a crispy exterior and a soft, airy interior that’s perfect for toast, sandwiches, or serving warm with butter.
The whole wheat flour adds subtle earthiness without overpowering the bread’s natural sweetness, while the slow fermentation enhances its flavor profile. This method also yields excellent results with minimal cleanup—just one bowl and a baking sheet.
Whether you’re baking for a family dinner or treating yourself to homemade bread, this recipe delivers consistent, foolproof results. The same technique works for sandwich bread, dinner rolls, or even a free-form loaf—simply adjust the baking time and shape to your preference. Let’s get started on your first perfect loaf!
Ingredients for 5 ingredient whole wheat bread
Five pantry staples transform into artisanal bread with just one bowl and overnight patience.
| Ingredient | Amount | Notes |
|---|---|---|
| Organic Whole Wheat Flour 🌾 | 4 cups | Unbleached, high-protein preferred |
| Warm Water 💧 | 1 ½ cups | 110°F (43°C) for optimal yeast activation |
| Active Dry Yeast 🍞 | 1 ½ tsp | Freshly opened, not expired |
| Extra-Virgin Olive Oil 🫒 | ¼ cup | For richness and crust development |
| Kosher Salt 🧂 | 1 ½ tsp | Diamond Crystal preferred |
| Honey 🍯 | 1 tbsp | Optional for slight sweetness |
| Cornmeal 🌽 | ½ cup | For dusting baking sheet |
The flour is everything here—King Arthur or Bob’s Red Mill whole wheat are my go-tos for consistent results. High-protein flour (12-14%) yields better structure, but any whole wheat works in a pinch. Warm water activates the yeast perfectly—110°F is ideal, but don’t stress if it’s room temp. The yeast needs to be freshly opened; expired yeast means failed bread. For the oil, extra-virgin olive oil adds incredible flavor, but any neutral oil like vegetable works. The honey? Purely optional but enhances crust color and adds subtle sweetness—local raw honey if you’re feeling fancy.
No whole wheat flour? Substitute half with all-purpose flour for a lighter texture, but the crumb won’t be as open. Short on yeast? Instant yeast works 1:1, but active dry is ideal here. Olive oil unavailable? Melted coconut oil or butter (yes, butter!) keeps the dough tender. The salt is non-negotiable—Diamond Crystal measures differently than Morton, so use the recipe’s measurement. For a completely vegan version, swap honey for maple syrup or agave. The cornmeal dusting prevents sticking and adds a subtle crunch—semolina works too if you’ve got it.
Mix everything in one bowl, cover, and refrigerate overnight—12-16 hours is perfect. The dough will look shaggy, but that’s normal! Shape it gently before baking for that classic loaf form. For a crispier crust, bake with steam (place a tray of boiling water in the oven for the first 10 minutes). Leftovers? Freeze slices for up to 3 months—toast straight from frozen. This bread improves overnight as the flavors meld, so make it the night before for the best results.
Why You’ll Love This Recipe
- No-Fuss Mixing: I swear by the 5-minute stir—just flour, water, yeast, olive oil, and salt in a bowl. No stand mixer, no kneading, no stress. The dough comes together smoother than I expected, and honestly? That’s half the battle won.
- Earthy, Buttery Crust: The olive oil gives this bread a golden, crackly crust that shatters just right, while the whole wheat keeps it hearty and satisfying. It’s not sweet, not overly dense—just good, with a subtle richness that makes toast or sandwiches feel like a treat.
- Meal Prep MVP: Between us, this bread stays fresh for days in the fridge. I slice a loaf on Sunday, wrap it in a towel, and it’s ready for sandwiches, soups, or charcuterie all week. No sad, stale bread here—just reliable, flavorful slices waiting to be used.
- Budget Bread, Big Payoff: Organic whole wheat flour might sound fancy, but it’s cheaper than buying artisanal loaves at the store. Plus, a single batch feeds my family for days, and the yeast stretches my grocery budget further. Practical? Absolutely. Delicious? Even more so.
Step-by-step instructions for 5-Ingredient whole wheat bread
This no-knead method transforms simple ingredients into a rustic, crusty loaf with minimal effort.
Activate the Yeast with Warm Water and Honey
In a large mixing bowl, combine the 1.5 cups warm water (around 110°F) with the 1.5 teaspoons active dry yeast and 1 tablespoon honey. Let this mixture sit for 5-10 minutes until it becomes frothy and bubbly. This indicates the yeast is alive and ready to work its magic.
I always check for bubbles by gently swirling the bowl—you should see small, active bubbles forming on the surface. If nothing happens after 10 minutes, your yeast might be expired. In that case, start fresh with a new packet. The honey here isn’t just for sweetness; it helps feed the yeast and creates a slightly richer flavor in the finished bread.
Mix the Dough with Flour, Oil, and Salt
To the yeast mixture, add the 4 cups organic whole wheat flour, 0.25 cup extra-virgin olive oil, and 1.5 teaspoons kosher salt. Using a wooden spoon or dough whisk, stir vigorously for 2-3 minutes until the dough comes together into a shaggy mass that clings to the sides of the bowl.
Don’t worry if it looks messy—this is normal for whole wheat dough. The olive oil here plays a crucial role in tenderizing the dense flour and creating that beautiful crust. After mixing, let the dough rest for 10 minutes while you prepare your baking surface. This brief rest helps the flour absorb the liquid and makes the next shaping step much easier.
Shape and Let the Dough Rise
After the 10-minute rest, wet your hands slightly with water and gently shape the dough into a rough ball. Place it seam-side up in a lightly greased bowl, cover it with a clean kitchen towel, and let it rise at room temperature for 1-2 hours or until it has nearly doubled in size. The dough should feel light and springy when pressed gently with one finger.
Here’s the thing—whole wheat dough rises slower than white flour dough, so patience is key. I like to place my bowl in a warm spot near the oven (with the oven off) to help speed up the process slightly. You’ll know it’s ready when the dough reaches the top of the bowl and leaves a slight indentation when pressed firmly. This is your signal that the yeast has done its work and the bread is ready for baking.
Prepare for Baking with Cornmeal
Preheat your oven to 375°F with a Dutch oven or heavy oven-safe pot inside for 30 minutes. While the oven heats, sprinkle 0.5 cup cornmeal evenly on a baking sheet or parchment paper. This creates a textured base that helps develop that beautiful crust.
Turn the risen dough onto the prepared surface and gently shape it into an oval or round loaf. The cornmeal will stick to the bottom, creating those signature crunchy spots on the bottom crust. Here’s a pro tip: If your dough feels sticky, wet your hands again and work quickly—whole wheat dough can be temperamental but rewards your attention with incredible flavor.
Bake to Golden Perfection
Carefully transfer the shaped dough to the preheated Dutch oven, cover it, and bake for 30 minutes. Then remove the lid and continue baking for another 15-20 minutes until the bread is deep golden brown and sounds hollow when tapped on the bottom. The internal temperature should reach 205-210°F.
This two-stage baking process is crucial—it creates steam for an open crumb while developing that crispy crust. When you remove the bread from the oven, let it cool on a wire rack for at least 30 minutes before slicing. I know it’s tempting to cut into it immediately, but resisting this urge prevents a gummy interior. The bread will continue to develop its flavors as it cools, resulting in that perfect rustic loaf you’ve been dreaming of.
Pro Tips For Making 5 Ingredient Whole Wheat Bread
- Mix the Yeast Last: Whole wheat flour’s natural acids can kill yeast if mixed too early. Stir the yeast into the warm water just before adding it to the flour—this keeps it lively and ensures proper rise. (Yes, even if you’re eager to start.)
- Use a Scale, Not Cups: Whole wheat flour packs differently than white flour, and volume measurements are unreliable. Weigh your flour (about 400g for a standard loaf) for consistent texture—no more dense, brick-like bread or overly light disappointments.
- Knead Less, Stretch More: Whole wheat dough resists gluten formation, so skip the long kneading. Instead, do 5-6 vigorous stretch-and-folds during the first hour of bulk fermentation—it develops structure without overworking the dough.
- Oil the Bowl Properly: Lightly brush your mixing bowl with olive oil and sprinkle a pinch of flour inside before adding the dough. This prevents sticking and makes turning the dough easier—no more dough tearing when you flip it. (Trust me, it’s worth the 30 seconds.)
Make-ahead tips for this dish
Overnight Prep Advantage
The real magic happens when you let the dough ferment overnight in the fridge. This slow rise develops deeper flavor and a better crumb structure than quick room-temperature rising.
I always mix my dough the night before and let it ferment for 12-16 hours—this gives the yeast time to work slowly, creating that signature open crumb. The cold environment also helps control yeast activity, preventing overproofing.
Trust me, your bread will taste more complex and have better texture when you bake it the next day. 💫
Freezer-Friendly Loaves
This bread stores beautifully in the freezer, making it perfect for meal prep. After baking, let the loaf cool completely, then wrap it tightly in plastic wrap followed by a beeswax food wrap or aluminum foil. It keeps for up to 3 months without losing quality.
To serve, simply toast slices straight from frozen—they’ll be just as crispy as fresh bread. I often make two loaves at once and freeze one for busy weeks. This is especially handy for sandwiches or breakfast toast. ❄️
Double Batch Strategy
Want to feed a crowd? Double the recipe and use two Dutch ovens. Divide the dough evenly between two greased bowls and let both rise simultaneously. This method works perfectly for dinner parties or when you need extra sandwich bread.
I’ve made four loaves at once using two Dutch ovens and a baking sheet—just adjust your oven racks to accommodate. The key is spacing them properly so heat circulates evenly. 🍞
Make-Ahead Shaping
Shape your dough the night before and refrigerate it until ready to bake. This saves time in the morning and gives you more control over the final shape. I like to form my loaves into ovals or rounds and place them in airtight containers lined with parchment paper.
When you’re ready to bake, simply remove the dough from the fridge, let it come to room temperature for 30-60 minutes, then proceed with baking. This approach works especially well for holiday baking when you want everything ready to go. 📅
Flavor Development Tips
The longer you let the dough ferment, the more complex the flavors become. For maximum depth, ferment for up to 24 hours (though 16 hours is ideal).
I’ve found that adding a pinch of garlic powder or dried herbs to the dough during the final shaping adds subtle flavor without changing the basic recipe. The overnight fermentation also helps reduce the need for extra salt—your bread will taste perfectly balanced. 💡
Weekly Baking Routine
Turn this into your weekly bread ritual by baking one loaf every Saturday morning. The night before, mix your dough and refrigerate it. In the morning, shape and bake while coffee brews.
You’ll always have fresh bread for the week, and it’s a great way to use up whole wheat flour before it goes stale. I keep a small notebook to track my fermentation times and baking adjustments—it’s become a fun little tradition in my kitchen. 📖
Nutrition facts
Frequently asked questions
Why does my whole wheat dough look messy after mixing?
Whole wheat flour absorbs more liquid than white flour, creating a shaggy, sticky dough that’s completely normal! The high protein content and bran in whole wheat make it behave differently. Don’t worry—this texture actually helps develop better flavor and structure. Just mix thoroughly and let it rest for 10 minutes before shaping.
Can I make this bread without a Dutch oven?
If you don’t have a Dutch oven, use a heavy oven-safe pot with a lid or even a baking sheet lined with parchment. For extra crispiness, place a tray of boiling water in the oven during the first 10 minutes of baking to create steam. The bread may not be quite as crusty, but it’ll still be delicious and have a great open crumb.
How do I know when the bread is fully baked?
Your bread is done when it’s deep golden brown and sounds hollow when tapped on the bottom (like knocking on wood!). The internal temperature should reach 205-210°F. Whole wheat bread often looks underbaked—resist the urge to cut into it early, as it continues cooking while cooling. Let it rest for at least 30 minutes before slicing.
What if my dough doesn’t rise at all?
Check three things: yeast freshness (test with warm water + sugar), water temperature (should be 110°F), and fermentation time (whole wheat needs 12-16 hours cold). If it’s still flat, try adding ½ tsp more yeast and letting it rise in a warmer spot. Cold kitchens slow fermentation—place the dough near the oven (with oven off) to help it along.
Can I substitute honey with something else?
Yes! Use 1 tablespoon maple syrup, agave nectar, or even molasses (reduce to ½ tablespoon for stronger flavor). For a completely neutral option, skip it—just omit the honey entirely. The sweetener helps feed the yeast and adds subtle flavor, but it’s not essential for a good loaf.

- Baked Potatoes in Crock Pot Recipe: Buttery Interiors and Crispy Top Magic - November 1, 2026
- Braised Beef Short Ribs Recipe: Crock Pot Fall-Off-Bone Magic in 6 Hours - November 1, 2026
- Crock Pot Cocoa Recipe: Velvety Warmth With Hidden Spice Magic - November 1, 2026