
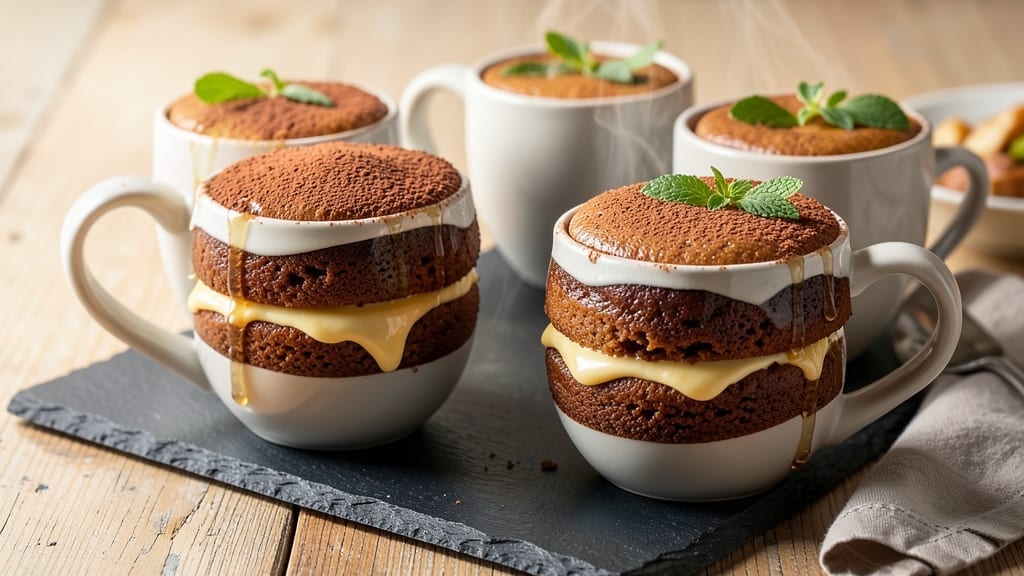
A 5-minute cake in a cup transforms your kitchen into a dessert paradise with no oven required—just mix, microwave, and devour. This no-bake chocolate fudge magic delivers rich, moist layers in a single serving, perfect for cravings or last-minute guests.
The secret lies in precise mixing and the right cup size, ensuring a cake that’s dangerously addictive without the fuss.
What sets this recipe apart is its simplicity: no flour sifting, no egg whites, just a handful of pantry staples that come together in under 5 minutes. The microwave does the heavy lifting, creating a cake with a tender crumb and a fudgy center that melts in your mouth.
It’s the kind of dessert that feels indulgent but requires zero effort—ideal for busy weeknights or when you’re craving something sweet without the cleanup.
By the time you’re done, you’ll have a single-serving cake that’s ready in the same time it takes to boil water. The texture is consistently moist, the chocolate flavor deep, and the edges just slightly set for easy handling.
This isn’t just a quick fix; it’s a foolproof method that delivers restaurant-quality results with minimal ingredients and no special skills required.
Whether you’re feeding one or making a batch for a crowd, this recipe scales effortlessly. Double the ingredients for multiple cups, or adjust the mix for vanilla or lemon variations.
The key to success? Pay attention to the microwave time—every oven varies, so start with the suggested duration and adjust as needed. Let’s make dessert this easy.
Ingredients for 5 minute cake in a cup
Just eight ingredients transform your microwave into a cake maker—no oven, no fuss, pure chocolate magic.
| Ingredient | Amount | Notes |
|---|---|---|
| Unsweetened Cocoa Powder 🍫 | ½ cup | High-quality Dutch-processed preferred |
| All-Purpose Flour 🌾 | ½ cup | Sifted for smooth texture |
| Granulated Sugar 🍚 | ¾ cup | White or light brown |
| Vegetable Oil 🫒 | ¼ cup | Light or canola oil |
| Milk 🥛 | ½ cup | Whole milk for richness |
| Vanilla Extract 🌿 | 1 tsp | Pure extract preferred |
| Baking Powder 🧂 | ½ tsp | Aluminum-free preferred |
| Salt 🧂 | ¼ tsp | Fine sea salt |
| Instant Espresso Powder ☕ | ½ tsp | Optional for depth |
| Microwave-Safe Mugs 🍵 | 4 whole | 8-10 oz capacity |
The cocoa powder makes all the difference here. Hershey’s Special Dark or Ghirardelli are my go-tos—they dissolve smoothly and give that deep chocolate flavor. If you’re using natural cocoa, add an extra pinch of baking soda to help it dissolve. The flour? King Arthur or Bob’s Red Mill brands sift beautifully, but any all-purpose works. Pro tip: measure your dry ingredients by spooning them into the cup and leveling off—don’t scoop directly from the bag. The mugs? Any standard microwave-safe mug works, but 8-10 oz capacity gives you that perfect single-serving cake.
No cocoa powder? Melted dark chocolate chips work in a pinch—just cool them first. Swap the milk for almond milk or coconut milk if you need a dairy-free version, but whole milk gives the richest texture. The instant espresso is optional but adds that coffeehouse cake vibe—if you don’t have it, just skip it. Want vanilla flavor without extract? Vanilla bean paste gives extra richness. The baking powder is crucial here—don’t skip it or your cake will be dense. And if you’re making a batch, double everything and use multiple mugs.
This mix keeps perfectly in the fridge for 3 days—just whisk before microwaving. For longer storage, freeze the dry ingredients separately from the wet in ziplock bags for 3 months. The freshly mixed batter? Use within 1 hour for best texture. Microwave times vary—start with 60 seconds and check, then add 10-15 second intervals until set. The edges should be just slightly firm while the center stays soft and fudgy.
Why You’ll Love This Recipe
- I’ve used these for everything: a late-night craving, a quick lunchbox treat for my kid’s school, or even a “dessert” when company drops by unannounced. Make four cups, and you’ve got backup for days—no freezer space needed, just grab and go.
- No Mixing Madness: I’ll be real—this recipe takes one bowl and three minutes of stirring. No sifter, no whisk wars, just dump, stir, microwave. That cocoa powder? It dissolves like magic in warm milk, so you’re not left with gritty chunks.
- Rich Without the Fuss: Here’s what sold me—the chocolate flavor packs a punch, but it’s not overpowering. The sugar and oil create this velvety texture, while the flour keeps it just sturdy enough to hold a spoonful. It’s like a cross between a mug cake and a brownie, but way faster.
- Cupboard Staple Magic: Between us, you’re probably already stocked for this. Flour, sugar, oil? Those sit in my pantry for months. Even the cocoa powder I keep on hand for hot chocolate. No last-minute grocery runs—just grab what you’ve got.
Step-by-step instructions for no-bake chocolate fudge magic
This 5-minute cake comes together faster than you can say “microwave.”
Mix the Dry Ingredients in Each Mug
Start by placing 4 whole microwave-safe mugs on a microwave-safe plate or tray. In each mug, add 2 tablespoons of the unsweetened cocoa powder, 2 tablespoons of the all-purpose flour, 1½ tablespoons of the granulated sugar, ⅛ teaspoon of the baking powder, ⅛ teaspoon of the salt, and ⅛ teaspoon of the instant espresso powder. I like to use a small measuring spoon for accuracy—this ensures each mug gets the exact same amount.
Use a fork or small whisk to stir the dry ingredients together in each mug until they’re fully combined. You want to break up any clumps in the cocoa powder and flour so your cake turns out smooth and even. Give each mug a good mix, tapping the bottom gently to help distribute everything evenly.
Add Wet Ingredients and Stir Well
Now it’s time for the wet ingredients. To each mug, add 1 tablespoon of the vegetable oil, 2 tablespoons of the milk, and ¼ teaspoon of the vanilla extract. I like to measure the vanilla extract first—it’s easy to spill when you’re working with multiple mugs.
Stir everything together vigorously with the fork or whisk. You’re looking to create a smooth, thick batter that coats the back of the spoon. If the batter looks too thick, add a splash of extra milk—just enough to make it pourable. The batter should be the consistency of thick pudding, but still flow easily when stirred.
Microwave for Perfect No-Bake Texture
Here’s where the magic happens. Place the plate with all four mugs in the microwave and cook on high power (100%) for 1 minute and 30 seconds. You’ll see the batter bubble and rise dramatically—this is exactly what you want. The key is to not open the microwave door during cooking; let the steam work its magic.
When the timer goes off, carefully remove the mugs from the microwave. You’ll notice the cakes have puffed up significantly and may have a slight crack on top—that’s normal! Let them sit for 30 seconds to cool slightly. Then, use a butter knife to loosen the edges of each cake from the mug, gently running it around the sides. This makes serving easier without breaking the cakes.
Serve Warm with Optional Toppings
Run the knife under hot water to make it extra slippery, then place it under each cake and lift straight up. The cakes should come out intact with just a little help. If any cake sticks too much, let it cool for another 10 seconds before trying again.
Serve immediately while still warm. These cakes are best enjoyed right out of the mug—they’ll firm up slightly as they cool but stay moist and fudgy. For extra indulgence, top with whipped cream, chocolate shavings, or a drizzle of melted chocolate. The espresso powder gives them a subtle coffee note that pairs perfectly with the rich chocolate flavor.
Pro Tips For Making 5 Minute Cake In A Cup
- STIR UNTIL SMOOTH: Mix the cocoa powder and sugar first—don’t just dump everything in. I learned this the hard way when I got lumps in my mug cake that made it taste grainy. A quick whisk with a fork or spoon before adding milk saves you from scraping the bottom later.
- USE WARM MILK: Cold milk makes your cake dense and flat. Heat it to about 100°F (just warm to the touch) before mixing—it blends better and gives you that classic, airy texture. (Yes, even if you’re impatient like me, give it 30 seconds in the microwave.)
- FILL CUPS HALFWAY FIRST: Overfilling leads to messy overflows and undercooked centers. Stop when your mug is only half full, then microwave for 60 seconds. The cake will rise, so trust the process—your future self will thank you for not dealing with a chocolate disaster on your counter.
- SWAP OIL FOR MELTED BUTTER: Skip the vegetable oil if you have butter. Melt 1 tablespoon and use it instead—it adds richness and a subtle depth of flavor that plain oil can’t match. (I was skeptical until I tried it, and now I never go back.)
Creative variations of this dish
Classic Vanilla Twist
Swap the cocoa powder for ½ cup powdered sugar and add 1 tablespoon lemon zest to the dry ingredients. Use 1 teaspoon vanilla bean paste instead of extract for deeper flavor. The result? A bright, citrusy cake with a tender crumb that’s perfect for breakfast or brunch. 🌸
Lemon Blueberry Magic
Replace the cocoa powder with ½ cup all-purpose flour and add ¼ cup fresh blueberries to each mug before microwaving. Fold them gently into the batter so they stay intact.
The microwave time stays the same, but the blueberries release juices that keep the cake ultra-moist. Top with a dollop of whipped cream for a summery treat.
Peanut Butter Cup Fusion
Add 2 tablespoons creamy peanut butter to the wet ingredients and sprinkle 1 tablespoon mini chocolate chips on top of each batter before microwaving. The peanut butter adds richness while the chocolate chips create pockets of gooey goodness.
This version is a crowd-pleaser that feels indulgent but still takes just 5 minutes.
Salted Caramel Surprise
Stir 1 tablespoon caramel sauce into the batter after microwaving, then sprinkle with pinch of flaky sea salt. The caramel soaks into the cake while the salt enhances the sweetness.
For extra drama, drizzle more caramel sauce on top before serving. This is my go-to for special occasions—it feels fancy but requires zero effort.
Spiced Pumpkin Delight
Reduce the sugar to ½ cup and add ¼ cup pumpkin puree and ½ teaspoon pumpkin pie spice to the wet ingredients. The microwave time remains the same, but the texture becomes denser and more cake-like.
Top with whipped cream and a sprinkle of cinnamon for a fall-inspired dessert that’s ready in minutes.
Coffee Lover’s Espresso Boost
Double the instant espresso powder to 1 teaspoon per mug and add a splash of 1 tablespoon cold brew coffee to the wet ingredients. The coffee intensifies the chocolate flavor while keeping the cake moist.
Serve with a dollop of vanilla ice cream for the ultimate coffee-cake combo. Perfect for when you need a caffeine kick with dessert! ☕
Nutrition facts
Frequently asked questions
Can I make this cake in a mug that’s smaller or larger than 8-10 oz?
For best results, stick to 8-10 oz mugs—this size gives you the perfect single-serving texture. If you must use a smaller mug (6 oz), reduce the batter by 25% and microwave for 45-60 seconds. Larger mugs (12 oz) need 20-25% more batter and 1 minute 45 seconds of cooking time. Always check doneness with a toothpick!
Why did my cake come out dense instead of light and fluffy?
Overmixing the batter or skipping the baking powder are the top culprits. Stir just until combined—10-15 seconds per mug max. Also ensure your baking powder is fresh (test it: mix 1 tsp with 2 tbsp water—if it fizzes, it’s active). Microwaving too long can also make cakes dense, so start with 1 minute 30 seconds and adjust in 10-second increments.
Can I make these cakes ahead of time?
Yes! Mix the dry ingredients in advance and store in an airtight container for 3 days at room temp. For the wet ingredients, measure oil, milk, and vanilla into a small jar and keep refrigerated for 2 days. To serve, combine just before microwaving. For fully made cakes, refrigerate in the mugs for up to 24 hours—reheat in the microwave for 10-15 seconds to restore warmth.
What’s the secret to getting the fudgy center?
Three things: don’t overcook, use high-quality cocoa powder, and let the cakes rest 30 seconds after microwaving. The center should look slightly underdone when you remove them—it’ll firm up as it cools. For extra fudginess, add 1 tbsp melted butter to the wet ingredients. The espresso powder also helps create that signature melt-in-your-mouth texture!
Can I use this recipe for a gluten-free version?
Swap the all-purpose flour for a 1:1 gluten-free baking flour blend (like Bob’s Red Mill or King Arthur). Add ½ tsp xanthan gum to each mug to improve texture. For extra moisture, reduce the milk by 1 tbsp per mug and add 1 tbsp applesauce to the wet ingredients. The microwave time stays the same, but check for doneness 10 seconds earlier than recommended.

- 6 Bean Chili Recipe: Hearty, Smoky Depth That Gets Richer Over Time - September 26, 2026
- 2 Gallon Red Sangria Recipe: Bold Spice and Fruit Fusion for Crowds - September 26, 2026
- 5 Star Apple Bread Recipe: Spiced Apple Swirl With Buttery Crust - September 26, 2026