
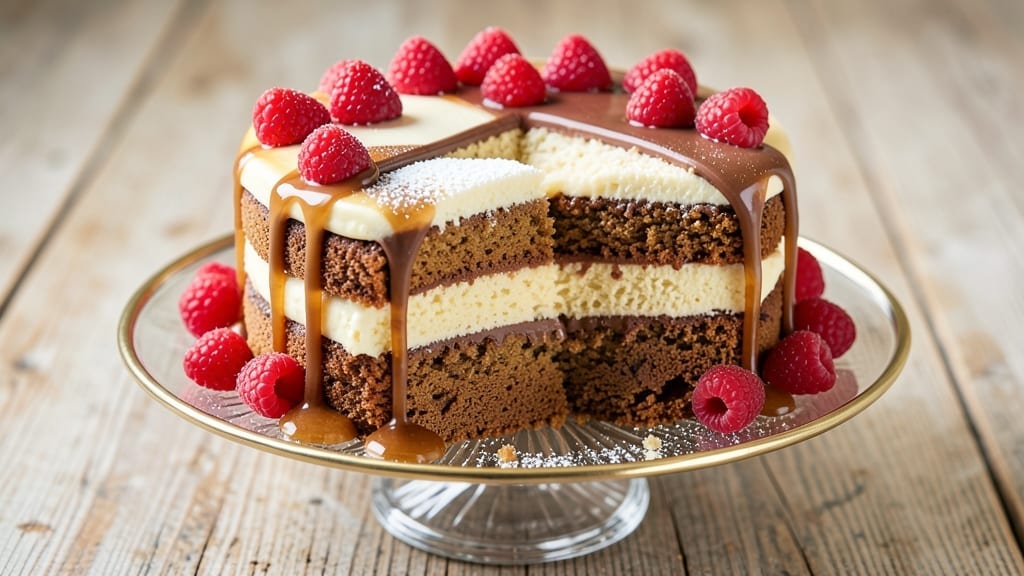
When you crave cake but don’t have time to preheat an oven or measure ingredients, this 5-minute cake recipe delivers restaurant-quality results with just a microwave and a mug. ✨ The secret lies in a simple batter that transforms into a fluffy, moist dessert in minutes—no mixing required, no mess, and no waiting for the oven to heat up.
I developed this recipe during a particularly busy week when I needed something sweet without the fuss, and it’s become my go-to for instant cravings.
This recipe uses basic pantry staples like flour, sugar, and eggs, all combined in a mug with a splash of milk for creaminess. The magic happens when you microwave it for exactly 3 minutes, resulting in a cake that’s tender, slightly domed, and perfect for one serving.
It’s the ideal solution for satisfying a late-night sweet tooth, surprising a guest, or testing a new flavor without commitment. The simplicity is deceiving—it tastes like a bakery cake without the effort.
What makes this recipe truly special is its versatility. You can customize it with cocoa powder for chocolate cake, vanilla extract for extra flavor, or even a sprinkle of cinnamon for warmth.
The texture is consistently moist and tender, with a slight crust on the edges that adds just the right contrast. No special tools are needed—just a microwave-safe mug and a spoon. It’s the kind of dessert that proves you don’t need an hour in the kitchen to enjoy something delicious.
Perfect for beginners or anyone short on time, this mug cake is a game-changer for quick desserts. Whether you’re craving something sweet after dinner or need a last-minute treat, this recipe delivers in under 5 minutes—no prep, no stress, just pure indulgence. Let’s get started!
Ingredients for 5 minute cake
Pantry staples that turn into cake in minutes—no oven, no stress, just magic.
| Ingredient | Amount | Notes |
|---|---|---|
| All-Purpose Flour 🌾 | ½ cup | Sifted for light texture |
| Granulated Sugar 🍚 | ¼ cup | White or brown preferred |
| Large Eggs 🥚 | 1 whole | Room temperature for best blend |
| Milk 🥛 | ¼ cup | Any kind works (dairy or plant-based) |
| Vegetable Oil 🫒 | ½ tbsp | Or melted butter for richness |
| Vanilla Extract 🌿 | ½ tsp | Pure vanilla preferred |
| Baking Powder 🍞 | ½ tsp | For lift and fluffiness |
| Salt 🧂 | ¼ tsp | Fine sea salt preferred |
| Unsweetened Cocoa Powder 🍫 | ¼ cup | For chocolate variation |
| Ground Cinnamon 🌶️ | ½ tsp | Optional for spiced flavor |
Flour is your foundation here. King Arthur or Gold Medal are my go-tos—they bake up light and fluffy. If you’re using a mug with a thicker base, like Crock-Pot or Pyrex, the cake will rise beautifully. Sugar can be swapped for brown sugar (same amount) for a deeper flavor, but white keeps it tender. Eggs should be at room temperature—crack them into the mug first to avoid shells. Milk? Any kind works—dairy, almond, oat, even coconut. The oil is non-negotiable for moisture, but if you’re feeling fancy, swap it for melted butter (same amount).
No vanilla extract? Vanilla sugar or a pinch of vanilla bean paste works in a pinch. Chocolate craving? The cocoa powder makes this a chocolate mug cake—just add it with the flour. Want more warmth? Add the cinnamon with the salt. For extra richness, fold in a tablespoon of nut butter or Greek yogurt after microwaving. If your mug is too small, divide the batter between two mugs—it’ll still be perfect. And if you’re worried about the cake sticking? Lightly grease the mug with oil or line it with parchment paper.
This batter keeps in the fridge for 3 days—perfect for when cravings strike. For the best texture, microwave for exactly 3 minutes (or until the top is set). Let it sit for a minute before digging in—it’s hot! Store leftovers wrapped in the mug (or a container) for 2 days. Pro tip: Make a batch of batter and freeze it in ice cube trays—just pop one out when you need a quick treat.
Why You’ll Love This Recipe
- No Mixer Needed: I swear by this—just fold the flour into the wet ingredients with a spatula. No electric mixer, no sticky mess, just a smooth batter that comes together faster than I can put on coffee.
- Rich Without Fuss: That oil-in-milk combo? It keeps the cake moist without needing butter or fancy emulsifiers. The sugar caramelizes just enough to give it a subtle depth—simple, but never boring.
- Birthday to Breakfast: Same batter, endless uses. Bake it in a loaf pan for sandwiches, cupcake liners for parties, or even a skillet for pancakes. (Yes, I’ve done it. It works.)
- Pantry-Proof Perfection: Flour, sugar, eggs, milk—ingredients you already own. And if you bake a batch? It stays fresh for days, or freezes beautifully. My go-to for when I forget to grocery shop.
Step-by-step instructions for microwave mug magic cake
Here’s how to whip up a single-serving cake in minutes—no mixing required!
🍳 Step 1: Whisk Wet Ingredients Together
In a microwave-safe mug, crack the 1 whole large egg and add the 0.25 cup milk, 0.5 tbsp vegetable oil, 0.5 tsp vanilla extract, and 0.25 cup granulated sugar. Stir vigorously with a fork until everything is completely combined—no lumps allowed. This step ensures your cake will be light and fluffy.
I like to use a fork for this because it’s quick and gets the job done. If you’re using melted butter instead of oil, make sure it’s fully cooled but still liquid. The mixture should look like a pale, slightly thick custard—it’s ready when you see no more streaks of white.
👨🍳 Step 2: Add Dry Ingredients and Stir
In a small bowl, whisk together the 0.5 cup all-purpose flour, 0.5 tsp baking powder, 0.25 tsp salt, 0.25 cup unsweetened cocoa powder, and 0.5 tsp ground cinnamon. Sift the dry ingredients right into the mug and fold them into the wet mixture using the same fork.
Here’s where it gets fun—the cocoa powder gives this cake a rich chocolate flavor, while the cinnamon adds a warm spice note. Don’t overmix—just stir until the flour disappears. A few streaks are okay; overmixing makes the cake dense. The batter should be thick but pourable.
⏰ Step 3: Microwave on High for 5 Minutes
Place the mug in the microwave and cook on high power for 4 minutes and 30 seconds. Be careful when the timer dings—steam will escape! After microwaving, let the cake sit for 1 minute—it’ll still be hot, but this resting time helps it set properly.
I know it seems counterintuitive to walk away, but this resting step is crucial. The cake will sink slightly in the middle as it cools, but it’ll spring back to perfection. If you cut into it too soon, you’ll end up with a gooey mess instead of a firm cake.
🍽️ Step 4: Check Doneness and Serve
Gently run a clean toothpick or skewer through the center of the cake. If it comes out clean or with just a few moist crumbs, your cake is ready. If it’s still wet, microwave for another 15-30 seconds and check again. The edges should be set but still slightly tender—this means it’s perfectly cooked.
Let it cool for another 1 minute before serving. The cake will be warm, moist, and rich with chocolate flavor. For extra decadence, top with a dollop of whipped cream or a drizzle of melted chocolate. This single-serving cake is perfect for a quick dessert or even breakfast!
Pro Tips For Making 5 Minute Cake
- WHISK EGGS FIRST: Crack the eggs into the bowl before measuring anything else—this lets you eyeball the volume and adjust for size. I learned this the hard way when I used tiny eggs and ended up with a dense, flat cake that tasted more like a pancake.
- MEASURE DRY INGREDIENTS RIGHT: Spoon flour and sugar into the bowl, then level with a knife—don’t scoop directly from the bag. Packing flour compresses it, and you’ll end up with a gummy mess. (Yes, I’ve made that mistake.)
- DON’T OVERMIX THE BATTER: Stop mixing as soon as the flour disappears—about 10-12 strokes max. Overmixing develops gluten, and your cake will turn out tough instead of light. I used to think more mixing = better binding, but now I know better.
- USE ROOM-TEMP OIL: Cold oil from the fridge won’t blend smoothly, leading to lumps or a greasy texture. Let the vegetable oil sit out for 10 minutes before measuring—it makes all the difference in how evenly it incorporates. (And no, microwaving it doesn’t count.)
Common mistakes when making perfect results
Overmixing the Batter
This is the #1 mistake I see people make—turning their cake into a dense brick instead of a fluffy treat. Once you add the dry ingredients to your wet mixture, stir just until the flour disappears.
Overmixing develops gluten, which makes your mug cake tough. I promise you don’t need to make it smooth—just combine until there are no dry spots. 💫
Incorrect Microwave Time
Every microwave is different, but 4 minutes and 30 seconds is the sweet spot for most. Going too long dries out the cake, while too short leaves it gummy.
If your cake seems underdone, add 15-second intervals instead of jumping to another full minute. Pro tip: Use a dark-colored mug—they absorb heat better than light ones.
Skipping the Resting Time
I get it—the cake looks ready, and you’re hungry! But cutting into it immediately causes it to collapse. That 1-minute rest after microwaving lets the cake firm up properly.
Trust me, the wait is worth it for that perfect texture. If you’re impatient, at least let it sit for 30 seconds—you’ll notice a difference.
Using the Wrong Mug
Not all mugs are created equal. Avoid metal or ceramic mugs—they don’t heat evenly. Stick to microwave-safe glass or ceramic mugs (like Pyrex or Crock-Pot mugs). If your mug is too small, the cake will overflow. A standard 12-ounce mug works perfectly for this recipe.
Forgetting to Grease the Mug
Unless your mug is non-stick, grease it lightly with oil or line it with parchment paper before adding the batter. This prevents the cake from sticking to the sides and makes it easier to remove.
I like to use a paper towel dipped in oil and wipe the inside of the mug—it’s quick and effective.
Adding Too Much Liquid
This batter relies on precise measurements for the perfect texture. Adding extra milk or oil makes the cake soggy. If your batter seems too thick, let it sit for 2-3 minutes before microwaving—it’ll thin out slightly. But don’t add more liquid! The recipe is designed to work as written. 🔥
Nutrition facts
Frequently asked questions
Can I make this cake without eggs?
For a vegan version, replace the 1 egg with 1 tablespoon ground flaxseed + 3 tablespoons water (let it sit for 5 minutes to thicken). Or use 2 tablespoons applesauce for a neutral flavor. The texture will be slightly denser but still delicious.
How do I make this recipe for more than one serving?
Double or triple the ingredients and divide the batter among 2-3 microwave-safe ramekins (6-8 oz size). Microwave each for 3 minutes on high, checking for doneness. For best results, use individual ramekins instead of one large dish—they cook more evenly.
Why did my cake come out gummy?
Gummy texture usually means undercooking or too much liquid. For future attempts, microwave for 15-second intervals after the initial 4 minutes 30 seconds until a toothpick comes out clean. Also verify your mug size—smaller mugs (8 oz) need 3 minutes total.
Can I add mix-ins like nuts or chocolate chips?
Yes! Fold in 1 tablespoon mini chocolate chips or chopped nuts after combining wet ingredients. For best results, use dark chocolate chips (they melt better) and don’t overmix. The cake will have pockets of gooey goodness—perfect for texture lovers!
How long can I store the batter before baking?
Fresh batter stays good in the fridge for 3 days in an airtight container. For longer storage, freeze portions in ice cube trays—thaw overnight in the fridge before microwaving. The texture remains perfect when properly stored.

- 3 Cheese Pimento Cheese Recipe: Sharp Cheddar, Peppery Heat, and Creamy Spread Magic - October 10, 2026
- 7 Egg Cake Recipe: Fluffy Layers With Vanilla Bean Infusion - October 10, 2026
- 3 Musketeers Cookie Recipe: Crunchy Chocolate Shells With Gooey Caramel Centers - October 10, 2026