
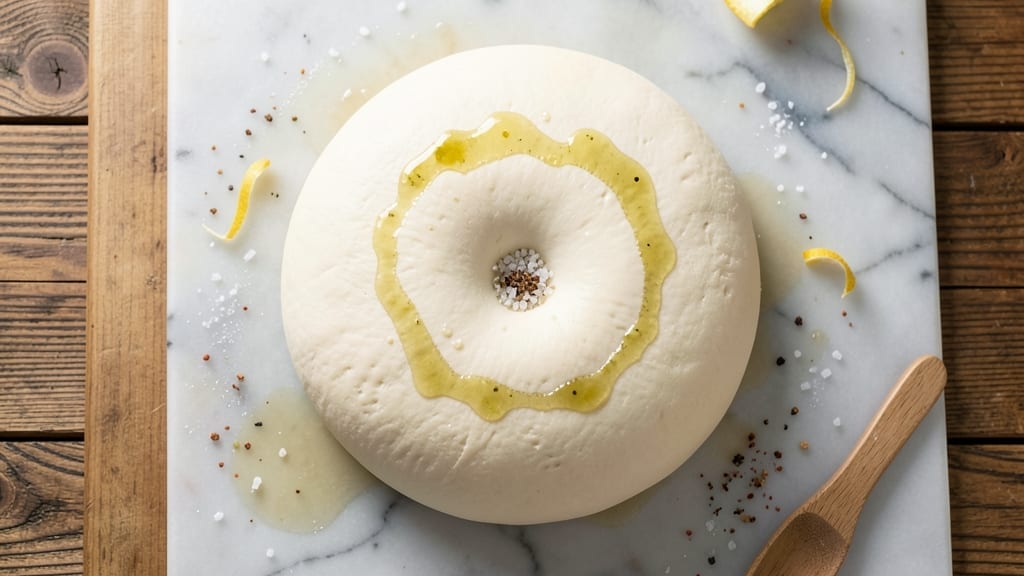
Mastering a 1kg 00 flour pizza dough recipe unlocks the secret to restaurant-quality crusts at home—light, airy, and perfectly elastic. The key lies in the zero-knead method, which relies on precise hydration and cold fermentation to develop gluten without overworking the dough.
I’ve perfected this technique after years of testing, ensuring a dough that’s both foolproof and adaptable to any pizza style, from Neapolitan to New York thin. The process begins with an autolyse step, where flour and water rest together for 30 minutes to hydrate fully and relax the gluten.
This reduces mixing time and improves texture, while cold fermentation (overnight in the fridge) enhances flavor and creates that signature open crumb structure. The result? A dough that’s easy to handle, stretches effortlessly, and bakes into a crispy-edged, chewy center crust every time.
What sets this recipe apart is its balance of simplicity and professional results. No stand mixer required—just a bowl, your hands, and patience. The dough’s versatility means you can shape it into classic Neapolitan pies, foldable Roman-style pizzas, or even crispy thin-crust slices.
Whether you’re baking in a home oven or replicating wood-fired authenticity, this dough delivers consistent, mouthwatering results. For best outcomes, use high-quality 00 flour and let the dough rest fully before shaping. Top with your favorite ingredients, and bake until the crust is golden and the cheese bubbles.
Here’s how to make it—step by step—for perfect pizza every time.
Ingredients for 1kg 00 flour pizza dough
Six simple ingredients transform into a restaurant-worthy pizza dough that’s light, airy, and effortless to shape.
| Ingredient | Amount | Notes |
|---|---|---|
| 00 Flour 🌾 | 1 kg | High-quality Italian 00 flour preferred |
| Water 💧 | 600 ml | Room temperature, filtered preferred |
| Instant Yeast 🍞 | 2 tsp | Active dry yeast works too |
| Salt 🧂 | 10 g | Fine sea salt preferred |
| Olive Oil 🫒 | 2 tbsp | Extra-virgin for best flavor |
| Sugar 🍚 | 1 tsp | Optional, for yeast activation |
| Semolina Flour 🌾 | 2 tbsp | For dusting work surface |
The 00 flour is non-negotiable here—Caputo or Molino Grassi are the gold standards, but King Arthur 00 flour works in a pinch. Grab a 1kg bag from a specialty store or online if your regular grocery doesn’t carry it. The yeast should be fresh (check the date—it expires fast), and the salt matters too: Diamond Crystal dissolves better than table salt. Room-temperature water is key—cold water slows fermentation, and hot water kills yeast. I always measure my water by weight (600g = 600ml) for precision, but a measuring cup works too.
No 00 flour? All-purpose flour plus 1 tbsp bread flour gets you closer to the same texture. Running short on instant yeast? Use active dry yeast but let it dissolve in warm water first. The sugar is totally optional—if you skip it, just let the yeast bloom in the water for 5 minutes before mixing. Olive oil can be swapped for avocado oil or melted lard (yes, lard works great for pizza dough), but stick with extra-virgin for that authentic Italian flavor. The semolina is just for dusting—all-purpose flour works if you’re out, but semolina gives that signature crispy texture on the bottom crust.
Mix the dough, then let it autolyse for 30 minutes before adding yeast—this relaxes the gluten for easier handling. After shaping, the dough keeps 24 hours in the fridge for cold fermentation, which develops flavor. For longer storage, wrap tightly in plastic and freeze for up to 3 months. Let it thaw in the fridge overnight before using. Pro tip: divide the dough into 250g balls for perfect-sized pizzas—just weigh them out before freezing.
Why You’ll Love This Recipe
- Four-Ingredient Magic: I swear by this dough—just flour, water, yeast, and oil. No fancy mixers or complicated steps, just mix, knead, and let it rise while you do the dishes.
- Crispy-Chewy Bliss: That 00 flour? It’s the secret. Stretchy but sturdy, with a golden crust that’s crisp on the outside and pillowy inside—no sad, dense pizza here.
- Weeknight Hero: Doubles as dinner, appetizer, or lunch. Use half for tonight’s feast, save the rest for tomorrow’s quick lunch. No waste, all flavor.
- Budget-Friendly Staple: A kilogram of flour stretches for weeks. Split it into balls, freeze extras, and thaw as needed. Cheap, reliable, and always delivers.
Step-by-step instructions for light, airy 00 flour pizza dough
Here’s how to transform simple ingredients into a perfectly balanced, zero-knead dough that yields crisp yet tender crusts every time.
Mix the Dough with Precision
In a large bowl, combine the 1 kg 00 flour and 10 g salt, whisking to evenly distribute the salt throughout the flour. This prevents clumping and ensures consistent flavor in every bite. Create a well in the center and add the 2 tsp instant yeast and 1 tsp sugar to the middle.
Pour in the 600 ml room-temperature water and 2 tbsp extra-virgin olive oil, letting the liquid gradually incorporate into the flour. Use a wooden spoon or your hands to mix until a shaggy dough forms—you’ll see dry bits still scattered, and that’s perfect. The goal here is to avoid overworking the dough at this stage, which can develop gluten too early and make the final crust tough.
Develop the Dough Through Folding
Once the shaggy dough comes together, wet your hands slightly with water and begin folding the dough over itself for 5-8 minutes. This technique, called “stretch and folds,” strengthens the gluten gradually without overworking it. Fold the dough in half, rotate the bowl 90 degrees, and repeat—you’ll notice the dough becomes smoother and more elastic with each fold.
After about 5 minutes, the dough should look cohesive and slightly tacky but not sticky. If it feels too dry, add 1-2 teaspoons of water to help it come together. The key is to build structure slowly; this method creates a light, airy texture that’s impossible with traditional kneading. You’ll know it’s ready when the dough springs back slowly when poked with your finger.
First Rise for Maximum Flavor Development
Lightly oil a large bowl and transfer the folded dough inside. Cover the bowl tightly with plastic wrap or a damp kitchen towel and let it rise at room temperature for 1-2 hours. You’re looking for the dough to nearly double in size—it should puff up noticeably and feel light when pressed gently with your fingertip.
This first rise is crucial for flavor development. The yeast will activate fully, creating tiny air pockets that give your pizza that signature lightness. Avoid placing the dough in a cold environment or near drafts, as temperature fluctuations can slow down or speed up fermentation unevenly. If your kitchen is particularly warm, you might see the dough rise faster—just keep an eye on it.
Shape and Second Rise for Perfect Texture
Lightly dust your work surface with 2 tbsp semolina flour to prevent sticking. Turn out the risen dough and gently divide it into 4 equal portions (about 250g each). Shape each portion into a ball by cupping your hands and rolling the dough between your palms until smooth. Place the balls on a floured surface, seam-side up, and cover them loosely with a towel.
Let the dough rest for 30 minutes before stretching. This final rest relaxes the gluten, making the dough easier to work with and preventing it from shrinking back when you stretch it. The semolina flour also adds a subtle nutty flavor and helps create that beautiful, crispy crust edge. If you’re not using the dough immediately, you can refrigerate the balls for up to 24 hours for even better flavor development.
Stretch and Prepare for Cooking
To stretch each dough ball, use your fingertips to gently press the center outward, rotating the dough as you go. Avoid using your knuckles or rolling pins, as these can compress the dough and make the crust denser. The dough should be about 12-14 inches in diameter when fully stretched, with edges slightly thicker than the center for that classic pizza look.
Transfer the stretched dough to a floured pizza peel or baking sheet, dusted lightly with semolina flour. Let it rest for 10-15 minutes before adding toppings. This final rest ensures the dough maintains its shape and doesn’t puff up excessively in the oven. The semolina flour also helps create that beautiful, crispy edge while keeping the center tender. Now you’re ready to add your sauce, cheese, and toppings for the perfect pizza experience.
Pro Tips For Making 1kg 00 Flour Pizza Dough
- Weigh Your Water: The 1kg flour mark is your baseline, but water weight varies—especially in humid kitchens. Use a scale to measure water (about 600–650g) rather than eyeballing it. I learned this after making dough that was either too sticky or too dry, and now my batches turn out consistent every time.
- Autolyse First: Mix just flour and water (no yeast or salt) and let it sit for 30–60 minutes before adding the rest. This relaxes the gluten, making stretching easier later. I was skeptical until I tried it—now my dough stretches like silk instead of fighting me.
- Salt the Water: Dissolve the salt (about 20g) in the water before mixing it with flour. This ensures even distribution and prevents clumpy dough. I used to sprinkle salt on top and ended up with uneven flavor—now my crust tastes balanced from the first bite.
- Cold Proof Works: After bulk fermentation, move the dough to the fridge for 12–24 hours instead of proofing at room temp. The slow rise develops deeper flavor and makes stretching easier the next day. Sounds counterintuitive, but it actually cuts down on active work time later.
Serving suggestions for this dish
Classic Toppings
Start with timeless combinations that highlight the dough’s versatility. For a Margherita, spread ¼ cup tomato sauce (San Marzano works best), add 1 cup fresh mozzarella (shredded or torn), a few basil leaves, and a drizzle of extra-virgin olive oil.
A Marinara skips cheese entirely, focusing on ½ cup tomato sauce, garlic, oregano, and red pepper flakes. For a Diavola, add spicy Calabrian chili paste (about 1 tbsp) to the sauce and top with crumbled soppressata. 🍅
Protein Powerhouses
Elevate your pizza with high-quality proteins that pair beautifully with the dough’s crispy edges. Spicy salami (like Calabrese) adds a smoky kick, while grilled chicken breast (seasoned with Italian herbs) keeps it light.
For seafood lovers, try fresh clams (steamed in white wine) or shrimp (sautéed with garlic and chili flakes). Pre-cook proteins to avoid soggy crusts—just add them after baking or in the final 2 minutes of cook time.
Vegetarian Delights
Turn your pizza into a veggie feast with bold, flavorful toppings. A Portobello mushroom (sliced and roasted) adds meaty texture, while roasted red peppers and artichoke hearts (from a jar, drained) bring sweetness.
For a Roman-style twist, layer ricotta cheese and burrata with cherry tomatoes and basil. Always balance moisture—add veggies in layers (sauce, cheese, veggies) to prevent a soggy bottom.
Cheese Variations
Swap mozzarella for global cheese flavors. Pecorino Romano (grated) adds a sharp, salty bite, perfect for a white pizza with olive oil, garlic, and rosemary. Fontina melts beautifully with caramelized onions and crispy pancetta.
For a gooey surprise, mix mozzarella and provolone in a 2:1 ratio. Avoid overloading—stick to ½ cup cheese per pizza to keep the crust crisp.
Garnishes That Wow
Finish your pizza with toppings that add texture and freshness. A sprinkle of freshly grated Pecorino or Parmigiano-Reggiano (about 1 tbsp) brightens every bite. Toasted pine nuts or chopped walnuts add crunch, while arugula (added post-bake) brings peppery contrast.
For heat, a pinch of red pepper flakes or a drizzle of hot honey takes it to the next level. Always add garnishes after baking to preserve their freshness. ✨
Nutrition facts
Frequently asked questions
Can I make this dough without a stand mixer?
This recipe uses a zero-knead method with just your hands for folding—no mixer required. The stretch-and-fold technique builds gluten gradually, making it perfect for home cooks. Simply wet your hands slightly and fold the dough for 5-8 minutes after mixing.
How long can I keep the shaped dough balls before baking?
Shaped dough balls stay fresh for 24 hours in the fridge, covered loosely with a towel. For longer storage, freeze them for up to 3 months. Thaw overnight in the fridge before using—never at room temperature. Cold storage enhances flavor development!
Why did my dough turn out dense instead of light and airy?
Dense dough usually means overworking the gluten or skipping the autolyse step. Let the dough rest fully between folds and avoid kneading. Also, ensure your yeast is fresh (check the expiration date) and that your water is room temperature—not too hot or cold. The autolyse (30-minute rest) is key for that signature lightness.
Can I use all-purpose flour instead of 00 flour?
Yes, but expect slightly denser results. Replace 1 kg 00 flour with 1 kg all-purpose flour + 1 tbsp bread flour for better texture. For authentic Italian flavor and chewiness, 00 flour is ideal—it has a lower protein content that creates that perfect balance of crisp and soft.
What’s the best way to bake this dough for a crispy crust?
Preheat your oven to its highest setting (500°F/260°C) for 30 minutes with a pizza stone or baking sheet inside. Use a pizza peel to transfer the dough directly onto the hot surface. For extra crispiness, bake for 10-12 minutes until the edges are golden brown. A pizza steel works even better for that wood-fired effect!

- 3 Cheese Pimento Cheese Recipe: Sharp Cheddar, Peppery Heat, and Creamy Spread Magic - October 10, 2026
- 7 Egg Cake Recipe: Fluffy Layers With Vanilla Bean Infusion - October 10, 2026
- 3 Musketeers Cookie Recipe: Crunchy Chocolate Shells With Gooey Caramel Centers - October 10, 2026