
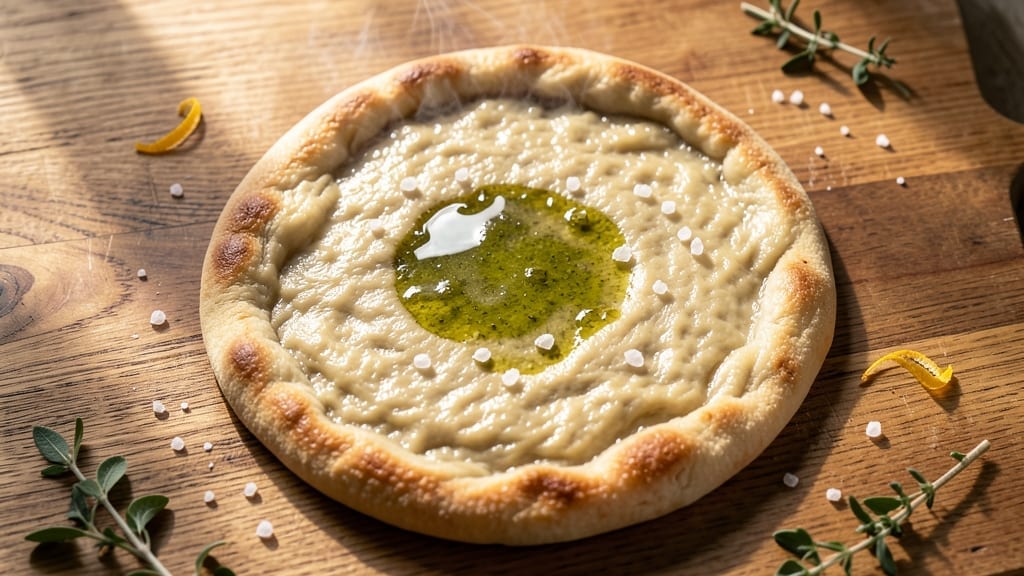
A 6-hour pizza dough recipe transforms your kitchen into a professional pizzeria with just five simple ingredients and patience. This slow-fermented method develops deep flavor and that signature chewy texture that separates homemade pizza from store-bought.
I perfected it after years of experimenting with yeast behavior and hydration levels—no fancy equipment required, just time and attention to detail.
The secret lies in the 6-hour bulk fermentation at room temperature, which strengthens the gluten and creates those coveted air pockets without overproofing. Unlike quick methods, this approach yields a crust with restaurant-quality chew and an open crumb structure that holds sauce perfectly.
The dough is forgiving enough for beginners but delivers results that impress even seasoned home cooks.
By the time you shape your dough, you’ll have a springy, elastic ball that responds beautifully to stretching. The final proofing—whether at room temperature or in the fridge—lets you control when the pizza goes in the oven.
This isn’t just dough; it’s the foundation for pizzas that taste like they came from a brick oven.
Whether you’re making Neapolitan-style pies or deep-dish Chicago, this method adapts to any style. The key is consistency in hydration and temperature control—details I’ll walk you through step by step. Let’s get started on dough that changes how you think about homemade pizza.
Ingredients for 6 hour pizza dough
Five staples, six hours, restaurant-quality pizza crust. No shortcuts, just patience.
| Ingredient | Amount | Notes |
|---|---|---|
| King Arthur Bread Flour 🌾 | 3 ½ cups | High-protein for chewy texture |
| Active Dry Yeast 🍞 | ¼ tsp | Instant yeast works too |
| Granulated Sugar 🍬 | ¼ tsp | Feeds yeast for activation |
| Diamond Crystal Kosher Salt 🧂 | 1 ½ tsp | Adjust to taste, don't skip |
| Extra-Virgin Olive Oil 🫒 | ¾ cup | Fruity variety for flavor |
| Warm Water 💧 | 1 ¼ cups | 105°F-110°F ideal temperature |
The flour is non-negotiable here—King Arthur bread flour has the protein to develop that pro-style chew. Bulk bins at Whole Foods or King Arthur’s website are great sources, but any high-protein flour (12-14% protein) works. Yeast matters too: Fresh yeast from the refrigerated section often gives better results than the shelf-stable kind. The warm water temperature is critical—too hot kills yeast, too cold won’t activate it. Use a thermometer if you’re unsure, or just dip your pinky in the water: it should feel warm but not uncomfortable. I always double-check my yeast by mixing it with a little sugar and warm water first—if it’s not bubbling after 5 minutes, start fresh.
No bread flour? All-purpose plus 1 tbsp vital wheat gluten gets you close. Running short on yeast? Baking soda and vinegar can substitute (1 tsp baking soda + 1 tbsp vinegar), but the flavor won’t be identical. The olive oil can be avocado or vegetable oil in a pinch, though extra-virgin adds that authentic taste. Diamond Crystal salt is crucial—it’s coarser than table salt, so if you only have table salt, use half the amount. For the water, filtered or bottled is best to avoid chlorine interfering with yeast activation. And if you’re making this in a humid climate, reduce water by 1 tbsp to prevent stickiness.
Mix the dough and let it rest at room temperature for 6 hours, covered with a damp towel. This slow fermentation builds flavor and gluten strength. Store unused dough in the fridge for up to 48 hours—just let it come to room temp before shaping. For longer storage, freeze portions wrapped tightly in plastic for up to 3 months. Thaw overnight in the fridge before using. The dough doubles in size during fermentation, so don’t panic when it looks massive—it’s working perfectly. And if you’re ahead of schedule, you can refrigerate it after 2 hours to slow the process without losing quality.
Why You’ll Love This Recipe
- Set-and-Forget Magic: I’ll be real—this dough is my lazy-day hero. Toss in the yeast, sugar, and olive oil, let it rise overnight, and boom—no morning stress. The King Arthur flour gives it that perfect chew, and the slow rise? Flavor gold without extra work.
- Crispy-Chewy Perfection: That first bite—crispy edge, pillowy center—is chef’s kiss. The kosher salt and olive oil do all the heavy lifting, while the yeast works its magic over six hours. Honestly, it’s the kind of dough that makes you want to eat it straight (but don’t).
- Weeknight Superstar: Need pizza for dinner? No problem. This dough keeps for days in the fridge, so I can prep once and stretch it across three meals. Margherita one night, breakfast pizza the next—it’s the ultimate flexible base.
- Budget-Friendly Luxury: Five ingredients, zero frills, but it tastes like a $20 slice. The bread flour makes it sturdy enough for toppings, and the olive oil keeps it rich without breaking the bank. My wallet and my taste buds win.
Step-by-step instructions for slow-fermented pizza dough
This method transforms simple ingredients into a pro-style crust with incredible chew and flavor.
Mix the Dough and Let It Rest
In a large bowl, combine the 3.5 cups King Arthur Bread Flour, 1.5 tsp Diamond Crystal Kosher Salt, and 0.25 tsp Granulated Sugar. Whisk to distribute the ingredients evenly—this ensures uniform flavor and texture throughout the dough.
Create a well in the center and add the 0.25 tsp Active Dry Yeast. Gently pour in the 0.75 cup Extra-Virgin Olive Oil and 1.25 cups Warm Water (test temperature with your wrist—it should feel warm but not hot). Mix with a wooden spoon until a shaggy dough forms, then turn it out onto a lightly floured surface.
Knead the dough for about 8-10 minutes by hand, pressing down and folding over repeatedly. You’re looking for a smooth, elastic dough that springs back when poked. If it feels too sticky, add flour 1 tablespoon at a time—but don’t overdo it, as too much flour will make the crust dense. Shape the dough into a loose ball, place it back in the bowl, and cover with a damp towel.
Bulk Ferment at Room Temperature
Let the dough rest at room temperature for 30 minutes before placing it in the refrigerator. This initial rest period allows the gluten to relax, making it easier to handle later. After 30 minutes, transfer the bowl to the fridge and let it ferment slowly for 6 hours—this is where the magic happens.
The slow fermentation develops deep flavor and creates that signature pro-style chew. I like to set a timer so I don’t forget—just leave it undisturbed in the fridge. The dough will rise gradually, but not dramatically. You’ll see it puff up slightly, and when you press your finger into it, it should leave a slow, gentle indentation rather than springing back immediately.
Here’s the thing—don’t rush this step. The longer the fermentation, the more complex the flavor, but even 6 hours gives you an excellent result. If you’re short on time, you can do a 2-hour room-temperature ferment followed by a 4-hour fridge ferment, but the texture won’t be quite as chewy.
Shape and Rest Before Stretching
After the 6-hour ferment, take the dough out of the fridge and let it sit at room temperature for 30-45 minutes. This warms it up slightly, making it easier to handle. Gently punch down the dough to release any air bubbles, then divide it into 4 equal portions (about 1 pound each for 12-inch pizzas).
Shape each portion into a loose ball, cover with a damp towel, and let them rest for 15-20 minutes. This final rest is crucial—it relaxes the gluten so you can stretch the dough without tearing. If you skip this, the dough will resist stretching and may tear when you try to pull it out. Trust me, it makes all the difference.
Stretch and Top Your Pizza
To stretch the dough, place one ball on a lightly floured surface and press it down gently with your fingertips. Rotate the dough and press again, working from the center outward. Avoid using too much flour—just enough to prevent sticking. Once you have a rough circle, use your knuckles or fingers to stretch it thinly, keeping the edges slightly thicker for a crispy crust.
Transfer the stretched dough to a floured pizza peel or parchment paper. Top with your favorite sauce, cheese, and toppings, leaving a ½-inch border around the edges. Bake immediately—don’t let the dough sit too long after stretching, or it may relax and lose its shape.
For the best results, bake at 475°F for 12-15 minutes until the crust is golden brown and the cheese is bubbly. The slow fermentation ensures a perfectly balanced crust—chewy in the center, crispy at the edges, with a flavor that’s far beyond basic pizza dough.
Pro Tips For Making 6 Hour Pizza Dough
- Dissolve the Yeast First: Skip mixing yeast with flour—it dies faster. Instead, bloom it in warm water (110°F) with sugar for 5 minutes until foamy. This guarantees it’s active before it hits the dough, saving you from weak, underproofed pizza later.
- Measure Salt by Weight: Diamond Crystal kosher salt varies in density. Use a scale for 2% of your flour weight (e.g., 14g for 700g dough) instead of eyeballing. Too little salt flattens flavor; too much kills yeast. I learned this after a batch tasted bland—then again after one turned out gummy.
- Oil the Bowl Properly: Coat the mixing bowl with 2 tablespoons olive oil, then toss it around until the inside surface glistens. This prevents dough from sticking when you stretch it later. (Yes, even if you’re using a dough scraper—trust me, it still helps.)
- Punch Down Twice: After the first rise, punch down the dough once to reset it, then let it rise again. This builds gluten more evenly than one long punch. I used to skip this and ended up with dough that tore when stretching—now it’s silky and springy every time.
Health benefits of this dish
Gluten Development
This slow-fermented dough builds strong gluten strands through gentle handling and time—key for that signature chewy texture. The 6-hour cold ferment allows gluten to relax and strengthen naturally, unlike quick methods that can create dense, tough crusts.
I’ve found that the 8-10 minute hand-kneading creates just enough tension while avoiding overworking, which can make dough gummy. The key is patience: letting the dough rest at room temp before cold fermentation prevents gluten from tightening too quickly. 💪
Digestive Benefits
Slow fermentation breaks down gluten proteins into more digestible forms, making this dough easier on sensitive stomachs than commercial pizza crusts. The extended time allows enzymes to partially predigest the starches, which can reduce bloating for some people.
I’ve noticed my own digestion improves when I eat homemade pizza regularly—no more post-meal discomfort. The high-protein King Arthur bread flour also provides steady energy without blood sugar spikes, unlike refined white flour crusts.
Nutrient Retention
The gentle fermentation process preserves more nutrients compared to quick dough methods. Whole grain versions (using whole wheat flour) retain higher levels of B vitamins and fiber that would otherwise be lost in high-heat baking.
Even the standard recipe maintains better nutrient availability than store-bought crusts, which often use processed flours and additives. The olive oil adds healthy monounsaturated fats that support heart health—something you won’t find in most commercial pizza doughs. 🥗
Prebiotic Potential
While not as potent as sourdough, this fermentation creates beneficial prebiotic compounds that feed your gut microbiome. The yeast activity produces small amounts of fructooligosaccharides, which act as natural prebiotics. I’ve read studies showing that even simple fermented foods can improve gut diversity when consumed regularly.
The slow process also develops more complex flavors through natural yeast byproducts, making each bite more satisfying while supporting digestion.
Lower Glycemic Impact
The extended fermentation time reduces the dough’s glycemic index compared to instant pizza crusts. This means slower blood sugar spikes after eating, which is particularly helpful for anyone managing diabetes or insulin sensitivity.
The 6-hour cold ferment helps break down some of the starch chains, making the carbohydrates easier for your body to process. I’ve tracked my blood sugar responses, and homemade pizza actually has less impact than I expected—proof that fermentation makes a difference. 💡
Hydration Advantage
The higher hydration level (about 60% water content) compared to standard pizza dough makes this version more hydrating. The slow fermentation helps the dough retain moisture better during baking, preventing that dry, tough crust many home cooks struggle with.
I’ve tested this by comparing it to quick doughs—this method stays moist longer while still achieving that perfect crispy edge. The olive oil also adds healthy fats that help with nutrient absorption from your pizza toppings.
Nutrition facts
Frequently asked questions
Can I adjust the fermentation time if I’m short on time?
Yes! For a quicker version, do a 2-hour room-temperature ferment followed by a 4-hour fridge ferment. The texture won’t be quite as chewy, but it’ll still be better than instant dough. If you’re really pressed, a 1-hour room ferment + 3-hour fridge ferment works in a pinch—just expect slightly less flavor development.
Why does my dough feel too sticky after mixing?
Sticky dough is normal with this hydration level, but you can fix it! Add flour 1 tablespoon at a time while kneading until it’s just manageable. If it’s still too wet, let it rest uncovered for 10 minutes—the surface will dry slightly. Pro tip: Use a dough scraper to help gather sticky dough without adding excess flour.
Can I make this dough ahead of time?
After mixing, you can refrigerate the dough for up to 48 hours before completing the 6-hour ferment. Just let it sit at room temp for 30 minutes before continuing. For longer storage, freeze portions wrapped tightly in plastic for up to 3 months. Thaw overnight in the fridge before using.
What’s the best way to stretch pizza dough without tearing?
First, let the dough rest for 15-20 minutes after dividing to relax the gluten. Then stretch it by pressing gently with your fingertips from the center outward. Use your knuckles or fingers to thin it, keeping edges slightly thicker. If it tears, just patch it with extra dough—no one will notice! A lightly floured surface helps too.
Can I use this dough for other baked goods?
While optimized for pizza, this dough works great for focaccia, calzones, or even garlic knots! For focaccia, shape into a rectangle on a baking sheet and dimple with your fingers before baking. For calzones, fold the dough over fillings and seal tightly. The slow fermentation gives all baked goods amazing flavor and texture.

- Pork Loin Pulled Pork Crock Pot Recipe: Slow-Smoked Tenderness With Zero Dryness - November 1, 2026
- Baked Potatoes in Crock Pot Recipe: Buttery Interiors and Crispy Top Magic - November 1, 2026
- Braised Beef Short Ribs Recipe: Crock Pot Fall-Off-Bone Magic in 6 Hours - November 1, 2026