
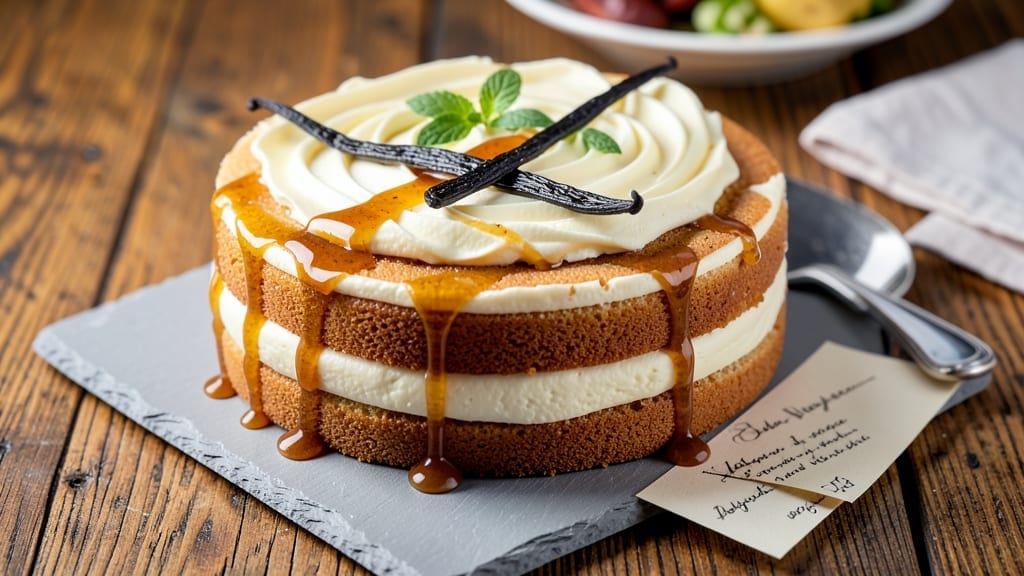
This 6-inch round vanilla cake recipe delivers moist, tender layers infused with real vanilla bean extract for that signature depth of flavor you can’t get from imitation. The secret lies in precise ingredient ratios and a gentle folding technique that keeps the crumb light yet rich—no dryness here.
I’ve baked this exact recipe for years, perfecting it through countless batches that always disappear too quickly from the plate.
The foundation starts with cake flour for silky texture, but the real magic happens when you infuse warm milk with vanilla bean extract before mixing. This step elevates the flavor from basic to extraordinary, creating layers that taste like they’ve been baking in a professional kitchen.
A simple syrup glaze after baking ensures that moistness you crave in every slice, while the vanilla aroma lingers long after the first bite.
What you’ll achieve is a perfectly proportioned single-layer cake with a tender crumb that holds its shape beautifully. The vanilla bean infusion gives it that professional bakery quality without requiring advanced techniques—just patience and attention to detail.
This cake serves 6-8 elegantly, making it ideal for small gatherings or when you want to impress with minimal effort.
Whether you’re frosting it with buttercream, filling it with vanilla cream, or serving it plain with fresh berries, this recipe delivers consistent results every time. The 6-inch size is perfect for practice or when you want to avoid leftovers, yet still makes a statement.
Let’s get baking—your taste buds will thank you.
Ingredients for 6 inch round vanilla cake
Gather these 12 simple ingredients to bake a moist, vanilla-kissed cake that tastes like a bakery secret.
| Ingredient | Amount | Notes |
|---|---|---|
| All-Purpose Flour 🌾 | 1 ½ cups | Sifted for even texture |
| Cake Flour 🌾 | ½ cup | For silky, tender crumb |
| Granulated Sugar 🍚 | 1 cup | White sugar preferred |
| Light Brown Sugar 🍚 | ½ cup | Packed for moisture |
| Unsalted Butter 🧈 | 1 cup | Room temperature, cubed |
| Large Eggs 🥚 | 2 whole | Room temperature for even mixing |
| Pure Vanilla Extract 🌿 | 1 tbsp | High-quality for flavor |
| Vanilla Bean Extract 🌿 | 1 tsp | Infused in warm milk |
| Whole Milk 🥛 | 1 cup | Warmed for infusion |
| Baking Powder 🍞 | 1 ½ tsp | Freshly opened |
| Salt 🧂 | ½ tsp | Fine sea salt |
| Simple Syrup 🍯 | ¼ cup | For glaze, 1:1 sugar:water |
The vanilla bean extract is non-negotiable here. Spend the extra on a pure extract—the kind that comes in a glass bottle with real vanilla beans. Trader Joe’s and Williams Sonoma have great options, but any bottle labeled ‘pure’ will work. The warm milk infusion is where the magic happens—don’t skip it. For the butter, Land O’Lakes or Plugrah are reliable, but any unsalted brand works. Cake flour is key for that tender crumb, and Bob’s Red Mill is my go-to for quality. If you can’t find cake flour, mix 3 tbsp cornstarch with 1 cup all-purpose flour as a substitute.
No vanilla bean extract? Double the pure vanilla extract—it won’t be the same, but it’ll still taste amazing. Running low on brown sugar? Lightly caramelize white sugar in a dry pan for 5 minutes to mimic it. The simple syrup glaze can be swapped for a thin apricot jam glaze if you prefer. For a dairy-free version, substitute dairy-free butter and milk, but the texture might be slightly denser. Always use room-temperature eggs and butter—they mix so much better and prevent lumps. If your butter is too soft, chill it for 15 minutes before creaming.
Store the cake in an airtight container at room temperature for up to 3 days, or in the fridge for 5 days if you’re not using the glaze. The glaze keeps for 1 week in the fridge, so make it fresh before serving. This cake freezes beautifully—wrap tightly in plastic and store for up to 3 months. To reheat, warm slices in the microwave for 10-15 seconds, or bake at 300°F for 5 minutes to revive the texture. Leftovers? They won’t last long, but if they do, toast them lightly for a bakery-fresh taste.
Why You’ll Love This Recipe
- No Mixer Needed: I swear by this recipe when my stand mixer’s on strike—just cream butter and sugars by hand, then fold in flours. The cake fluffs up light as a cloud without a single whisk mark, and honestly? The texture’s so tender it feels like cheating.
- Butter-Sugar Magic: That combo of brown and granulated sugar with cold butter? It’s the secret to a cake that’s actually moist—not dry like so many box mixes. The crust stays just crisp enough to hold frosting, but the center? Pure, buttery vanilla heaven.
- Party in a Pan: Six-inch rounds are the ultimate crowd-pleaser—stack two for a towering dessert, or slice into squares for a brunch spread. I’ve used them for birthdays, showers, and even as a last-minute office treat. (Yes, even on a Tuesday.)
- Budget-Friendly Luxury: You’re using pantry staples here—no fancy ingredients, just good old butter and flour. A single batch costs me less than takeout, and leftovers? They last in the fridge for days. Freeze slices for emergencies—trust me, you’ll thank me later.
Step-by-step instructions for 6 inch round vanilla cake
Here’s how to create a perfectly moist vanilla cake with layers that stay tender and flavorful.
Prepare the Vanilla Bean Milk
In a small saucepan, gently warm the 1 cup whole milk over medium-low heat until it reaches 160°F—just until tiny bubbles form around the edges. Remove from heat and stir in the 1 tsp vanilla bean extract. Let it steep for 10 minutes while you prepare the other ingredients. This infusion adds depth that pure extract alone can’t match.
I like to place the saucepan over a bowl of ice water after removing it from heat—this stops the milk from overheating while it infuses. The milk should smell rich and aromatic when ready, with visible vanilla flecks if using real vanilla bean extract. Let it cool completely to room temperature before using.
Cream Butter and Sugars
In a large mixing bowl, combine the 1 cup unsalted butter (room temperature), 1 cup granulated sugar, and 0.5 cup light brown sugar. Beat with an electric mixer on medium speed for 3-4 minutes until light and fluffy. You’ll notice the mixture nearly doubles in volume and becomes pale—this incorporates air that helps create that tender crumb.
Here’s the thing—don’t rush this step. I’ve found that under-creaming leads to dense cake, while over-creaming adds too much gluten. Stop when you can see the butter ribboning back into the sugar mixture when the beaters lift. The butter should be completely smooth with no visible lumps.
Combine Wet and Dry Ingredients
Add the 2 whole large eggs, one at a time, beating well after each addition until fully incorporated. Mix in the 1 tbsp pure vanilla extract and the cooled vanilla-infused milk. The batter should be smooth with a ribbon consistency—thick enough to hold its shape when the beaters lift.
In a separate bowl, whisk together the 1.5 cups all-purpose flour, 0.5 cup cake flour, 1.5 tsp baking powder, and 0.5 tsp salt. Sift the dry ingredients directly into the wet mixture and mix on low speed just until combined—about 20-30 seconds. Overmixing develops gluten, which makes the cake tough. Stop mixing as soon as you see no more flour streaks.
Bake the Cake Layers
Preheat your oven to 350°F. Grease two 6-inch round cake pans thoroughly with butter and flour, tapping out any excess. Divide the batter evenly between the pans. Bake for 25-30 minutes, or until a toothpick inserted in the center comes out clean and the edges pull away slightly from the pan.
I always check the cake at the 22-minute mark—your oven might run hot. The cake should spring back when gently pressed in the center. Let the cakes cool in the pans for 10 minutes, then transfer to a wire rack to cool completely before assembling. This prevents them from breaking when you try to level them later.
Assemble and Glaze
Once completely cool, level the tops of the cakes if needed. Place one layer on a cake stand or plate, then spread a thin layer of 0.125 cup simple syrup (half of the total amount) over the top. This keeps the cake moist while you assemble. Add the second layer and repeat with the remaining syrup.
For the glaze, warm the remaining 0.125 cup simple syrup until it becomes slightly thicker. Drizzle generously over the assembled cake. Let the glaze set for 15 minutes before serving. The cake should have a beautiful sheen and remain moist for days when stored properly. The vanilla infusion will give it that professional bakery quality that’s hard to find in store-bought versions.
Pro Tips For Making 6 Inch Round Vanilla Cake
- Cream Butter Properly: Whip that butter and sugar until it’s pale and fluffy—like beating a snowbank until it’s light as a cloud. I used to rush this, but those 3-4 minutes make all the difference in texture (yes, even if your arm feels like it’s doing push-ups).
- Sift the Flours Together: Mix your all-purpose and cake flour in a bowl first, then sift them together. This keeps the cake light and prevents lumps—no one wants a dense brick, especially in a 6-inch pan where every layer counts.
- Don’t Overmix the Batter: Stop folding in the flour the second it’s just combined. Overmixing turns your cake into a chewy disaster. I learned this after a batch turned out more like a muffin than a tender vanilla slice.
- Test for Doneness Right: Tap the center of the cake—it should spring back, not jiggle like jelly. If it’s golden but still wobbly, tent it with foil and let it finish baking. No one likes a gummy middle, especially in a small cake where every bite matters.
Perfect pairings for this dish
Classic Frosting Options
Buttercream frosting is the perfect partner for this cake—its richness complements the vanilla beautifully. Whip 1 cup unsalted butter with 3 cups powdered sugar and 2 tbsp heavy cream until smooth.
Add 1 tsp vanilla bean extract for extra depth. Spread between layers and on top for a clean, elegant finish. 💛
For a lighter touch, try a vanilla cream filling. Mix 1 cup heavy cream with 2 tbsp powdered sugar and 1 tsp vanilla extract, then whip until stiff peaks form. Pipe between layers for a bakery-style look.
Fresh Fruit Toppings
Fresh berries add vibrant color and acidity that cuts through the cake’s richness. Arrange raspberries or blackberries in a circular pattern on top, or slice strawberries into rounds. The natural juices will slightly macerate the cake, adding moisture with each bite.
For a tropical twist, use mango slices or pineapple chunks. Lightly brush the fruit with simple syrup> (1:1 ratio) before arranging to prevent drying. Garnish with fresh mint leaves for a refreshing contrast.
Chocolate Drizzle
A dark chocolate ganache elevates this cake to dessert showstopper status. Melt ½ cup dark chocolate chips with ¼ cup heavy cream, then drizzle over the assembled cake. Let it set for 10 minutes before serving. The bitterness of the chocolate balances the sweetness perfectly.
For a white chocolate version, use ½ cup white chocolate chips> and add 1 tsp vanilla extract> to the melted mixture. This creates a creamy, sweet contrast that pairs wonderfully with the cake’s vanilla notes.
Coffee Infusion
If you love coffee flavors, try brushing the cake layers with a coffee syrup> (1 cup strong brewed coffee reduced with ½ cup sugar). This adds depth that pairs surprisingly well with vanilla. Drizzle the syrup over the top before adding berries or frosting.
For a stronger coffee kick, mix 1 tbsp instant espresso powder**> into the cake batter during Step 3. The coffee enhances the vanilla’s natural sweetness while adding complexity. This works especially well with chocolate frosting.
Nutrition facts
Frequently asked questions
Can I bake this in a single 6-inch pan instead of two?
No, this recipe is designed for two 6-inch layers to create the perfect height and texture. A single layer would be too dense and might not bake evenly in the center. If you only need one layer, reduce the batter by half (using 0.75 cup flour, 0.5 cup sugar, etc.) while keeping all other ratios identical.
Why does your recipe use both cake flour and all-purpose flour?
The combination creates the ideal texture—cake flour gives a silky, tender crumb while all-purpose flour adds structure. Cake flour has a higher protein content (about 7-9%) than all-purpose, which helps develop gluten for a lighter cake. If you’re short on cake flour, substitute with 1 cup all-purpose flour minus 2 tbsp, replacing with 2 tbsp cornstarch.
Can I make this cake ahead of time?
Bake the layers 1 day ahead and store them wrapped in plastic at room temperature. Assemble the cake 4-6 hours before serving to allow flavors to meld. For long-term storage, freeze the baked layers (without glaze) for up to 3 months. Thaw overnight in the fridge before assembling.
What’s the secret to keeping this cake moist?
The simple syrup glaze is key—it adds moisture while creating that beautiful sheen. For extra tenderness, brush the warm cake layers with 2 tbsp warm syrup immediately after baking. Also, the vanilla bean infusion in the milk adds natural moisture that keeps the crumb soft for days when stored properly.
How do I adjust this for a gluten-free version?
Replace the all-purpose flour with a 1:1 gluten-free baking flour blend (like Bob’s Red Mill) and the cake flour with a gluten-free blend designed for cakes. Add 1 tsp xanthan gum to the dry ingredients to improve texture. Keep all other measurements the same, but expect slightly denser results—gluten-free cakes benefit from an extra 5 minutes in the oven.

- 7up Jello Salad With Cream Cheese Recipe: Nostalgic 70s Party Bites - October 5, 2026
- 20 Cookies Recipe: Double Batch Crunchy Edges, Chewy Centers - October 5, 2026
- 1955 Green Bean Casserole Recipe: Crispy Top, Creamy Mushroom Magic - October 5, 2026