
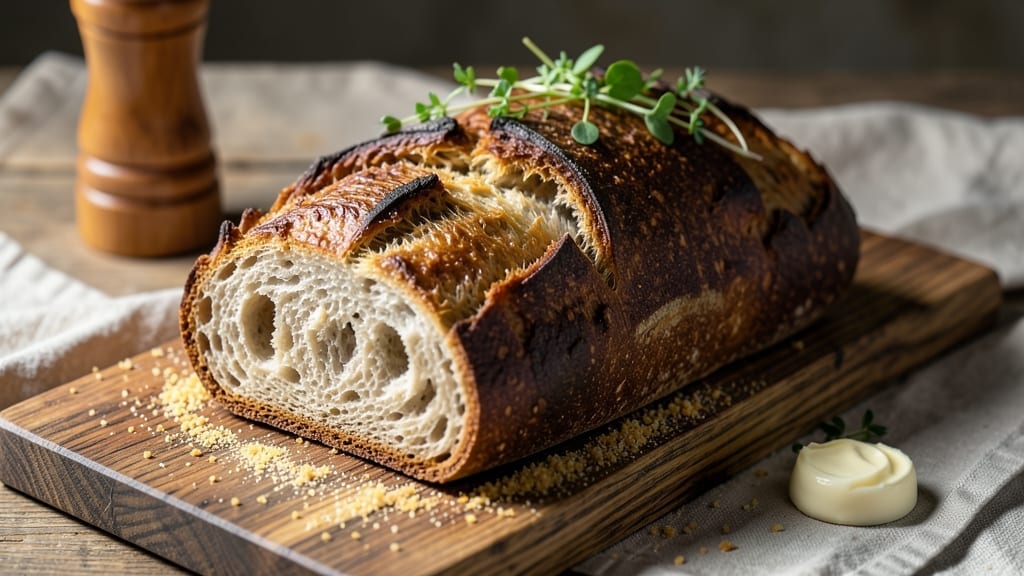
Mastering 75% hydration sourdough bread transforms your kitchen into a bakery—where every bite delivers an open crumb so light it seems to float and a crust so crisp it crackles like autumn leaves. 🌟 The secret lies in that precise water-to-flour ratio, which creates a dough that’s both workable and capable of developing extraordinary flavor during fermentation.
This recipe eliminates guesswork with clear timing, temperature guidelines, and the windowpane test to ensure perfect texture every time.
The process begins with a simple mix of flour, water, and salt, but it’s the autolyse and strategic bulk fermentation that build the bread’s signature tang and airy structure.
We’ll guide you through folding schedules that strengthen gluten without overworking the dough, followed by a final proof that transforms it into a golden, domed loaf ready for the oven. No special equipment is needed—just patience, a scale, and a steady hand.
What you’ll achieve is a loaf with a crusty exterior that shatters satisfyingly and a crumb so open it cradles every bite. The flavor develops depth during fermentation, creating that unmistakable sourdough tang that pairs perfectly with butter, jam, or even on its own.
This recipe delivers professional-quality results at home, with troubleshooting tips to handle any challenges along the way.
Whether you’re baking for a crowd or treating yourself to homemade bread, this 75% hydration sourdough recipe produces loaves that stay fresh for days. Let’s get started on creating your first perfect batch—no bakery experience required.
Ingredients for 75 hydration sourdough bread
Seven ingredients transform your kitchen into a bakery—where every bite delivers that perfect sourdough crumb and crust.
| Ingredient | Amount | Notes |
|---|---|---|
| Unbleached Bread Flour 🌾 | 500 g | High-protein for structure |
| Active Sourdough Starter 🍞 | 125 g | 100% hydration, bubbly |
| Filtered Water 💧 | 375 g | Room temperature, ~75°F |
| Fine Sea Salt 🧂 | 10 g | Diamond Crystal preferred |
| Vegan Butter (for scoring) 🧈 | 2 tbsp | Melted, plant-based |
| Cornmeal (for dusting) 🌽 | ¼ cup | Fine grind preferred |
| Vegan Olive Oil (for bowl) 🫒 | 1 tbsp | Extra-virgin for flavor |
The bread flour is non-negotiable here—King Arthur or Caputo are my go-tos for that signature open crumb. If you’re using all-purpose, expect a denser result. Your sourdough starter must be active (bubbly and doubled in 4-6 hours)—King Arthur or a reliable starter from a trusted source work best. I always keep mine in the fridge and feed it daily when baking. The water temperature matters: too cold slows fermentation, too hot kills the yeast. Aim for 75°F (24°C). For salt, Diamond Crystal dissolves more gently than table salt, so use it if you can.
No vegan butter on hand? Coconut oil or melted vegan margarine work in a pinch, though they lack the same richness. Running short on cornmeal? Semolina or rice flour are great substitutes—they just add a slightly different texture. The olive oil isn’t just for greasing; it adds subtle flavor to the dough. If you’re using a lower-quality oil, toast it lightly in a dry pan first to enhance its aroma. For scoring, a razor blade gives the cleanest cuts, but a sharp serrated knife works too. Just make sure it’s super sharp—dull blades tear the dough.
Store your starter in an airtight jar in the fridge for up to 1 week—feed it before using. The dough can rest in the fridge overnight for even more flavor (12-16 hours), but bake it within 4 hours of shaping for best results. Once baked, let the loaf cool completely on a wire rack—at least 2 hours—before slicing. Wrap cooled loaves in a clean kitchen towel and store at room temperature for 3 days, or freeze for 3 months. The crust stays crispy for days this way.
Why You’ll Love This Recipe
- Just Four Ingredients: I swear, this is the simplest sourdough I’ve ever made—just flour, starter, water, and salt. No fancy mix-ins, no stressing over hydration math. The dough comes together in minutes, and honestly? That’s half the battle won.
- Tangy, Crispy Magic: The 75% hydration keeps it light yet chewy, while the active starter delivers that perfect tang. Brush the crust with vegan butter before baking? Oh, that golden crack? Chef’s kiss. Simple scoring with a knife gives you those dramatic, ear-splitting slashes (and yes, my kids love that part).
- Meal Prep MVP: Slice it fresh for toast, freeze half for later, or pack it for lunches—this bread holds up like a champ. I’ve thrown it in sandwiches, dipped it in olive oil, even toasted it for French toast. Between us, it’s my go-to for lazy mornings and packed lunches alike.
- Budget-Friendly Staple: Unbleached flour and salt are cheap, and a small starter goes a long way. No need to buy pre-sliced loaves or specialty bread—this makes way more, and leftovers last for days. Plus, the longer it sits, the better the flavor gets. (Yes, even on a Tuesday night.)
Step-by-step instructions for perfect 75% hydration sourdough
This one-bowl method delivers a crispy crust and airy crumb every time.
👨🍳 Step 1: Mix Dough with the Right Technique
In a large bowl, combine the 500 g unbleached bread flour with the 125 g active sourdough starter. I like to use a wooden spoon first to break up any starter clumps and distribute it evenly through the flour. This creates a dry well for the other ingredients.
Add the 375 g filtered water and 10 g fine sea salt, then mix vigorously with your hands for 5-7 minutes. You’re looking for a shaggy dough that clings to your fingers but still feels slightly tacky—not sticky enough to require flour. The high hydration (75%) means this dough will be softer than traditional sourdough, so resist the urge to add extra flour. This is where the open crumb structure develops.
🥘 Step 2: Bulk Ferment for Maximum Flavor
Cover the bowl with a damp kitchen towel and let it ferment at room temperature (70-75°F) for 4-6 hours. I place my bowl in a slightly warm spot near the oven with the light on—this creates a cozy environment without overheating. You’ll know it’s ready when the dough has doubled in size and shows active bubbles along the surface and sides.
During this time, I do a “poke test” every hour: gently press two fingers into the dough. If the indentation stays put (no immediate bounce back), it’s ready for shaping. The longer you ferment, the more tangy flavor develops, but don’t exceed 8 hours or the dough may overproof.
🔥 Step 3: Shape and Proof for Structure
Lightly oil your hands and gently deflate the dough by pressing down with your fingers. Then fold one side over the center, rotate the bowl 90 degrees, and repeat. Do this 3-4 times total—this develops gluten strands for that signature open crumb. The dough will resist at first but should relax after a few folds.
Transfer the dough to a lightly oiled bowl (use the 1 tbsp vegan olive oil), cover, and let it proof for 1-2 hours until it rises 50-75% of its original size. I like to do this in the fridge overnight for better flavor development, but for this schedule, room temp works fine. The dough should feel springy when pressed gently.
🍳 Step 4: Prepare for Baking
Preheat your oven to 450°F with a Dutch oven inside for 45 minutes. This creates the perfect steam environment for crust development. While it heats, dust a baking sheet with 0.25 cup cornmeal—this prevents sticking and adds texture to the bottom crust.
Turn the dough onto the prepared sheet, then carefully transfer it to the hot Dutch oven. I use a peel for this—just slide it under the dough and lift gently. The dough will puff up as it hits the hot pot. Bake covered for 20 minutes, then remove the lid and bake 20-25 minutes more until the crust is deep golden brown and sounds hollow when tapped.
🔪 Step 5: Score and Finish
Remove the bread from the Dutch oven and immediately score it with a sharp razor or lame. I make a ½-inch deep cut down the center—this controls expansion and creates that beautiful ear. Brush the top with melted 2 tbsp vegan butter for extra shine and flavor.
Return to the oven for 5-10 minutes to set the crust, then let it cool on a wire rack for at least 1 hour before slicing. The internal temperature should reach 95°F—this ensures proper crumb structure. The bread will continue to firm up as it cools, developing that perfect balance of crispy crust and airy interior.
Pro Tips For Making 75 Hydration Sourdough Bread
- WEIGH YOUR STARTER: The 75% hydration recipe is forgiving, but your starter’s weight matters more than volume. Use a kitchen scale—100g of active starter (not the whole jar) gives you predictable fermentation. I used to eyeball it and wondered why my dough sometimes felt sluggish or overproofed.
- SALT THE WATER FIRST: Dissolve the salt in the filtered water before mixing—it prevents clumping and ensures even distribution. Skip this, and you’ll end up with salt pockets that make your first bite taste like a science experiment. (Yes, even if you’re impatient like me.)
- STRETCH AND FOLD LATE: With 75% hydration, the dough is loose but structured enough to handle stretch-and-folds—just wait until the bulk ferment has visibly risen and the surface looks slightly tacky. Doing it too early flattens the gluten; too late, and you’ll fight a sticky mess. Aim for 2-3 sets, 30 minutes apart.
- SCORE WITH A RAZOR: Vegan butter is soft and can smear, so use a fresh razor blade for scoring. Dip it in hot water first to prevent sticking—this guarantees clean cuts that hold steam and create that perfect oven spring. (Your future self will thank you.)
Storing and reheating your leftovers
Room-Temp Storage
Wrap your freshly baked loaf in a clean kitchen towel (not plastic!) and store it at room temperature for up to 3 days. The towel allows the crust to stay crispy while keeping the crumb soft.
I place mine in a burlap-lined basket—the natural fibers absorb excess moisture without drying out the bread. For extra freshness, store in a cool pantry (below 70°F) rather than a warm kitchen. 🌾
Fridge Preservation
If you need to extend freshness beyond 3 days, slice the loaf and freeze the pieces individually on a tray before bagging. For whole loaves, wrap tightly in plastic wrap followed by the kitchen towel, then store in the fridge for up to 5 days.
The crust will soften slightly but revives beautifully when toasted. I always reheat slices for 10-15 seconds in the toaster for that bakery-fresh crunch. ✨
Freezer Magic
For long-term storage, freeze baked loaves wrapped in plastic wrap and the kitchen towel for up to 3 months. Thaw at room temperature for 2-3 hours before toasting. I like to slice and freeze individual portions too—just pop them directly from frozen into the toaster for 20-30 seconds.
The high hydration makes this bread surprisingly resilient to freezing without drying out. 💫
Reviving Day-Old Crust
If your crust loses its crunch, don’t toss it! Place the loaf on a wire rack and broil for 2-3 minutes at 375°F until the crust turns golden again.
For extra crispiness, brush with melted vegan butter before broiling. This works especially well for sandwich bread—just slice, toast, and enjoy that satisfying crunch. 🔥
Starter Care
Your sourdough starter deserves equal attention. Store unused portions in the fridge in an airtight jar for up to 1 week. Feed it 1:1:1 (starter:flour:water) every 3-4 days to maintain activity.
When baking again, take it out 12 hours before use and feed it 2-3 times to revive its strength. A healthy starter is the foundation of great sourdough—never skip the feeding! 🍞
Nutrition facts
Frequently asked questions
What makes 75% hydration different from other sourdough recipes?
The 75% hydration (375g water to 500g flour) creates a softer, more extensible dough that develops an extraordinary open crumb structure. Unlike lower hydration doughs (60-65%), this ratio requires precise handling but rewards you with a lighter, airier interior. The higher water content also enhances flavor development during fermentation, giving you that signature tangy depth.
Can I use all-purpose flour instead of bread flour?
Yes, but expect a denser crumb and less open structure. Bread flour’s higher protein content (12-14%) develops stronger gluten strands needed for that signature sourdough texture. For best results, stick with bread flour, but if you’re in a pinch, add 1 tsp vital wheat gluten per 100g flour to compensate. The flavor won’t be quite as developed, though.
How do I know when my starter is ready to use?
A ready starter should be bubbly, doubled in size, and have a slightly domed top within 4-6 hours after feeding. It should also pass the “float test”—drop a small spoonful in water; if it floats, it’s active enough. For this recipe, aim for a starter that’s been fed 12-24 hours before using to ensure maximum activity.
Why did my dough collapse during baking?
This usually happens when the dough is underproofed (not fermented long enough) or overworked during mixing. For this hydration level, the dough should be 50-75% risen before baking. If it collapses, try extending bulk fermentation by 1-2 hours next time and avoid excessive handling. Also ensure your oven is properly preheated with the Dutch oven inside.
Can I bake this without a Dutch oven?
Place the shaped dough on a baking sheet lined with parchment paper, then cover tightly with aluminum foil. Bake at 450°F for 30 minutes covered, then 15-20 minutes uncovered. For extra steam, add a tray of boiling water to the oven. While not identical to Dutch oven results, you’ll still get a good crust and open crumb. The key is maintaining moisture during the initial baking phase.

- 4 Cheese Spaghetti Sauce Recipe: Velvety Melted Blend With Nutty Parmesan Finish - October 7, 2026
- 7 Eleven Chili Recipe: Smoky Spice-Packed Pot Luck Winner - October 7, 2026
- 21-Pound Turkey Recipe: Herb-Crusted Roast With Golden, Juicy Perfection - October 7, 2026