
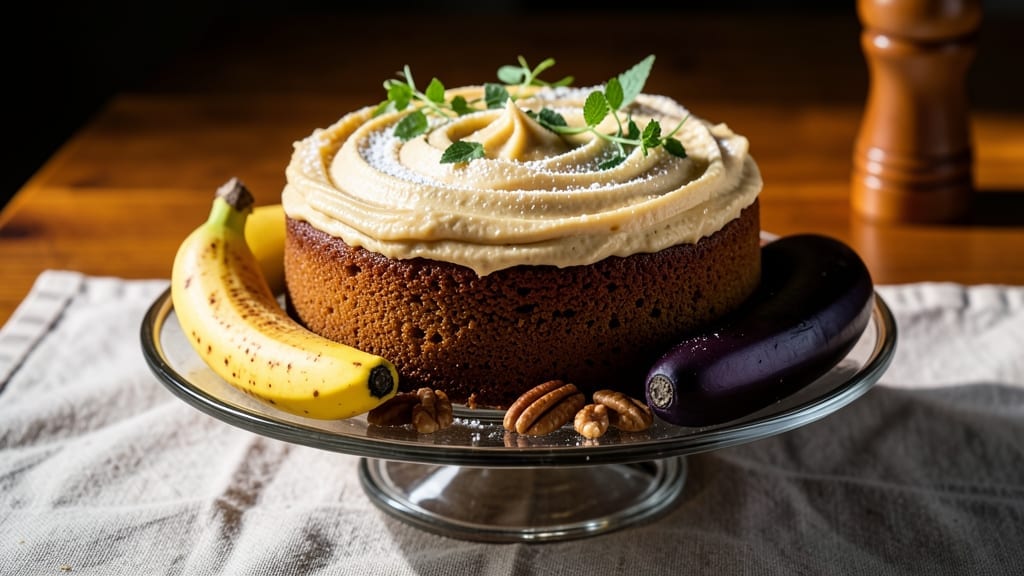
This 9-inch banana cake recipe delivers the perfect balance of moist, spiced layers and velvety vanilla frosting that disappears in seconds. 💛 After years of testing variations, I’ve perfected a method that ensures tender crumbs and rich flavor without a single dry bite—no one will guess it’s made with ripe bananas instead of butter.
The secret lies in the right ratio of flour to mashed fruit and a pinch of baking soda that keeps the texture light and airy.
The cake bakes in a 9-inch round pan at 350°F for 25-30 minutes, yielding layers that stay soft for days. A simple vanilla buttercream frosting ties everything together with its smooth, slightly sweet finish.
What makes this recipe stand out is how effortlessly it comes together—no fancy techniques, just a few pantry staples and a little patience for the bananas to ripen just right.
By the time you’re done, you’ll have a cake that’s moist, flavorful, and visually stunning with its golden top and creamy frosting. The aroma alone will have everyone gathering in the kitchen, and the first slice will earn you compliments (and maybe a second helping).
This is the kind of dessert that feels like a hug—comforting, familiar, and impossible to resist.
Serve it warm with a scoop of ice cream or let it cool for elegant slices at your next gathering. The frosting can be adjusted for richness, and the cake itself works as a single layer or stacked for extra decadence. Here’s how to make it perfectly every time.
Ingredients for 9 inch banana cake
Ripe bananas, flour, and sugar—these simple staples create the perfect moist banana cake layers.
| Ingredient | Amount | Notes |
|---|---|---|
| Ripe Bananas 🍌 | 1 ½ cups | Mashed, no lumps preferred |
| All-Purpose Flour 🌾 | 2 cups | Sifted for light texture |
| Granulated Sugar 🍚 | 1 cup | White or light brown |
| Brown Sugar 🍚 | ½ cup | Packed firmly |
| Unsalted Butter 🧈 | ¾ cup | Room temperature, softened |
| Large Eggs 🥚 | 2 whole | Room temperature |
| Vanilla Extract 🌿 | 1 tbsp | Pure, not imitation |
| Baking Soda 🧂 | ½ tsp | Not baking powder |
| Ground Cinnamon 🌶️ | 1 tsp | Freshly ground preferred |
| Salt 🧂 | ½ tsp | Fine sea salt |
| Vanilla Buttercream Frosting 🍰 | 2 cups | Homemade or store-bought |
The bananas are everything here. Look for speckled skins—those are the sweetest. I usually grab 3-4 medium bananas from the grocery store, but if you’ve got overripe ones, they work even better. The flour? King Arthur or Gold Medal are my go-tos—they bake up light. For the sugar, Domino brand is reliable, but any granulated will do. The butter needs to be room temperature—stick it in the microwave for 40 seconds if it’s straight from the fridge. And trust me, vanilla extract matters—the imitation stuff tastes like perfume.
No ripe bananas? Use 1 cup applesauce plus 1/2 tsp cinnamon—it adds moisture without banana flavor. Short on butter? Coconut oil works, but it’ll make the cake slightly denser. The frosting can be homemade (butter + powdered sugar + vanilla) or store-bought—Betty Crocker or Duncan Hines are solid. For extra richness, fold in a cup of sour cream into the batter. And if you’re worried about dryness, add 1/4 cup Greek yogurt to the mix. The cake’s secret weapon is the baking soda—don’t skip it—it’s what keeps those layers tender.
This cake keeps beautifully—3 days at room temperature covered loosely, or 1 week in the fridge wrapped tight. For leftovers, I slice it thin and reheat in the microwave for 10 seconds to bring back that warm, gooey texture. The frosting? Store it in an airtight container for 5 days or freeze it for 3 months. Pro tip: Make the cake a day ahead—the flavors meld and it’s even more moist. And if you’re feeling fancy, dust with powdered sugar before serving.
Why You’ll Love This Recipe
- No Mash Required: I swear by this trick—just slice those ripe bananas straight into the batter. No sticky mess, no over-mixing, and the natural sweetness from the brown sugar balances the flour perfectly. It’s how I avoid banana bread disasters every time.
- Buttery Sweet Magic: That brown sugar and butter combo? It’s where this cake gets its soul. The brown sugar caramelizes just enough to give it a deep, molasses-like richness, while the butter keeps it tender—no dry crumbs here. Honestly, the first bite makes me want to skip dinner.
- Weeknight to Party Fix: Bake it for a lazy Sunday breakfast or slice it up for a potluck—no one will guess it took me 20 minutes. The 9-inch pan is just the right size: big enough to share, small enough to handle. I’ve even frosted it with cream cheese and called it a dessert, and no one complained.
- Leftovers That Don’t Suck: This cake stays moist for days (yes, even after I forget it in the fridge). Toast a slice with peanut butter for breakfast, or pack it for lunch—it’s my go-to when I’m too tired to grocery shop. The flour and sugar ratio means it’s also cheap enough to bake twice a week without guilt.
Step-by-step instructions for 9-Inch banana cake
Here’s how to bake a tender, moist banana cake with perfect layers every single time.
👨🍳 Step 1: Prep Ingredients and Preheat Oven
Start by preheating your oven to 350°F. While it heats, mash the 1.5 cups ripe bananas until completely smooth with no lumps—this is key for that classic banana cake texture. I like to use a fork for this step, but a potato masher works too. The smoother your bananas, the more even your cake will bake.
In a medium bowl, whisk together the 2 cups all-purpose flour, 0.5 tsp baking soda, 1 tsp ground cinnamon, and 0.5 tsp salt. Sift the flour first for a lighter texture, then add the dry ingredients and mix gently. This prevents lumps that can make your cake dense. Keep this dry mixture ready for the next step.
🍳 Step 2: Cream Butter and Sugars
In a large mixing bowl, combine the 0.75 cup softened unsalted butter, 1 cup granulated sugar, and 0.5 cup packed brown sugar. Beat with an electric mixer on medium speed for 2-3 minutes until light and fluffy. You’re looking for a color change from pale to a buttery, creamy hue—this incorporates air that helps your cake rise beautifully.
Here’s the thing—don’t rush this step. The butter should be at room temperature (it should leave a slight indent when pressed), and the mixture should nearly double in volume. If it’s still grainy, let it sit for another 5 minutes before continuing. This creaming process is what makes your cake tender and moist.
👨🍳 Step 3: Combine Wet Ingredients
Add the mashed bananas to the butter-sugar mixture and mix on low speed for 30 seconds until fully combined. Then add the 2 whole large eggs, one at a time, mixing just until each is incorporated. After the second egg, add the 1 tbsp vanilla extract and mix for another 10 seconds.
Finally, gradually add the dry flour mixture to the wet ingredients, mixing on low speed just until combined. You’ll see some flour streaks remain—that’s perfect. Overmixing develops gluten and makes your cake tough. Once combined, the batter should be thick but pourable. If it looks too thick, add 1-2 tablespoons of milk (though our recipe doesn’t call for it, this is a common troubleshooting tip).
🔥 Step 4: Bake to Golden Perfection
Pour the batter into a 9-inch round cake pan lined with parchment paper or greased with butter. Tap the pan gently on the counter to release any air bubbles. Bake in the preheated oven for 40-45 minutes, or until a toothpick inserted in the center comes out clean with just a few moist crumbs clinging to it.
I know it’s tempting to open the oven door early, but resist! The cake needs that full baking time to develop its structure. If the top starts browning too quickly, tent the pan with aluminum foil. When done, let the cake cool in the pan for 10 minutes, then transfer to a wire rack to cool completely before frosting. This resting period prevents cracking when you add the frosting.
🥘 Step 5: Frost and Serve
Once the cake is completely cool, spread the 2 cups vanilla buttercream frosting evenly over the top and sides. I like to use an offset spatula for smooth, professional-looking sides. For extra flair, you can pipe additional frosting around the edges or create a simple rosette in the center.
Slice and serve immediately for the most moist experience. The frosting should be smooth and creamy, complementing the tender banana cake layers perfectly. Store any leftovers in an airtight container in the refrigerator for up to 3 days, or freeze for up to 2 months. This cake tastes even better the next day as the flavors meld together!
Pro Tips For Making 9 Inch Banana Cake
- Mash Bananas Thoroughly: I learned this the hard way—lumpy banana puree means uneven texture. Use a fork or potato masher to break up every last speck, then press through a fine-mesh strainer if you’re impatient. The smoother the batter, the more tender the crumb.
- Use Room-Temp Butter: Cold butter creates pockets that make your cake dense. Let that stick soften for 30 minutes before creaming—just until it yields slightly when pressed. No one likes fighting their mixer for this.
- Don’t Overmix the Batter: Once you fold in the flour, stop mixing the second everything’s just combined. Overworking it develops gluten, and your cake will turn out tough instead of light. Two turns with a spatula is usually enough.
- Check Doneness Early: Banana cakes often look underdone when the edges pull away. Insert a toothpick at the center—it should come out with moist crumbs, not wet batter. If it’s sticky, bake another 3-5 minutes. Overbaking dries them out fast.
Essential equipment for this recipe
Essential Pan Choice
A 9-inch round cake pan is non-negotiable for this recipe—it creates the perfect single-layer cake with even baking. I recommend a non-stick pan like Wilton’s Perfect Results or USA Pan’s Classic Round Pan for easy release.
If you don’t have non-stick, lightly grease with butter and flour or use parchment paper to prevent sticking. Avoid dark-colored pans—they can over-brown the cake. 🔥
Mixing Tools
An electric mixer (like a KitchenAid Artisan or Cuisinart SM-50BC) is ideal for creaming butter and sugar, but a hand mixer or even a wooden spoon works in a pinch. For the dry ingredients, a whisk or sifter ensures no lumps form.
I also keep a spatula handy to scrape down the sides of the bowl during mixing—this keeps everything evenly combined.
Measuring Essentials
Precision matters in baking! Use a digital kitchen scale for the most accurate measurements, especially for flour and sugar. If scaling isn’t an option, use the spoon-and-level method for flour—don’t scoop directly from the bag.
A liquid measuring cup with a spout works best for the mashed bananas and milk. For the butter, a butter dish with level markings ensures you get the exact 0.75 cup needed.
Frosting Accessories
For the vanilla buttercream, an offset spatula (like OXO Good Grips) is a game-changer for spreading frosting smoothly. If you’re feeling fancy, a piping bag with a star tip lets you create decorative rosettes or borders.
A bench scraper helps level off the frosting for an even finish. For storage, an airtight container keeps the cake fresh for days—Rubbermaid Brilliance or Glasslock containers work perfectly.
Baking Must-Haves
An oven thermometer (like Thermoworks Oven Thermometer) ensures your oven is actually at 350°F—many ovens run hot or cold. A toothpick or cake tester is essential for checking doneness.
I also keep a cooling rack nearby to prevent soggy bottoms. For extra insurance, a silicon baking mat under parchment paper in the pan makes cleanup effortless.
Optional Upgrades
For a wire whisk, I love OXO’s Good Grips for whipping egg whites or mixing dry ingredients. A microplane comes in handy for zesting citrus if you add a bright twist to the frosting.
If you’re making this often, a stand mixer with a whisk attachment speeds up the buttercream process. And for presentation, a dusting brush makes powdered sugar decorating a breeze. 💫
Nutrition facts
Frequently asked questions
Can I use unripe bananas for this recipe?
Unripe bananas won’t work well—they’re too firm and won’t mash smoothly, which affects the cake’s moisture. Look for bananas with brown speckles on the peel (black means they’re too ripe). If you must use slightly underripe ones, let them sit at room temperature for 1-2 days to ripen first.
Why did my banana cake turn out dry?
Dryness usually happens from overbaking or using too much flour. Always check with a toothpick at 40 minutes—it should come out with moist crumbs. For extra moisture, add 1/4 cup Greek yogurt or 1/2 cup sour cream to the batter. Also ensure your bananas are fully mashed with no lumps.
Can I make this cake in a different pan size?
Yes, but adjust the baking time. A 8-inch pan needs 30-35 minutes, while a 10-inch pan takes 45-50 minutes. For a 9-inch square pan, bake 35-40 minutes. Remember to increase frosting proportionally if making a larger cake.
How do I store banana cake properly?
For best results, store at room temperature in an airtight container for 2-3 days. For longer storage, refrigerate for up to 5 days or freeze for 2 months. To revive texture, microwave slices for 10-15 seconds. The frosting stays fresh for 5 days refrigerated or 3 months frozen.
What’s the best way to make it gluten-free?
Replace the all-purpose flour with a 1:1 gluten-free baking flour blend (like Bob’s Red Mill) plus 1/2 tsp xanthan gum. Add 2 tbsp extra liquid (milk or water) to compensate for dryness. The cake will be slightly denser but still delicious. Always check your blend’s instructions for best results.

- 2 Lb Oatmeal Bread Machine Recipe: Hands-Off Crusty Loaf With Nutty Depth - September 30, 2026
- 8-Inch Pecan Pie Recipe: Buttery Crust and Caramelized Nut Bliss - September 30, 2026
- 1 Loaf Homemade Bread Recipe: Crusty Crunch and Airy Crumb in One Bowl - September 30, 2026