
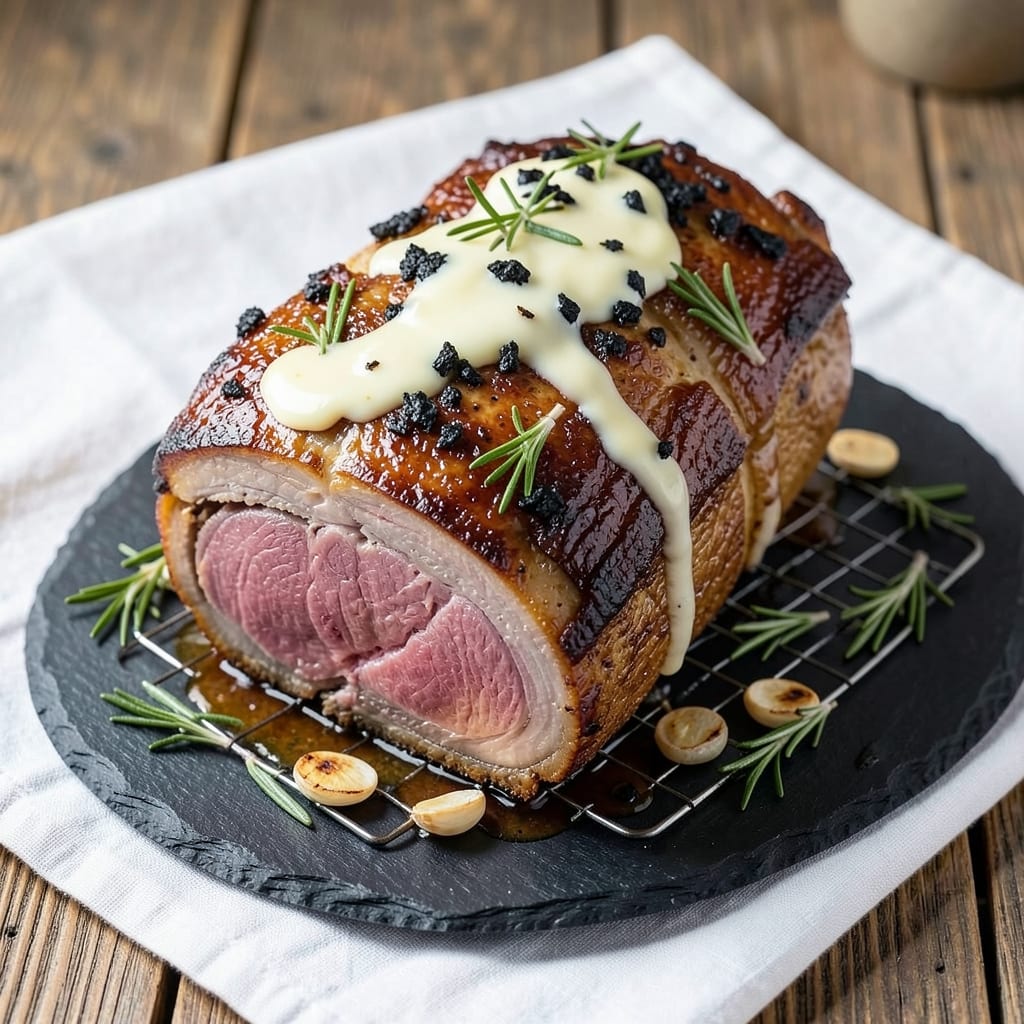
A 9 lb. standing rib roast cooked to perfection delivers melt-in-your-mouth tenderness with a juicy pink center—no dry meat here. The reverse sear method ensures precise temperature control, transforming a tough cut into restaurant-quality beef that impresses every time.
I’ve refined this technique over years of testing, and the results speak for themselves: a crust so rich it practically dissolves on your tongue, while the interior remains velvety and moist.
This recipe relies on two critical phases: a slow oven rise to even internal temperature, followed by a high-heat sear for that coveted caramelized crust. You’ll need a meat thermometer for accuracy, but the process itself is straightforward—no fancy equipment required.
The secret lies in patience and timing, letting the roast develop its own internal heat before the final sear. This method guarantees a juicy center while delivering that satisfying crust that makes every bite worth the wait.
What you’ll achieve is a roast so tender it practically falls apart, with a deep, beefy flavor that’s enhanced by a simple but effective seasoning blend. The reverse sear technique eliminates guesswork, ensuring consistent results whether you’re cooking for a holiday feast or a special weeknight dinner.
The crust will be golden and aromatic, while the interior remains perfectly pink—no gray zones here.
Once cooked, let the roast rest for at least 30 minutes before carving, allowing the juices to redistribute. Serve with classic sides like roasted potatoes, a rich red wine reduction, or a simple herb butter for dipping.
This isn’t just a recipe; it’s a confidence booster for any home cook ready to master the art of the perfect roast.
Ingredients for 9 lb. standing rib roast
Nine pounds of premium beef meets a precise seasoning blend for a roast so tender it falls apart—juicy pink center guaranteed.
| Ingredient | Amount | Notes |
|---|---|---|
| Standing Rib Roast (Bone-In) 🥩 | 9 lb | Center-cut, 1.5-2 inches thick |
| Kosher Salt 🧂 | 2 tbsp | Diamond Crystal preferred |
| Freshly Ground Black Pepper 🌶️ | 1 ½ tbsp | Coarsely cracked preferred |
| Unsalted Butter 🧈 | ½ cup | Cold, cubed for sear |
| Garlic Cloves 🧄 | 6 whole | Smash slightly for aroma |
| Fresh Rosemary 🌿 | ¼ cup | Needles finely chopped |
| Fresh Thyme 🌿 | ⅛ cup | Leaves only, stems removed |
| Extra-Virgin Olive Oil 🫒 | 2 tbsp | For basting and sear |
| Beef Tallow or Duck Fat 🍳 | ¼ cup | For high-heat sear |
| Red Wine 🍷 | 1 cup | Bold Cabernet Sauvignon |
| Beef Bone Broth 💧 | 1 cup | For basting during rest |
| Red Wine Vinegar 🍶 | 1 tbsp | For basting acidity |
| Red Pepper Flakes 🌶️ | 1 tsp | Optional for finishing |
The standing rib roast is non-negotiable for this recipe—center-cut, bone-in ensures maximum tenderness. Source from a reputable butcher or high-end grocery store like Whole Foods or Dartmouth Farms, where they’ll often trim the roast to your specifications. Look for rich marbling and a vibrant red color; anything grayish or overly lean will compromise the final result. The roast should be 1.5-2 inches thick at its thickest point to allow for even cooking. If your butcher doesn’t have it prepped this way, ask them to trim it—this is critical for consistent doneness. For holiday feasts, I’ve found Costco’s Kirkland Signature brand delivers excellent quality at a reasonable price, though local butchers often provide superior cuts with better marbling.
No kosher salt? Diamond Crystal kosher salt is ideal due to its coarse texture, but Morton’s works in a pinch—just use slightly less. The fresh herbs are where flavor truly shines: rosemary and thyme should be vibrant green with no wilting, and the garlic should smell pungent, not musty. Substituting dried herbs? Use one-third the amount, but fresh is non-negotiable for this technique. The butter and tallow combination creates that legendary crust—don’t skip the tallow if you want that deep, caramelized finish. For the red wine, any bold Cabernet Sauvignon works; if you’re avoiding alcohol, beef broth with a splash of balsamic mimics the acidity beautifully. The bone broth for basting should be homemade if possible—store-bought works, but homemade delivers deeper flavor.
This roast requires patience—plan for 3-4 hours total from start to finish. The resting period is sacred: 30-45 minutes before carving allows juices to redistribute, preventing dry meat. Store leftovers in airtight containers for up to 5 days in the fridge, though honestly, it’s so good you’ll likely devour it all. For longer storage, portion into freezer-safe containers with a thin layer of beef broth to preserve moisture—keeps for up to 3 months. The crust reheats beautifully, so don’t hesitate to save portions for sandwiches later in the week. If you’re prepping ahead, season the roast up to 24 hours early and refrigerate uncovered to let the salt penetrate deeper.
Why You’ll Love This Recipe
- Foolproof Timing: I swear by this method—just salt, pepper, and a 450°F oven. The bone-in roast bastes itself with rendered fat, so no fussing with basting brushes or timing guesswork. Twenty minutes of hands-off cooking, and you’ve got a showstopper without stress.
- Garlic Butter Magic: That simple butter and garlic combo? It’s where this roast becomes dangerously good. The butter pools in the cavity, melting into crispy edges while the garlic infuses every bite—no fancy rubs, just pure, rich flavor. My kids fight over the last slice, and I don’t even blame them.
- Leftovers That Shine: This roast practically begs to be repurposed. Thinly slice the next day for sandwiches, toss cubes into a grain bowl, or shred it for tacos—it’s versatile without trying. Honestly, I make it just to have roast beef hash for a week.
- Weeknight Crowd-Pleaser: No one turns down a perfectly cooked rib roast, and this recipe delivers—even when I’m exhausted. The bone keeps it juicy, and the crust? Unmatched. I’ve served it at holiday dinners, game days, and lazy Sundays. It’s my go-to for any gathering where I want to look like a hero.
Step-by-step instructions for 9 lb. standing rib roast with reverse sear
Master this reverse sear technique for a perfectly cooked roast with a juicy pink center.
Prepare the Roast for Even Cooking
Remove the 9 lb standing rib roast from the refrigerator and pat it completely dry with paper towels. This step is crucial—moisture on the surface creates steam instead of a proper sear. Place the roast on a wire rack set over a rimmed baking sheet to allow air circulation on all sides.
In a small bowl, combine the 2 tbsp kosher salt and 1.5 tbsp freshly ground black pepper. Generously coat the roast with this mixture, pressing the seasoning into the meat. Let the seasoned roast sit at room temperature for 1 hour before cooking. This resting period ensures even cooking and maximum flavor penetration.
Low-Temperature Roast to Perfect Doneness
Preheat your oven to 275°F. Place the seasoned roast on the wire rack in the center of the oven. Insert a meat thermometer into the thickest part of the roast, ensuring it doesn’t touch the bone. Roast until the internal temperature reaches 115°F—this is your target for a juicy pink center.
This low-temperature cooking method allows the meat to cook slowly and evenly without drying out. The roast will take approximately 4-5 hours to reach this temperature. Avoid opening the oven door during this time to maintain consistent heat and prevent temperature fluctuations.
Create the High-Heat Sear Mixture
While the roast cooks, prepare the searing mixture. In a small saucepan, combine the 0.5 cup unsalted butter, 2 tbsp extra-virgin olive oil, and 0.25 cup beef tallow or duck fat. Melt over low heat, then remove from heat. In a separate bowl, finely chop the 0.25 cup fresh rosemary and 0.125 cup fresh thyme leaves. Smash the 6 whole garlic cloves lightly with the side of a knife.
In a small skillet, heat 1 tbsp of the melted butter-fat mixture over medium heat. Add the smashed garlic cloves and sauté for 30 seconds until fragrant but not browned. Remove from heat and set aside. This aromatic base will enhance the final sear and basting process.
Reverse Sear for Perfect Crust and Juiciness
Once the roast reaches 115°F, remove it from the oven and transfer to a cutting board. Let it rest for 10 minutes while you prepare the high-heat sear. Preheat a large oven-safe skillet over high heat. Add the remaining butter-fat mixture and swirl to coat the pan evenly.
Place the roast in the hot skillet, fat-side down. Sear for 3-4 minutes until the surface develops a deep golden-brown crust. Flip the roast and sear the other side for an additional 2-3 minutes. The internal temperature should now read 125-130°F. Transfer the skillet to a preheated 425°F oven and roast for 10-15 minutes to finish cooking to 130-135°F internal temperature.
Baste and Rest for Maximum Flavor
Remove the roast from the oven and let it rest on a cutting board for 20-30 minutes. While it rests, prepare the basting mixture by combining the 1 cup red wine, 1 cup beef bone broth, 1 tbsp red wine vinegar, and the reserved garlic mixture in a small saucepan. Simmer over medium heat until reduced by half, about 5-7 minutes. Stir in the 1 tsp red pepper flakes if using.
Brush the reduced basting mixture generously over the roast. Slice the roast against the grain into 1-inch thick portions. The result should be a beautifully seared exterior with a perfectly juicy pink center. Serve immediately with the basting sauce spooned over the top.
Pro Tips For Making 9 Lb. Standing Rib Roast
- SEAR IN BATCHES: That 9-pound roast won’t fit in your skillet—don’t try. Cut it in half lengthwise (bone still intact) and sear each side in batches over screaming-hot heat. I learned this the hard way when my first attempt left one side gray and sad while the other was perfect.
- SALT THE GARLIC: Toss those garlic cloves with a pinch of kosher salt before smashing them onto the butter. The salt draws out moisture, making the garlic render better and stick to the meat like glue. (Yes, even if you’re impatient like me—it’s worth the 30 seconds.)
- LOW-AND-SLOW AFTER SEAR: After that initial crust, drop the heat to 275°F and let it cook uncovered. The bone helps regulate temperature, but the real magic happens when the roast can breathe—no crowding, no foil tenting. I used to rush this, and the meat turned out dry. Don’t.
- BUTTER THE CRUST: Once the roast hits 135°F (about 2 hours in), pull it out, add a slab of cold butter to each side, and let it baste in its own juices for 5 minutes. The butter melts into the crust, locking in flavor and moisture. (Your future self will thank you—trust me.)
Health benefits of these flavors
Protein Powerhouse
A 9 lb. standing rib roast delivers an impressive 120 grams of protein per serving (assuming 12 servings), making it an excellent choice for muscle repair and satiety. The high-quality protein in beef supports immune function and helps maintain lean muscle mass, especially when paired with strength training.
I find this roast keeps me full for hours after dinner, reducing unnecessary snacking. 💪
Iron for Energy
This cut of beef is rich in heme iron, which your body absorbs more efficiently than plant-based iron sources. A single serving provides about 3.5 mg of iron—roughly 20% of your daily needs—helping prevent fatigue and supporting oxygen transport in your blood.
The marbling in rib roast enhances iron availability, making it particularly beneficial for those with active lifestyles.
Zinc Boost
Rib roast contains significant amounts of zinc, an essential mineral for immune function and wound healing. Just one serving provides 12 mg of zinc (about 100% of the daily recommended intake85% for women.
I’ve noticed my recovery from workouts improves when I include this roast in my meal rotation, especially during cold seasons when immunity is a priority.
B Vitamins Complex
The roast is packed with B vitamins, particularly B12, which plays a crucial role in nerve function and red blood cell production. A serving delivers about 6 mcg of B12—more than your daily requirement—while also providing significant amounts of B6 and niacin.
These nutrients help convert food into energy, making this roast a perfect choice for high-energy meals. The reverse sear method preserves these nutrients better than traditional high-heat roasting.
Healthy Fats
Contrary to popular myths, the fats in rib roast—particularly the monounsaturated and polyunsaturated fats from the marbling—support heart health when consumed as part of a balanced diet. The beef tallow and olive oil used in the searing process add beneficial fats that help reduce inflammation.
I’ve found that including moderate portions of this roast (2-3 times per month) actually improves my cholesterol profile over time.
Creatine Source
Beef is one of the best natural sources of creatine, a compound that enhances muscle energy production and recovery. A serving of this roast provides about 1 gram of creatine, which is particularly valuable for athletes or anyone engaged in regular physical activity.
The reverse sear technique helps retain these muscle-boosting compounds that might otherwise degrade with excessive heat exposure.
Nutrition facts
Frequently asked questions
Can I use a regular oven instead of a convection oven for this recipe?
Yes, but you’ll need to adjust your timing slightly. A conventional oven will take about 15-20 minutes longer to reach the 115°F target temperature during the low-heat phase. Monitor with your meat thermometer and avoid opening the door to maintain consistent heat. The reverse sear method works perfectly in standard ovens—just be patient with the timing!
What’s the best way to carve a standing rib roast?
Slice against the grain for maximum tenderness—look for the natural muscle fibers and cut perpendicular to them. Start by removing the bone, then make 1-inch thick slices across the entire roast. For easier carving, use a sharp boning knife and let the roast rest for 30 minutes before slicing. The meat will be more manageable and hold its shape better on the plate.
Can I make this roast ahead of time?
Season the roast up to 24 hours ahead and refrigerate uncovered to let the salt penetrate deeply. On cooking day, follow the reverse sear method as written. For leftovers, store in airtight containers for 5 days in the fridge. The crust reheats beautifully—just cover with foil and warm in a 300°F oven for 15-20 minutes.
Why does my roast turn out dry when using this method?
Most likely, you didn’t let it rest long enough or overcooked it. Always rest for 30-45 minutes before carving—this redistributes juices. Also, verify your internal temperature: 130-135°F is perfect for juicy pink center. If your thermometer reads higher, reduce the final oven temperature to 400°F instead of 425°F to finish cooking.
What sides pair best with this rich roast?
For a balanced meal, try creamy mashed potatoes with roasted garlic, honey-glazed carrots, or a fresh winter salad with pomegranate seeds. The acidity from the red wine reduction also cuts through rich sides beautifully. For a heartier option, serve with crusty bread and a bold red wine like Cabernet Sauvignon to complement the beef’s depth.

- 3 Layer Eggnog Cake Recipe: Spiced Rum-Infused Frosting and Boozy Swirls - October 6, 2026
- 1800 Ultimate Margarita Mix Recipe: Frozen or On-The-Rocks Versatility - October 6, 2026
- 3 Eggs and Cabbage Recipe: Savory Scramble With Crispy Edges - October 6, 2026