
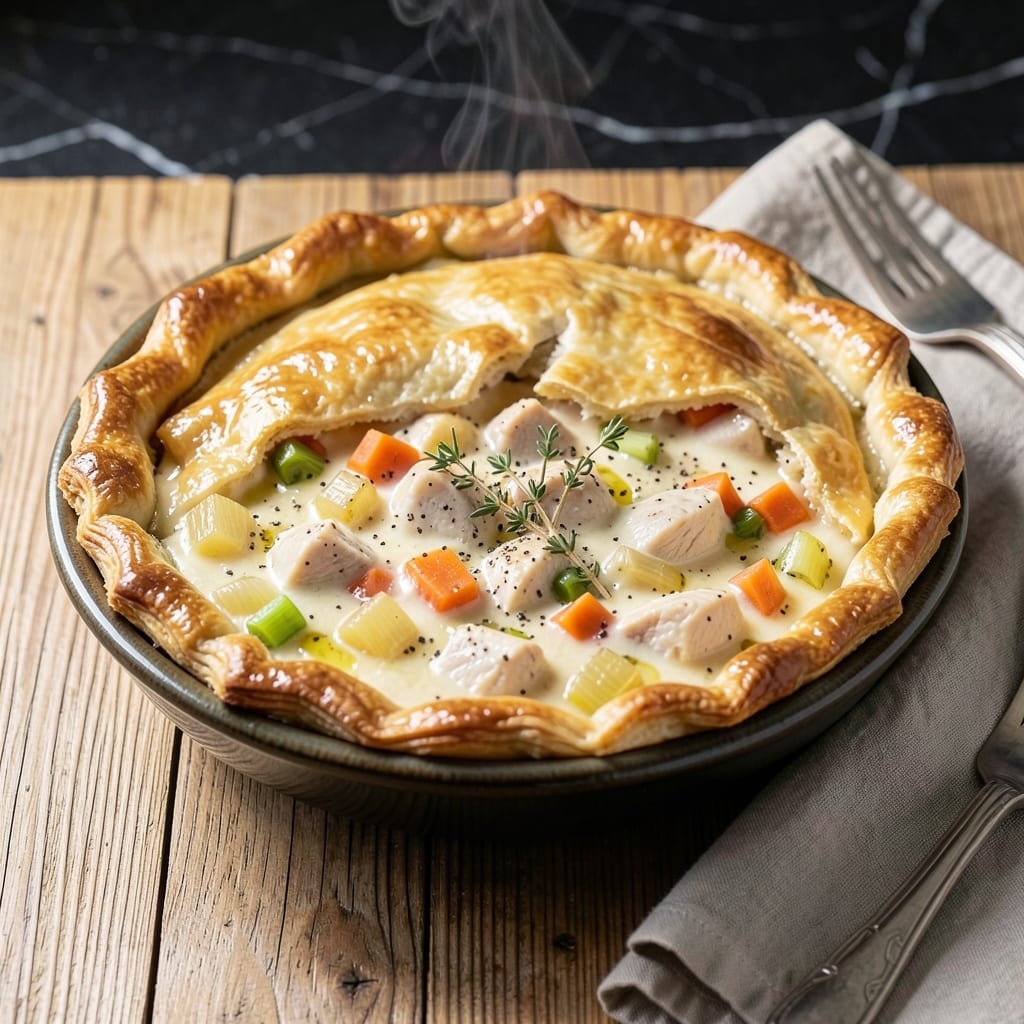
This chicken pot pie delivers a velvety filling with a golden, flaky crust that’s impossible to resist. The evaporated milk creates a richness that sets this version apart from traditional recipes.
I’ve tested countless variations, and this method guarantees a creamy, thick filling that doesn’t curdle. The crust stays crisp and buttery, even after baking, thanks to a few simple but precise techniques.
What you’ll love most is how the tender chicken, hearty vegetables, and smooth sauce come together under that perfect pastry top. It’s comfort food at its most satisfying.
Ready to bake the ultimate pot pie? Here’s how to make it right.
Ingredients for Chicken Pot Pie Recipe with Evaporated Milk
Pantry staples plus fresh veggies and that secret ingredient for extra creaminess.
| Ingredient | Amount | Notes |
|---|---|---|
| Boneless Skinless Chicken Breast 🍗 | 1 ½ lb | Diced into bite-sized pieces |
| All-Purpose Flour 🌾 | ⅓ cup | For thickening the filling |
| Unsalted Butter 🧈 | ½ cup | Divided for filling and crust |
| Yellow Onion 🧅 | 1 whole | Finely diced for filling |
| Carrots 🥕 | 2 whole | Peeled and sliced into coins |
| Celery Stalks 🥬 | 2 whole | Diced for aromatic base |
| Frozen Peas 🌱 | 1 cup | No need to thaw |
| Chicken Broth 💧 | 1 ½ cups | Low-sodium preferred |
| Evaporated Milk 🥛 | 1 cup | Full-fat for creamy richness |
| Salt 🧂 | 1 tsp | Adjust to taste |
| Black Pepper 🌶️ | ½ tsp | Freshly ground |
| Dried Thyme 🍃 | ½ tsp | Crushed between fingers |
| Refrigerated Pie Crusts 🥧 | 2 sheets | Or homemade if preferred |
| Large Egg 🥚 | 1 whole | For egg wash on crust |
The chicken should be fresh—look for bright pink flesh (no gray tinges) at Whole Foods or your local butcher. I always grab the organic, air-chilled kind when it’s on sale. The evaporated milk is non-negotiable here; Pet or Carnation are both solid brands. For the crust, Pillsbury refrigerated saves time without sacrificing flakiness. If you’re making it from scratch, use ice-cold butter and don’t overwork the dough.
No evaporated milk? Heavy cream at half the amount works in a pinch (but it’s richer). Swap the peas for diced potatoes or green beans if that’s what’s in your freezer. Fresh thyme is better than dried, but dried works fine at half the quantity. The flour can be swapped for cornstarch (use 2 tbsp per 1/3 cup flour), but the filling might be less velvety.
Leftovers keep in the fridge for 3-4 days—reheat in the oven to keep the crust crisp. You can freeze unbaked pies for 2-3 months (wrap tightly in foil). The filling thickens as it cools, so don’t worry if it seems thin straight out of the oven.
Why You’ll Love This Recipe
- One Bowl Wonder: I mix the flour, butter, and evaporated milk right in the same dish I’ll bake it in—no extra bowls to wash.
- Creamy Comfort: The evaporated milk gives the filling this rich, velvety texture that coats the chicken and carrots just right.
- Feeds the Freezer: I always double the batch and freeze one—perfect for those nights I’m too tired to cook.
- Budget Stretch: Boneless chicken breast and basic pantry staples keep this hearty meal surprisingly affordable.
Step-by-Step Instructions for Chicken Pot Pie With Evaporated Milk
Here’s how I make a creamy, velvety filling topped with a perfectly flaky crust.
Step 1: Cook the Chicken and Vegetables
In a large skillet, melt ¼ cup unsalted butter over medium heat. Add the diced 1.5 lb boneless skinless chicken breast and cook for 6-8 minutes until no longer pink. The chicken should be fully opaque with no pink in the center.
Transfer the chicken to a plate and set aside. In the same skillet, add the finely diced yellow onion, sliced 2 carrots, and diced 2 celery stalks. Cook for 5 minutes until the vegetables soften and the onion turns translucent.
Step 2: Create the Creamy Filling
Sprinkle the 0.33 cup all-purpose flour over the vegetables and stir to coat evenly. Cook for 1 minute to remove the raw flour taste. This step thickens the filling and prevents lumps.
Gradually pour in the 1.5 cups chicken broth and 1 cup evaporated milk, stirring constantly to combine. Bring to a gentle simmer over medium heat and cook for 3-4 minutes until the mixture thickens and coats the back of a spoon.
Stir in the 1 cup frozen peas, 1 tsp salt, 0.5 tsp black pepper, and 0.5 tsp dried thyme. Return the chicken to the skillet and mix well. Remove from heat and let the filling cool slightly.
Step 3: Assemble the Pot Pie
Preheat your oven to 375°F. Line a 9-inch pie dish with one of the 2 sheets refrigerated pie crusts, pressing it gently into the bottom and sides. Trim any excess dough hanging over the edge.
Pour the chicken and vegetable filling into the crust-lined dish, spreading it evenly. The filling should be slightly mounded in the center but not overflowing.
Step 4: Add the Top Crust and Bake
Place the second sheet of pie crust over the filling. Crimp the edges to seal the pie, then cut several small slits in the top crust to allow steam to escape. This prevents a soggy bottom and ensures the pie bakes evenly.
In a small bowl, beat the 1 whole large egg and brush it lightly over the top crust. This egg wash gives the crust a beautiful golden finish. Bake for 35-40 minutes until the crust is golden brown and the filling is bubbling.
Step 5: Rest and Serve
Remove the pot pie from the oven and let it rest for 10 minutes before serving. This resting time allows the filling to set and makes it easier to slice. The crust should be flaky and the filling thick and creamy.
Slice into wedges and serve warm. Each serving should have a generous portion of the creamy filling and a crisp, golden crust on top and bottom. Enjoy your homemade comfort food at its best!
Pro Tips For Making Chicken Pot Pie Recipe With Evaporated Milk
- Pre-Cook the Chicken: Poach or sauté the chicken breast first—raw chicken in the filling often overcooks while the crust bakes, leaving it dry. I learned this the hard way after pulling out rubbery chunks from my first few pies.
- Sauté the Onions Long: Cook the yellow onions until they’re golden and sweet, about 8-10 minutes. Sounds tedious, but it builds a deep flavor base that evaporated milk alone can’t provide.
- Thicken Before Adding Milk: Make your roux with butter and flour first, then whisk in the evaporated milk gradually. Dumping it all in at once guarantees lumps—my grandmother swore by this, and she was right.
- Use Cold Butter: Cut the unsalted butter into the flour when it’s straight from the fridge. Warm butter makes a tough crust, and after a few sad, dense pies, I finally started chilling mine for 10 minutes before handling.
Essential Equipment for Perfect Results
Pie Dish Essentials
I always use a 9-inch glass pie dish—it conducts heat evenly and lets me check the bottom crust for doneness. Pyrex is my go-to brand, as it handles temperature changes without cracking. The deep dish version works perfectly for this recipe’s generous filling. 💡
Rolling Pin Perfection
For homemade crusts, a French-style rolling pin (without handles) gives me the most control. I prefer wooden pins over marble for better grip. Roll from the center outward for an even thickness of about ⅛ inch.
Skillet Selection
A 12-inch stainless steel skillet is ideal for cooking the chicken and veggies—it’s roomy enough to prevent crowding. All-Clad or Cuisinart make excellent options. Avoid nonstick for this step, as you want those browned bits for flavor.
Pastry Tools
I never skip the pastry brush for egg wash—it gives that perfect golden sheen. A pizza cutter makes quick work of trimming excess dough. And don’t forget parchment paper for easy transfer if making a free-form pot pie.
Thermometer Check
An instant-read thermometer ensures your chicken reaches 165°F before assembling. I use ThermoWorks for accuracy. This small step prevents undercooked meat and guarantees a safe, delicious filling.
Cooling Rack
After baking, transfer your pie to a wire cooling rack. This prevents the bottom crust from getting soggy by allowing air circulation. Let it rest for the full 10 minutes to set the filling properly. 🌟
Nutrition Facts
Frequently Asked Questions
Why use evaporated milk instead of regular milk?
Evaporated milk has 60% less water than regular milk, creating a richer, creamier filling without thinning. It also caramelizes slightly during baking, adding depth to the sauce.
Can I make this ahead of time?
Assemble the pie completely, then refrigerate for up to 24 hours before baking. Or freeze unbaked pies for 2-3 months. Bake from chilled for 5-10 minutes longer.
How do I prevent a soggy bottom crust?
Blind-bake the bottom crust for 8 minutes before adding filling. Also, ensure the filling is slightly cooled to prevent steam. The slits in the top crust help too!
What can I substitute for evaporated milk?
Use ½ cup heavy cream plus ½ cup whole milk for similar richness. Or 1 cup half-and-half in a pinch. Avoid low-fat options—they won’t thicken as well.

- 6 Qt Dutch Oven Bread Recipe: Crusty Crumb and Golden Crust in One Bake - September 25, 2026
- 8-Inch Chocolate Cake Recipe: Fudgy Crust and Decadent Ganache Swirls - September 25, 2026
- 5 Star Lasagna Recipe with Ricotta Cheese: Layers of Creamy Cheese and Tender Meat - September 25, 2026