
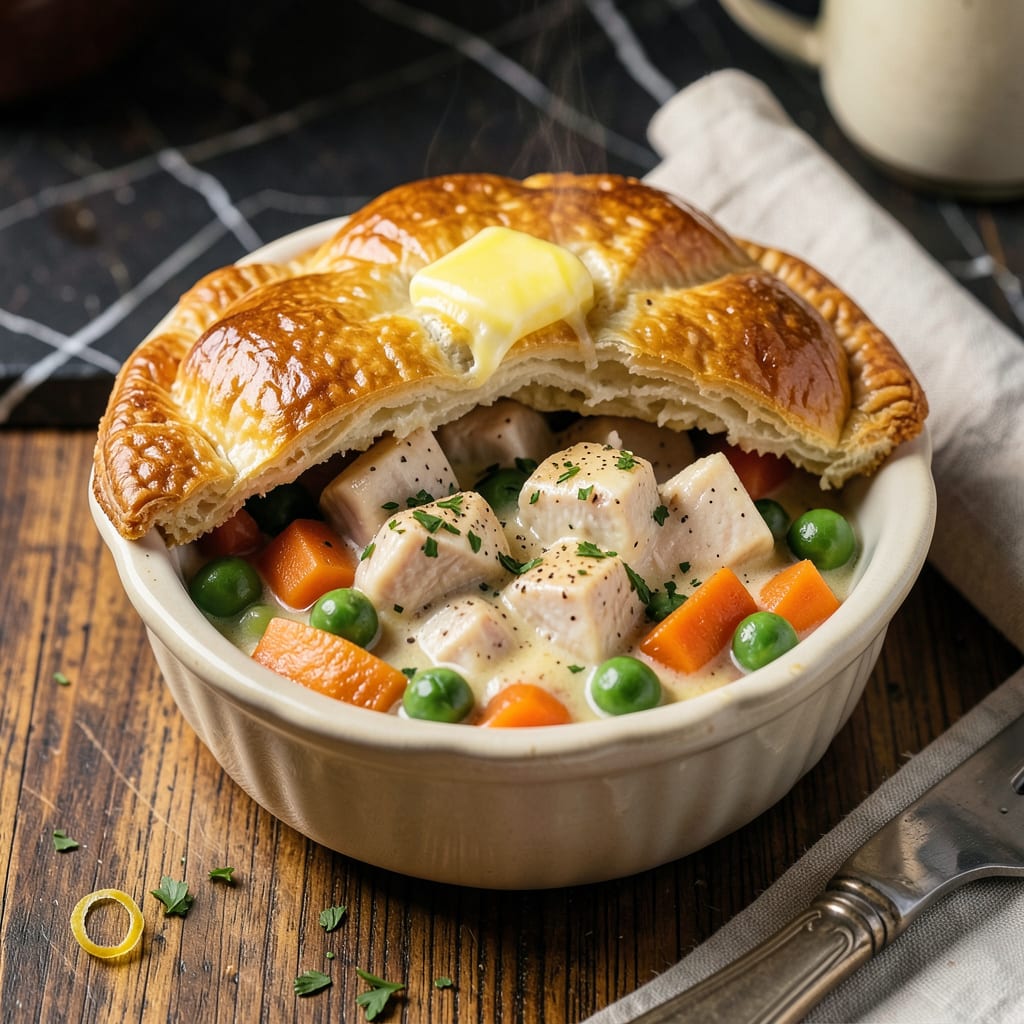
There’s something deeply satisfying about a perfectly baked chicken pot pie—especially when it’s sized just right for two. This recipe delivers all the comfort of the classic dish without leaving you with days of leftovers. The combination of flaky golden crust and rich, creamy filling makes every bite worth the effort.
What sets this small-batch version apart is its efficiency. You’ll use just one baking dish and standard pantry ingredients to create a meal that feels special enough for company but simple enough for a weeknight. The filling comes together quickly with tender chicken, fresh vegetables, and a velvety sauce that clings to every ingredient. No wasted ingredients, no overwhelming portions—just perfect comfort food in manageable servings.
Ingredients for Chicken Pot Pie Recipe Small
This small-batch recipe combines tender chicken, seasonal vegetables, and a velvety sauce—all encased in golden, flaky crust.
| Ingredient | Amount | Notes |
|---|---|---|
| Boneless, Skinless Chicken Breast 🍗 | ½ lb | Diced into 1/2-inch cubes |
| Unsalted Butter 🧈 | 3 tbsp | Divided for roux and filling |
| All-Purpose Flour 🌾 | 3 tbsp | For roux and thickening |
| Whole Milk 🥛 | ¾ cup | Full-fat for creaminess |
| Low-Sodium Chicken Broth 💧 | ¾ cup | Quality brand preferred |
| Frozen Peas and Carrots Mix 🥕 | ½ cup | No need to thaw |
| Fresh Pearl Onions 🧅 | ¼ cup | Peeled and halved |
| Fresh Thyme Leaves 🌿 | 1 tsp | Stripped from stems |
| Kosher Salt 🧂 | ½ tsp | Diamond Crystal preferred |
| Freshly Ground Black Pepper 🌶️ | ¼ tsp | Coarse grind optimal |
| Refrigerated Pie Crust 🥧 | 1 sheet | Pillsbury recommended |
| Large Egg 🥚 | 1 whole | For egg wash |
Optimal quality requires using fresh, high-moisture chicken breast—avoid pre-frozen varieties which can dry out during baking. The Pillsbury refrigerated pie crust delivers consistent flakiness without requiring homemade dough skills. For the vegetable component, fresh pearl onions provide superior texture compared to frozen, though the peas and carrots mix can remain frozen for convenience. Professional kitchens use Diamond Crystal kosher salt for its clean flavor and precise measurement control.
Substitutions maintain integrity when carefully selected. Chicken thighs can replace breast if preferred, though cooking time may require adjustment. Half-and-half stands in for whole milk at a 1:1 ratio for added richness. Fresh thyme may be replaced with one-third the amount of dried thyme, added during the roux stage. For dietary adaptations, vegetable broth and mushrooms create a satisfying vegetarian version without compromising the creamy filling texture.
Storage considerations ensure maximum quality retention. The assembled (unbaked) pie keeps refrigerated for 12 hours—ideal for morning prep. Baked pie maintains optimal texture for 3 days when refrigerated in an airtight container. Reheat individual portions at 350°F for 15 minutes to restore crust crispness. Freezing is not recommended due to potential sauce separation upon thawing.
Why You’ll Love This Recipe
- I’ll be real: this reheats like a dream. Pack individual portions for work, or stash leftovers for a lazy weekend lunch. The small size means no sad, soggy crust by day three.
- One-Bowl Magic: Honestly, I love that this comes together in a single skillet. Sear the chicken, make the roux with butter and flour right in the same pan, then pour in the milk and broth—no extra bowls, no fuss.
- That Golden Crust Moment: Here’s what sold me—the buttery, flaky top cracking open to reveal creamy chicken and veggies underneath. The milk and broth combo gives it a richness that store-bought versions can’t touch.
- My Lunchbox Hero: I’ll be real: this reheats like a dream. Pack individual portions for work, or stash leftovers for a lazy weekend lunch. The small size means no sad, soggy crust by day three.
Step-by-Step Instructions for Chicken Pot Pie
This method ensures a velvety filling and golden-brown crust for your perfectly portioned pot pie.
Step 1: Prepare the Chicken and Vegetables
Begin by dicing the 0.5 lb boneless, skinless chicken breast into uniform ½-inch cubes. This size ensures even cooking without drying out the meat. Pat the chicken dry with paper towels to promote better browning when cooked.
Prepare the 0.25 cup fresh pearl onions by peeling and halving them. Combine with the 0.5 cup frozen peas and carrots mix in a small bowl—no need to thaw the frozen vegetables, as they’ll cook perfectly in the hot filling. Set aside while you prepare the roux.
Step 2: Create the Roux and Velouté Base
In a medium saucepan over medium heat, melt 2 tbsp unsalted butter until foaming subsides. Immediately whisk in the 3 tbsp all-purpose flour to form a smooth paste. Cook for 2-3 minutes, stirring constantly, until the mixture turns a pale golden color and emits a nutty aroma.
Gradually pour in the 0.75 cup whole milk and 0.75 cup low-sodium chicken broth, whisking vigorously to prevent lumps. Increase heat to medium-high and bring to a gentle simmer. Cook for 5-7 minutes until the mixture thickens enough to coat the back of a spoon. This velouté base should have the consistency of heavy cream.
Step 3: Assemble the Filling
Reduce heat to medium-low and add the prepared chicken, vegetables, 1 tsp fresh thyme leaves, 0.5 tsp kosher salt, and 0.25 tsp freshly ground black pepper. Stir to combine and simmer for 10-12 minutes until the chicken reaches an internal temperature of 165°F and the vegetables are tender.
The filling should be thick but still pourable. If it appears too thick, add 1-2 tbsp of additional chicken broth. Remove from heat and let cool for 5 minutes—this prevents the crust from becoming soggy during baking. Taste and adjust seasoning if needed.
Step 4: Assemble and Bake the Pot Pie
Preheat your oven to 375°F. Unroll the 1 sheet refrigerated pie crust and cut it into two equal rectangles. Press one piece into a 6-inch oven-safe dish (or two 3-inch ramekins), allowing the edges to overhang slightly. Pour in the cooled filling, leaving a ½-inch border at the top.
Top with the second piece of crust, crimping the edges to seal. Cut three small slits in the center to allow steam to escape. Whisk the 1 whole large egg with 1 tsp water to create an egg wash, then brush evenly over the crust. Bake on the middle rack for 25-30 minutes until the crust is deep golden brown and the filling bubbles through the vents.
Step 5: Rest and Serve
Remove the pot pie from the oven and let it rest for 10 minutes before serving. This allows the filling to set slightly, preventing it from spilling out when sliced. The crust should be crisp and flaky, while the filling remains creamy and thick.
Serve immediately while hot. For clean slices, use a sharp knife dipped in hot water between cuts. Each serving should showcase the golden crust, creamy filling studded with tender chicken and vegetables, and the aromatic scent of thyme throughout.
Best Sauces and Condiments for This Recipe
Classic Gravy Drizzle
A simple homemade gravy elevates this pot pie to new heights. I make mine by whisking 1 tbsp pan drippings (from cooking the chicken) with 1 tbsp flour, then slowly adding ½ cup warm chicken broth. Simmer until thickened, about 3-4 minutes, then finish with a splash of cream. 💛
Spicy Sriracha Mayo
For those who love heat, mix ¼ cup mayonnaise with 1 tsp sriracha and a squeeze of lime. This creamy, tangy sauce cuts through the richness of the filling. I like to serve it on the side for dipping the crust—it adds a fun, unexpected kick to every bite.
Herb-Infused Butter
Melt 3 tbsp unsalted butter and stir in 1 tsp chopped fresh thyme and ½ tsp garlic powder. Drizzle this aromatic butter over each serving just before eating. The herbs complement the thyme in the filling, creating layers of flavor that feel restaurant-worthy.
Creamy Garlic Aioli
Blend ⅓ cup mayo, 1 minced garlic clove, and 1 tbsp lemon juice until smooth. This velvety aioli adds brightness to the dish. I often make extra to use on sandwiches the next day—it keeps well in the fridge for up to 3 days. ✨
Tangy Mustard Cream
Whisk together ¼ cup sour cream, 1 tbsp Dijon mustard, and ½ tsp honey. The mustard’s sharpness balances the creamy filling beautifully. This sauce is particularly great if you’re serving the pot pie with a side of roasted potatoes.
Fresh Herb Garnish
While not a sauce, a sprinkle of fresh parsley or chives adds color and freshness. I always keep some on hand to brighten up the golden crust right before serving. It’s the simplest way to make your small pot pie look—and taste—like it came from a gourmet kitchen. 🌿
Nutrition Facts
Frequently Asked Questions
Can I make this in ramekins instead of a single dish?
Divide the filling between two 3-inch ramekins and top each with a small crust circle. Bake at 375°F for 20-25 minutes—they’ll cook faster than the single dish. This creates perfect individual servings with extra crispy edges.
What’s the best way to prevent a soggy bottom crust?
Two tricks work best: First, let the filling cool for 5 minutes before assembling. Second, brush the bottom crust with a thin layer of beaten egg white before adding filling. This creates a moisture barrier for extra crispness.
Can I prepare this ahead of time?
Yes! Assemble the pie completely (unbaked) and refrigerate for up to 12 hours. Add 5 extra minutes to baking time if starting cold. For best results, keep the egg wash separate and brush it on just before baking.
Why did my filling turn out watery?
This usually happens if the roux wasn’t cooked long enough or the filling wasn’t simmered sufficiently. Cook the roux until pale golden (2-3 minutes) and simmer filling until it coats a spoon thickly. If needed, mix 1 tsp cornstarch with cold water and stir in.

- 6 Bean Chili Recipe: Hearty, Smoky Depth That Gets Richer Over Time - September 26, 2026
- 2 Gallon Red Sangria Recipe: Bold Spice and Fruit Fusion for Crowds - September 26, 2026
- 5 Star Apple Bread Recipe: Spiced Apple Swirl With Buttery Crust - September 26, 2026