
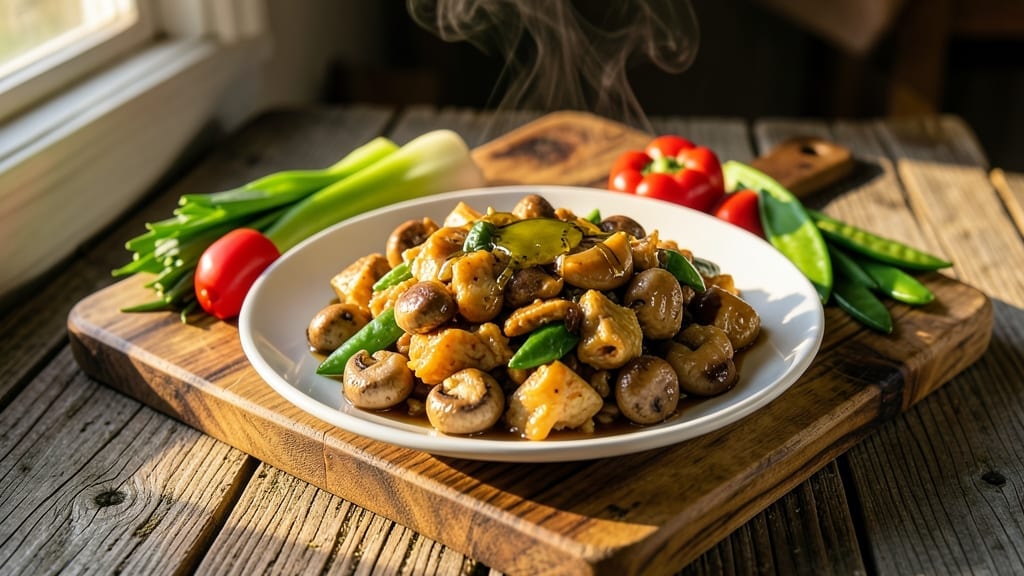
This Instant Pot chop suey recipe delivers restaurant-quality results in just 25 minutes, transforming tough proteins and crunchy vegetables into perfectly crispy-tender bites with minimal effort. The secret lies in pressure cooking’s ability to tenderize while preserving texture, creating a dish that’s both authentic and efficient.
I’ve adapted traditional stir-fry techniques to work seamlessly in the Instant Pot, where the sauté function handles aromatics while the pressure cooker does the heavy lifting.
The beauty of this method is how it balances authenticity with convenience. We’ll build flavor through classic chop suey ingredients—ginger, garlic, soy sauce, and a touch of sugar—that create that signature savory-sweet profile.
The Instant Pot’s multi-functionality means we can brown the protein and vegetables directly in the pot, eliminating extra pans and streamlining cleanup. What you’ll end up with is a dish that’s crispy on the edges yet tender inside, with vegetables that maintain their vibrant colors and slight crunch.
This recipe maintains all the hallmarks of traditional chop suey while making it accessible for weeknight cooking. The proteins stay juicy, the vegetables achieve that perfect al dente texture, and the sauce clings to everything without making the dish soggy.
It’s the kind of meal that tastes like it took hours to prepare, even though it comes together in less time than most takeout orders. The best part? Every component cooks together, ensuring balanced flavors in every bite.
Whether you’re feeding a family or meal prepping for the week, this chop suey recipe delivers consistent results. The pressure cooking method makes it particularly forgiving—even if you’re new to Instant Pot cooking.
Let’s get started with a dish that proves you can have restaurant-quality Chinese-American comfort food without spending hours in the kitchen.
Ingredients for chop suey instant pot
Restaurant-quality chop suey ingredients that transform in your Instant Pot.
| Ingredient | Amount | Notes |
|---|---|---|
| Beef Chuck Roast 🥩 | 1 ½ lb | Cut into 1-inch cubes |
| Green Bell Pepper 🌶️ | 1 whole | Cut into strips |
| Red Bell Pepper 🌶️ | 1 whole | Cut into strips |
| Celery Stalks 🥬 | 3 whole | Cut into 1-inch pieces |
| Medium Onion 🧅 | 1 whole | Cut into wedges |
| Garlic Cloves 🧄 | 4 cloves | Minced |
| Fresh Ginger 🌿 | 1 ½ tbsp | Grated, packed |
| Soy Sauce 🥢 | ½ cup | Low-sodium preferred |
| Oyster Sauce 🍜 | 2 tbsp | High-quality brand |
| Brown Sugar 🍬 | 2 tbsp | Light or dark |
| Cornstarch 🌾 | 1 tbsp | For thickening |
| Vegetable Oil 🫒 | 1 tbsp | For sautéing |
| Sesame Oil 🫒 | 1 tsp | For finishing |
| Salt 🧂 | 1 tsp | Diamond Crystal preferred |
| Black Pepper 🌶️ | ½ tsp | Freshly ground |
The beef is your foundation—chuck roast gives that perfect tender texture, not tough sirloin. Grab it pre-cubed at Costco or your butcher’s counter for convenience. For the veggies, fresh bell peppers and celery are non-negotiable—they need to be crisp and vibrant. If you’re using frozen, thaw and pat them dry first (trust me, it makes a difference). The onion should be yellow or white, not sweet like Vidalia. And that ginger? Freshly grated from a microplane—jarred ginger just won’t cut it here.
No oyster sauce? Hoisin sauce with a splash of fish sauce works in a pinch, though it won’t be identical. Short on brown sugar? White sugar plus a pinch of cinnamon gets you close. The soy sauce should be low-sodium—you can always add more salt at the end. For the sesame oil, toasted is ideal, but regular works too. If you’re using pre-cut veggies, give them a quick rinse to remove any excess moisture that’ll make them soggy. The cornstarch needs to be lightly toasted in the oil first—this prevents clumping and gives that signature crispy texture to the sauce.
This reheats beautifully—just add a splash of water and another quick pressure cook. Keeps for 4-5 days in the fridge, freezes for 3 months if portioned properly. I always make double batches because it’s that good. Store the sauce separately if you want to use it on noodles later—just reheat it with a little water. The beef actually tastes better the next day once it’s had time to reabsorb all those delicious juices.
Why You’ll Love This Recipe
- One-Pot Magic: I swear by this recipe—no extra pans, no mess. Toss the prepped beef, veggies, and sauce into the Instant Pot, press start, and walk away. The chuck roast gets fork-tender while the bell peppers stay crisp, and cleanup? Just a quick wipe-down.
- Umami Bomb: That beef chuck roast? It’s the star—deep, rich flavor that doesn’t need fancy marinades. The onions and celery caramelize just enough to mingle with the soy and ginger, giving it that classic chop suey taste without the takeout shortcuts.
- Lunchbox Hero: Between us, this is my go-to for meal prep. Pack the leftovers with rice, and you’ve got a lunch that’s hearty enough for a workday but still feels special. My kids actually ask for it—yes, even on a Tuesday.
- Budget Win: Chuck roast is affordable, and the veggies stretch across multiple meals. Double the batch, freeze half, and you’ve got a future dinner sorted. Honestly, it’s the kind of recipe that makes grocery day feel like a victory.
Step-by-step instructions for crispy-tender Instant Pot chop suey
Here’s how to turn tough cuts into fork-tender beef and vibrant veggies in one pressure cooker.
Prep the Beef and Vegetables for Maximum Flavor
Cut the 1.5 lb beef chuck roast into 1-inch cubes—this size ensures even cooking and maximum surface area for that signature chop suey bite. Toss the beef cubes in a bowl with 1 tsp salt and 0.5 tsp black pepper, rubbing them gently to coat. Set aside while you prep the vegetables.
Slice the 1 whole green bell pepper and 1 whole red bell pepper into strips (about ½-inch wide), the 3 whole celery stalks into 1-inch pieces, and the 1 whole medium onion into wedges. Mince the 4 cloves garlic and grate the 1.5 tbsp fresh ginger (packed). The reason for these precise cuts? They all finish cooking at the same time, giving you that perfect al dente texture in every bite.
Sauté the Aromatics and Beef for Deep Flavor
Set your Instant Pot to the “Sauté” function and add 1 tbsp vegetable oil. Once shimmering, add the onion wedges and cook for 2 minutes until they begin to soften. Add the minced garlic, grated ginger, and 1-inch celery pieces, cooking for another 1 minute until fragrant—this is where the foundation of your sauce begins.
Increase heat to medium-high and add the beef cubes in a single layer. Let them sear for 2-3 minutes without stirring, until they develop a light crust. This step is crucial—it locks in juices and builds that rich, caramelized flavor. Once browned, stir the beef and add 0.5 cup soy sauce and 2 tbsp oyster sauce, letting it simmer for 1 minute to meld the flavors.
Pressure Cook to Perfect Tenderness
Add the bell pepper strips to the Instant Pot, then pour in 2 tbsp brown sugar and 1 tbsp cornstarch (this will create that signature glossy sauce). Seal the lid and set the Instant Pot to High Pressure for 12 minutes. The cornstarch acts as a natural thickener, while the brown sugar balances the savory flavors with just the right touch of sweetness.
Once the cooking cycle completes, let the pressure release naturally for 10 minutes—this prevents the beef from becoming tough. Then, quick-release any remaining pressure. The beef should be fork-tender, with the vegetables just beginning to soften but still holding their shape. If the sauce looks too thin at this point, we’ll fix that in the next step.
Finish with Umami and Texture
Remove the lid and stir in 1 tsp sesame oil, letting it sizzle for 30 seconds to infuse the dish with its nutty aroma. Taste and adjust seasoning if needed—you might want to add a splash more soy sauce or a pinch of salt depending on your preference. The sauce should coat the back of a spoon but still be light enough to cling to the beef and vegetables.
Here’s the thing—if the sauce is too thick, add 1-2 tablespoons of water and stir until smooth. For extra crispiness, transfer everything to a skillet over medium-high heat and cook for 2-3 minutes, stirring constantly, until the vegetables achieve that slight char and the beef develops a glossy sheen. Serve immediately over steamed rice to soak up every last bit of that savory-sweet sauce.
Pro Tips For Making Chop Suey Instant Pot
- Sear the Beef First: Don’t skip browning that chuck roast—cut it into 1-inch chunks and sear them in a hot pan with oil until deep golden. I learned this the hard way: skipping this step leaves your chop suey tasting like it came straight from a packet. The Maillard reaction is your flavor foundation, and the Instant Pot can’t fix weak starting flavors.
- Cut Onions Thin: Slice that onion into paper-thin half-moons, not thick chunks. Thick slices stay crunchy and undercooked in the Instant Pot, while thin ones soften perfectly and blend into the sauce. I used to eyeball it, but now I measure: about ¼-inch thick slices for consistent results.
- Don’t Overfill the Pot: Fill the Instant Pot only halfway—crowding turns your beef into a sad, gray mush. A packed pot steams instead of sears, and your veggies end up soggy. Trust me, your chop suey will thank you with better texture and less cleanup.
- Deglaze with Soy Sauce: After searing the beef, splash in ¼ cup soy sauce right in the pan before transferring everything to the Instant Pot. That browned crust dissolves into the sauce, giving your dish a deeper umami kick. I was skeptical until I tried it—now it’s non-negotiable for me.
Make-ahead tips for chop suey instant pot
Meal Prep Strategy
Divide the fully cooked chop suey into 4-6 meal-sized portions and store in airtight glass containers with tight-fitting lids. I recommend Glasslock 16-ounce containers because they’re microwave-safe and stackable.
The beef and vegetables stay tender for 4-5 days in the fridge, while the sauce maintains its glossy texture—just reheat with a splash of water. 📅
Freezer-Friendly Tips
For longer storage, freeze portions in single-serving portions (about 1.5 cups per container) to prevent freezer burn. Use quart-sized freezer bags with the rolling method to remove excess air.
Label with the date—this chop suey keeps its quality for up to 3 months without texture degradation. Thaw overnight in the fridge before reheating.
Reheating Perfection
For fridge-to-table meals, transfer a portion to the Instant Pot with 2 tablespoons of water, seal the lid, and cook on High Pressure for 5 minutes. Natural release only—this method preserves the beef’s tenderness and prevents drying.
If using the microwave, cover with a damp paper towel and heat on 50% power for 3-4 minutes, stirring halfway. 🔥
Sauce Separation Hack
To repurpose the sauce later, carefully ladle it into a separate container before freezing the main dish. Reheat the sauce with 1 tablespoon of water over medium heat, stirring constantly until it reaches a glossy consistency.
It’s perfect for tossing with noodles or drizzling over rice bowls—just add a pinch of sesame oil for that authentic finish.
Double Batch Advantage
Make two batches at once and freeze one portion immediately. This ensures you always have a ready-to-cook meal when cravings hit. I keep one batch in the fridge for 3-day meals and one frozen for monthly emergencies.
The flavors actually deepen in the freezer, making it taste even more restaurant-quality after reheating. 💪
Portion Control Tips
For balanced meals, serve 1 cup of chop suey with ½ cup cooked rice per person. To prevent soggy rice, store it separately in a sealed container.
When reheating, cook the rice and chop suey simultaneously in the Instant Pot using the “Steam” function for 2 minutes—this keeps everything piping hot and ready to serve. 🍚
Nutrition facts
Frequently asked questions
Can I use chicken or pork instead of beef for this Instant Pot chop suey?
For chicken, use 1.5 lbs boneless thighs or breasts cut into 1-inch cubes and reduce the pressure cook time to 8 minutes (chicken cooks faster). Pork works too—opt for pork shoulder and cook for 10 minutes under pressure. Just remember to trim excess fat from pork to avoid greasy sauce. The key is adjusting the cook time based on the protein’s density.
Why does my chop suey sauce turn out watery or too thick?
Watery sauce usually means the cornstarch didn’t activate properly. Make sure to toast the cornstarch in the oil for 30 seconds before adding liquids. For thick sauce, try adding ½ tsp cornstarch mixed with 1 tbsp cold water and stir in at the end. If it’s too thick, thin with 1 tbsp water or broth while reheating. The sauce should coat the back of a spoon but remain light enough to cling to ingredients.
Can I make this chop suey vegetarian or vegan?
Yes! Swap the beef for extra-firm tofu or seitan (cut into cubes) and use vegetable broth instead of water. For umami depth, add 1 tbsp soy sauce + 1 tsp mushrooms powder. Skip the oyster sauce and replace with 1 tbsp hoisin sauce + 1 tsp miso paste. The pressure cook time remains 12 minutes, but check for doneness early if using tofu. The veggies will still get that perfect al dente texture!
How do I prevent the vegetables from getting mushy in the Instant Pot?
Mushy veggies happen when they overcook. Start with firm, fresh vegetables (no wilting) and cut them to similar sizes so they cook evenly. Add the bell peppers last (just before pressure cooking) since they’re more delicate. After pressure cooking, finish with a quick 2-minute pan sear to restore crispness. Also, avoid overfilling the pot—keep ingredients at ⅔ capacity max for even heat distribution.
Can I make this chop suey ahead of time for meal prep?
This recipe is perfect for meal prep! Store in airtight containers for 4-5 days in the fridge or freeze for 3 months. When reheating, add 2 tbsp water and pressure cook for 5 minutes (natural release). For microwave reheating, cover with a damp paper towel and heat on 50% power for 3-4 minutes, stirring halfway. The sauce may thicken slightly when reheated—just add a splash of water to restore consistency.

- Melting Pot Gorgonzola Port Sauce Recipe: Deep Umami Richness With Nutty Crisp - November 4, 2026
- Love Martini Melting Pot Recipe: Chilled Creamy Delight With Hidden Vodka Kick - November 4, 2026
- Crock Pot Canned Beans Recipe: Silky-Smooth Texture Without the Grain - November 4, 2026