
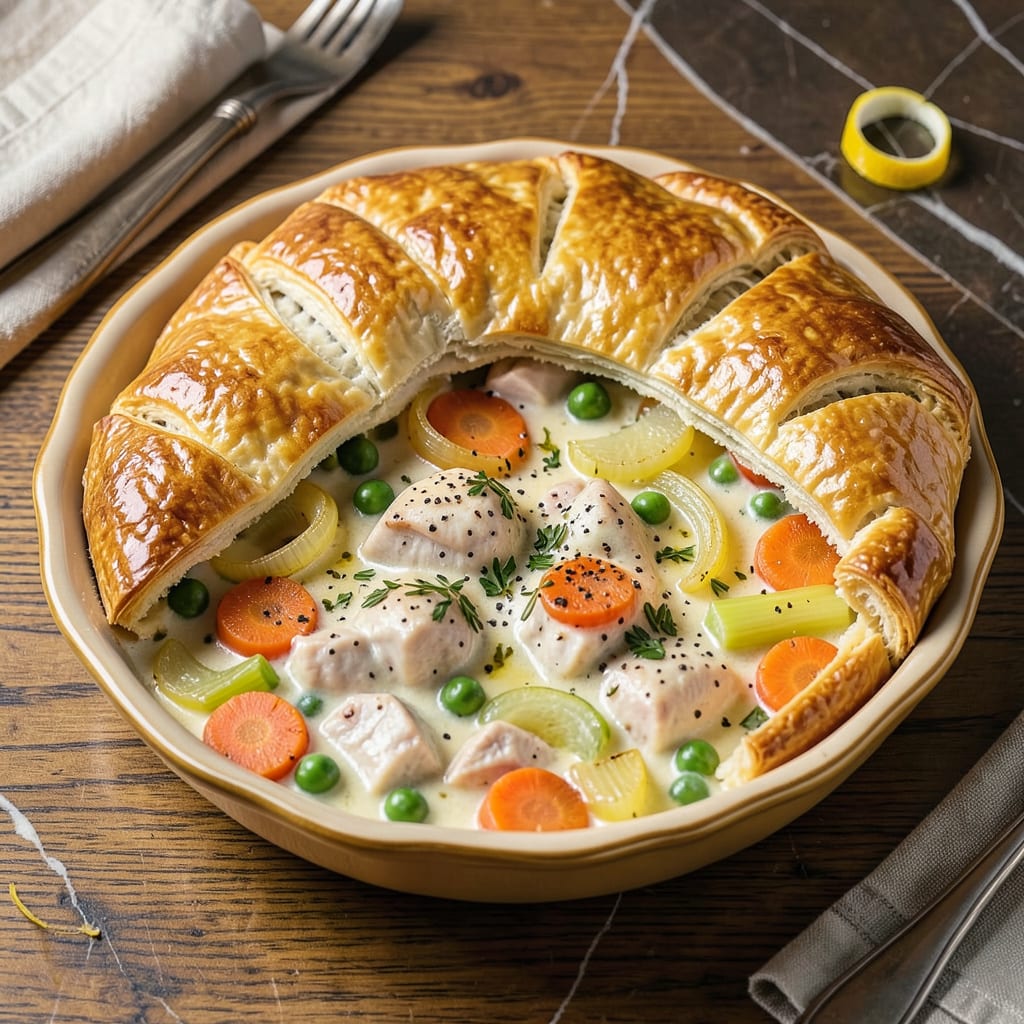
There’s something deeply satisfying about a homemade chicken pot pie that rivals your favorite restaurant version. This recipe delivers the creamy, comforting filling and flaky golden crust that made Cracker Barrel’s version famous. After testing multiple techniques, I’ve perfected the balance between rich, velvety sauce and perfectly cooked vegetables.
The secret lies in building layers of flavor—starting with a proper roux for the filling and ensuring the crust stays crisp while baking. You’ll achieve that signature comfort food experience with tender chicken, vibrant vegetables, and a sauce that’s luxurious without being heavy. It’s the kind of dish that turns a simple dinner into something truly special.
Ingredients for Cracker Barrel Chicken Pot Pie
This is where restaurant-quality comfort begins—tender chicken, vibrant veggies, and that signature creamy sauce.
| Ingredient | Amount | Notes |
|---|---|---|
| Boneless, Skinless Chicken Breasts 🍗 | 2 lb | Cut into 1-inch cubes |
| Unsalted Butter 🧈 | ½ cup | Divided for roux and crust |
| All-Purpose Flour 🌾 | ⅔ cup | Divided for roux and filling |
| Yellow Onion 🧅 | 1 whole | Finely diced |
| Carrots 🥕 | 3 whole | Peeled, sliced 1/4-inch thick |
| Celery Stalks 🌿 | 3 whole | Sliced 1/4-inch thick |
| Frozen Green Peas 🌱 | 1 cup | No need to thaw |
| Chicken Broth 💧 | 3 cups | Low-sodium preferred |
| Heavy Cream 🥛 | 1 cup | Full-fat for creaminess |
| Fresh Thyme Leaves 🌿 | 2 tsp | Or 1 tsp dried thyme |
| Fresh Parsley 🌿 | 2 tbsp | Chopped, for garnish |
| Kosher Salt 🧂 | 1 ½ tsp | Divided for seasoning |
| Freshly Ground Black Pepper 🌶️ | ½ tsp | Adjust to taste |
| Refrigerated Pie Crusts 🥧 | 2 sheets | Or homemade crust |
| Large Egg 🥚 | 1 whole | For egg wash |
[recipeingredientscaler]
The chicken makes all the difference here. Boneless, skinless breasts stay tender without drying out, but thighs work too if you prefer richer flavor. I grab mine from Whole Foods when they’re on sale—their butcher counter has consistently good quality. For the crust, Pillsbury refrigerated pie dough is my go-to shortcut (the blue box), but if you’re making homemade, use vodka in the dough for extra flakiness (worth the extra step).
No heavy cream? Whole milk plus 2 tbsp melted butter gets you close. Fresh thyme is ideal, but dried works at one-third the amount. The peas can be fresh if you’ve got them, but frozen are honestly better here—they hold their shape. For the broth, Better Than Bouillon paste makes a richer base than canned. If you’re gluten-free, swap the flour for cornstarch (use half the amount).
Assemble the pie right before baking—no soggy crust. Leftovers keep 3-4 days in the fridge, but the crust loses crispness. Freeze unbaked pies for up to 2 months (wrap tight in foil). Reheat slices in the toaster oven to revive that golden crust.
Why You’ll Love This Recipe
- One-Pan Magic: I love that this comes together in a single skillet—no juggling pots or extra dishes. Brown the chicken, sauté the onions and carrots in that same buttery flour base, then let the oven do the rest. One pan, minimal mess, maximum flavor.
- That Golden Crust Trick: Here’s what sold me—the buttery, flaky topping you get from just flour, butter, and a splash of milk. It’s not fancy, but when it bakes over the creamy chicken filling? Ridiculously good. (My kids fight over the crispy edges.)
- Weeknight Rescue Dish: Honestly, this is my go-to when I’ve got 45 minutes and zero inspiration. The chicken cooks while I chop the veggies, and the whole thing bakes hands-off. Leftovers? Even better the next day—if there are any.
- Budget-Friendly Crowd Pleaser: A pound of chicken breasts, basic pantry staples, and a handful of carrots stretch into a meal that feeds four generously. I’ll be real: it’s cheaper than takeout and tastes like a restaurant dish. (Yes, even on a Tuesday night.)
Step-by-Step Instructions for Chicken Pot Pie
Here’s how to build that perfect balance of creamy filling and flaky crust, just like your favorite comfort food spot.
Step 1: Cook the Chicken and Vegetables
Start by cutting the 2 lb boneless, skinless chicken breasts into 1-inch cubes. Season them with ½ tsp kosher salt and ¼ tsp freshly ground black pepper. In a large skillet, melt 2 tbsp unsalted butter over medium heat. Add the chicken and cook for 5-6 minutes until the pieces are opaque and just cooked through. Remove the chicken with a slotted spoon and set aside.
In the same skillet, add the finely diced yellow onion, peeled and sliced carrots, and sliced celery stalks. Cook for 6-8 minutes until the vegetables soften and the onion becomes translucent. This builds the flavor foundation for your filling. Stir in the fresh thyme leaves and cook for another 30 seconds until fragrant.
Step 2: Create the Creamy Filling
Reduce the heat to medium-low and add the remaining 6 tbsp unsalted butter to the skillet. Once melted, whisk in ⅔ cup all-purpose flour to create a roux. Cook this mixture for 2 minutes, stirring constantly, until it turns a light golden color—this removes the raw flour taste and builds depth.
Gradually pour in the 3 cups chicken broth, whisking continuously to prevent lumps. Bring the mixture to a gentle simmer and cook for 3-4 minutes until it thickens enough to coat the back of a spoon. Stir in the 1 cup heavy cream, 1 cup frozen green peas, and the cooked chicken. Season with the remaining 1 tsp kosher salt and ¼ tsp freshly ground black pepper. Simmer for 2-3 minutes until everything is heated through and the sauce is creamy and velvety.
Step 3: Assemble the Pot Pie
Preheat your oven to 375°F. Unroll one of the refrigerated pie crusts and press it gently into a 9-inch pie dish, allowing the edges to overhang slightly. Pour the chicken and vegetable filling into the crust, spreading it evenly. The filling should be thick but still pourable—if it seems too thin, let it simmer a bit longer.
Unroll the second pie crust and place it over the filling. Trim any excess dough, then crimp the edges together with your fingers or a fork to seal the pie. Cut 4-5 small slits in the top crust to allow steam to escape during baking. This prevents the filling from becoming soggy and ensures the crust stays flaky and crisp.
Step 4: Bake to Golden Perfection
In a small bowl, whisk the large egg with 1 tbsp water to create an egg wash. Brush this mixture evenly over the top crust—this gives the pot pie that beautiful golden-brown finish. Place the pie on a baking sheet (to catch any potential spills) and bake on the middle rack of your oven for 35-40 minutes.
You’ll know it’s done when the crust is deep golden brown and the filling is bubbling gently through the slits. If the crust begins to brown too quickly, tent the pie loosely with aluminum foil. Let the pot pie rest for 10 minutes after removing it from the oven—this allows the filling to set slightly, making it easier to serve.
Step 5: Garnish and Serve
Sprinkle the pot pie with the 2 tbsp chopped fresh parsley just before serving. This adds a pop of color and a fresh contrast to the rich, creamy filling. Use a sharp knife to cut the pie into 6 equal portions, making sure to go all the way through the bottom crust for clean slices.
Serve each portion while still warm, ensuring every bite delivers that perfect combination of flaky crust, tender chicken, and creamy vegetables. The filling should be thick enough to hold its shape on the plate but still lusciously creamy. Pair with a simple green salad to balance the richness of this comforting dish.
Troubleshooting cracker barrel chicken pot pie
Filling Too Thin
If your filling resembles soup rather than a creamy sauce, the roux likely didn’t cook long enough. Return the mixture to medium-low heat and simmer for an additional 5-7 minutes, stirring constantly. If it’s still too thin, mix 1 tbsp flour with 2 tbsp cold water and whisk into the filling. Cook until thickened. 💡
Crust Not Browning
An under-browned crust often means the oven temperature is too low. Verify your oven reaches 375°F with an oven thermometer. For the last 5 minutes of baking, move the pie to the upper rack and brush with additional egg wash. If needed, broil for 1-2 minutes—watch closely!
Soggy Bottom Crust
A soggy bottom happens when the filling releases too much moisture. Before adding filling, brush the bottom crust with a thin layer of beaten egg white—this creates a protective barrier. Also, ensure your filling is thick enough to mound slightly when spooned. Bake on a preheated pizza stone for extra crispness.
Vegetables Too Crunchy
Undercooked veggies mean they need more time in the skillet. Sauté the onion, carrots, and celery for 10-12 minutes until fully tender before adding flour. If you prefer softer peas, stir them into the filling 5 minutes before removing from heat. For extra tenderness, parboil carrots for 3 minutes first.
Filling Bubbles Over
An overflowing pie usually means the steam vents are inadequate. Cut 6-8 slits (not just 4-5) in the top crust, each about 1-inch long. Place the pie dish on a rimmed baking sheet to catch spills. Avoid overfilling—leave ½-inch space between filling and crust edge. If it still bubbles, tent with foil halfway through baking. ⚡
Dough Shrinks Back
Shrinking crust often results from overworking the dough or not sealing edges properly. When placing the top crust, gently stretch it to fit rather than rolling it thinner. Press the edges firmly with fork tines to create a tight seal. Chill the assembled pie for 15 minutes before baking to relax the gluten. If using store-bought crust, avoid the “no-roll” varieties—they shrink more.
Nutrition Facts
Frequently Asked Questions
Can I use rotisserie chicken instead?
Shred 3 cups cooked rotisserie chicken to replace the fresh chicken breasts. This saves time and adds extra flavor. Just skip the cooking step and add the shredded chicken when combining the filling.
How do I keep the bottom crust crispy?
Pre-bake the bottom crust for 8 minutes at 375°F before adding filling. Also, brush it with a thin layer of beaten egg white—this creates a moisture barrier. Baking on a preheated pizza stone helps too.
Can I make this ahead of time?
Yes! Assemble the pie completely, then refrigerate (unbaked) for up to 24 hours. When ready, bake as directed, adding 5-10 extra minutes if cold. For longer storage, freeze unbaked pies for up to 2 months.
What if I don’t have heavy cream?
Swap the heavy cream for 1 cup whole milk plus 2 tbsp melted butter. For extra richness, use ½ cup evaporated milk plus ½ cup regular milk. The filling will be slightly less creamy but still delicious.

- 1.5 Lb Whole Wheat Bread Recipe: No-Knead Crusty Loaf With Nutty Depth - September 26, 2026
- 7lb Roast Chicken Recipe: Juicy Golden Crust With Herb Butter Seal - September 26, 2026
- 2 Pie Crust Recipe With Lard: Golden, Shatterproof Layers in 30 Minutes - September 26, 2026