
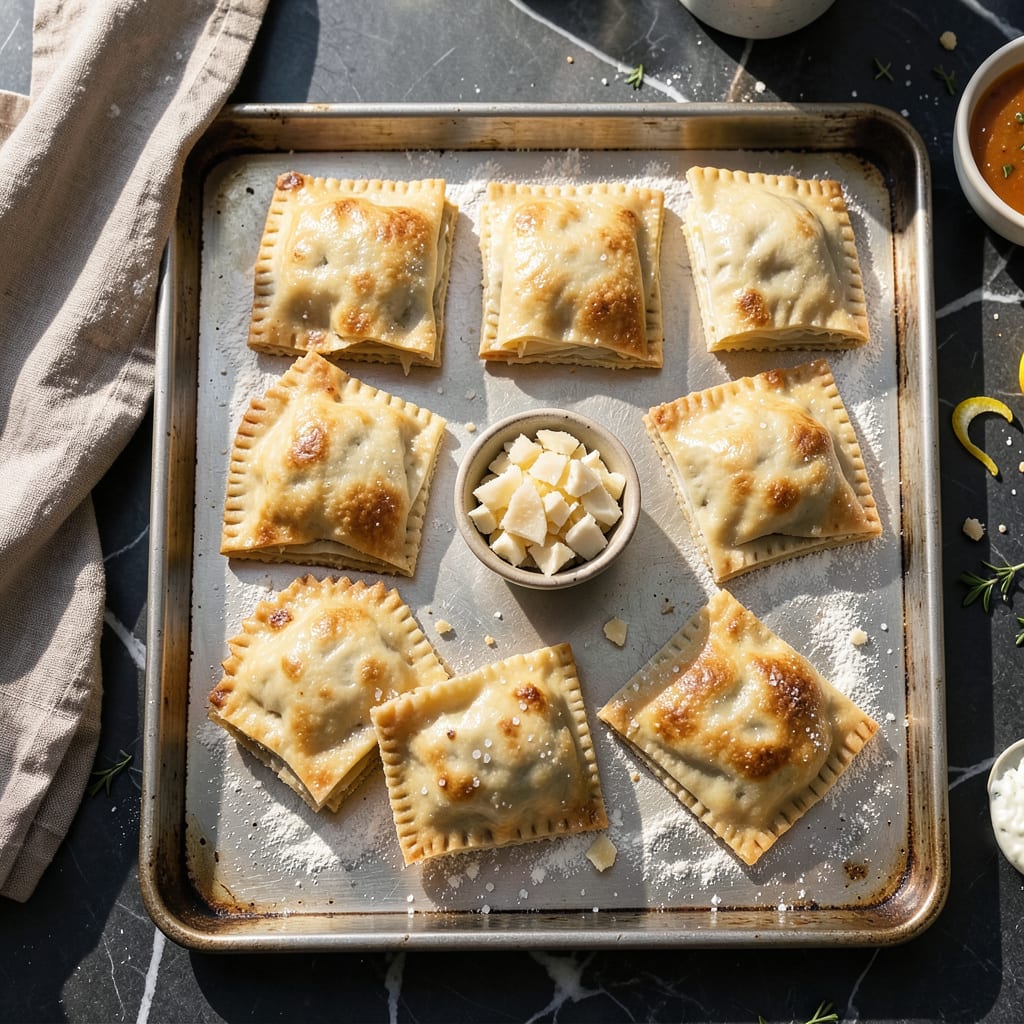
Perfect pot pie begins with the crust, and these flaky dough squares deliver the ideal balance of tenderness and structure. Developed through years of testing, this recipe ensures golden, layered results every time—whether you’re topping a classic chicken pot pie or creating handheld savory pastries.
The secret lies in maintaining cold butter throughout the process and using a precise folding technique that creates distinct layers. With just 5 basic ingredients and straightforward handling, you’ll achieve bakery-quality dough that bakes to crisp perfection while staying tender inside. No advanced skills required—just follow the method closely.
Ingredients for Pot Pie Dough Squares
Five essential ingredients transform into golden, layered dough squares—perfect for pot pies or savory pastries.
| Ingredient | Amount | Notes |
|---|---|---|
| All-Purpose Flour 🌾 | 2 ½ cups | Unbleached, plus extra for dusting |
| European-Style Unsalted Butter 🧈 | 1 cup | Chilled, cut into 1/2-inch cubes |
| Fine Sea Salt 🧂 | 1 tsp | Diamond Crystal preferred |
| Ice Water 💧 | ½ cup | Plus 1-2 tbsp as needed |
| Distilled White Vinegar 🍶 | 1 tsp | For tenderness and structure |
[recipeingredientscaler]
The butter quality is paramount for flaky layers. European-style butter (82-86% fat) like Plugrá or Kerrygold yields superior results due to its lower water content. Standard grocery store butter works in a pinch, but avoid margarine or spreads. The flour should be unbleached all-purpose—King Arthur or Gold Medal are reliable brands. Measure by weight (300g) if possible for absolute precision, though volume measurements work well with proper technique.
No distilled vinegar? Lemon juice or apple cider vinegar at equal amounts provide similar acidity. For a richer flavor profile, substitute 1 tbsp sour cream for 1 tbsp of the ice water. If avoiding dairy entirely, coconut oil (solid, chilled) can replace butter at a 1:1 ratio, though the texture will differ slightly. The dough can be made 24 hours ahead—wrap tightly and refrigerate for enhanced flavor development.
Store wrapped dough squares between parchment layers in an airtight container for 3 days refrigerated or 3 months frozen. Thaw overnight in the refrigerator before using. For maximum flakiness, maintain the cold chain—return to fridge between foldings if your kitchen exceeds 72°F. Baked squares keep 2 days at room temperature in a paper bag to preserve crispness.
Why You’ll Love This Recipe
- No-Fuss Dough: I’ve made pie crusts that require chilling, resting, and babysitting—this one’s different. Just pulse flour, cold butter, salt, and a splash of vinegar (the secret for tenderness), then add ice water. Roll it out while your filling simmers. No waiting, no stress.
- Buttery, Flaky Magic: That European-style butter? Worth every penny. It layers into the flour so the squares bake up crisp and golden on the edges, but still tender enough to soak up gravy. The vinegar keeps it from toughening up—so you get that bakery-quality crunch without the fuss.
- Freezer-Friendly Hero: Honestly, this dough is my meal prep cheat code. Make a double batch, cut into squares, and freeze them flat between parchment. Toss a handful straight from the freezer onto chicken pot pie, beef stew, or even a quick veggie bake. No thawing needed—just extra crispy edges.
- Stretches Like Crazy: One batch covers a 9×13 dish or individual ramekins—or, here’s what sold me—cut the squares small for mini pot pies, or go big for a rustic galette. Leftovers? The dough reheats surprisingly well, staying crisp under the broiler for 2 minutes. (Yes, even on a Tuesday night.)
Step-by-Step Instructions for Pot Pie Dough Squares
This method delivers perfectly flaky, tender dough squares with minimal effort and maximum reliability.
Step 1: Combine Dry Ingredients and Chill
In a large mixing bowl, whisk together the 2.5 cups All-Purpose Flour and 1 tsp Fine Sea Salt until thoroughly combined. I recommend using Diamond Crystal salt for its clean flavor and precise measurement. Place this mixture in the freezer for 10 minutes to ensure all ingredients stay cold during the next steps.
The cold temperature is critical for preventing the butter from melting prematurely, which would compromise the flaky layers. This brief chilling period also gives you time to prepare your work surface and gather remaining ingredients, creating a more efficient workflow.
Step 2: Cut in the Butter for Optimal Flakiness
Remove the chilled flour mixture from the freezer and add the 1 cup European-Style Unsalted Butter that you’ve already cut into 1/2-inch cubes. Using a pastry cutter or your fingertips, work the butter into the flour until the mixture resembles coarse crumbs with some pea-sized butter pieces remaining visible.
This step requires careful attention – you want to distribute the butter evenly without overworking it. The visible butter pieces will create those desirable flaky layers during baking. If the butter begins to soften or stick to your fingers, return the bowl to the freezer for 5 minutes before continuing.
Step 3: Create the Dough with Liquid Ingredients
In a small bowl, combine the 0.5 cup Ice Water and 1 tsp Distilled White Vinegar. The vinegar serves two important purposes: it tenderizes the dough by inhibiting gluten formation and adds subtle structure. Create a well in the center of your flour-butter mixture and pour in the liquid.
Using a fork, gently toss the mixture until it just begins to come together. Switch to your hands and press the dough gently until it forms a cohesive mass, being careful not to overwork it. The dough should feel slightly shaggy but hold together when pressed – if it seems too dry, add additional ice water 1 tablespoon at a time.
Step 4: Shape and Chill the Dough
Turn the dough out onto a lightly floured surface and gently pat it into a 1-inch thick rectangle. Fold the dough in thirds like a business letter, then rotate it 90 degrees and fold again. This lamination technique creates additional layers without excessive rolling.
Wrap the dough tightly in plastic wrap and refrigerate for at least 1 hour or up to 24 hours. This resting period allows the gluten to relax and the butter to firm up, making the dough easier to roll out and ensuring maximum flakiness. The dough should feel firm but still pliable when ready to use.
Step 5: Roll and Cut into Squares
On a lightly floured surface, roll the chilled dough to a 1/8-inch thickness, maintaining an even thickness throughout. Use a sharp knife or pizza cutter to trim the edges, then cut the dough into 4-inch squares. For clean cuts, press straight down without dragging the knife.
Transfer the squares to a parchment-lined baking sheet, leaving 1/2 inch between each piece. At this point, you can either bake immediately or freeze the squares on the tray until solid, then transfer to an airtight container for up to 3 months. This make-ahead option preserves the dough’s quality while offering convenience.
Pro Cooking Tips for pot pie dough squares
Butter Temperature Control
I can’t stress enough how critical it is to keep your butter ice cold throughout the entire process. I like to chill my European-style butter in the freezer for 15 minutes before cubing it, then return it to the fridge while prepping other ingredients. If your kitchen runs warm, place your mixing bowl over an ice pack during the cutting-in process. 🌡️
Folding Technique Mastery
The “business letter” fold creates those beautiful layers we all love. After your first fold, rotate the dough 90 degrees before folding again—this creates cross-directional layers. I recommend doing 2-3 total folds during the initial shaping, then letting it rest before final rolling. This technique mimics professional puff pastry methods.
Rolling Perfection Tips
When rolling your dough to that perfect 1/8-inch thickness, work from the center outward in all directions. Use a French rolling pin (without handles) for better control. If the dough starts to resist, let it rest for 5 minutes in the fridge—this prevents gluten from tightening up and causing cracks.
Cutting Clean Squares
For those sharp, professional-looking edges, use a bench scraper or pizza wheel instead of a knife. Press straight down without dragging—this prevents the layers from compressing. I like to dip my cutter in flour between cuts for cleaner separation. The 4-inch size works perfectly for individual pot pies or handheld pastries.
Blind Baking Secrets
If pre-baking your squares for a crisp topping, dock the dough with a fork and use pie weights or dried beans to prevent puffing. Bake at 375°F for 12 minutes until just set but not browned. For extra insurance against soggy bottoms, brush the baked squares with a thin layer of egg wash before adding filling. ✨
Troubleshooting Common Issues
If your dough feels tough, you’ve likely overworked it—next time, use fewer folds and handle it more gently. For cracks during rolling, let the dough warm slightly at room temperature for 5-10 minutes. If your squares puff unevenly during baking, check that your oven temperature is accurate with an oven thermometer—I was surprised when I discovered mine ran 25°F hot!
Nutrition Facts
Frequently Asked Questions
What’s the best way to keep the dough from sticking when rolling?
Use a light dusting of flour on both your work surface and rolling pin. For extra insurance, place parchment paper under and over the dough. If it starts sticking, chill for 5 minutes before continuing.
Can I make these squares ahead of time?
Cut squares can be frozen on a tray until solid, then stored in an airtight container for up to 3 months. Bake directly from frozen, adding 2-3 minutes to the baking time.
Why did my squares puff up unevenly during baking?
Uneven puffing usually means inconsistent thickness or butter distribution. Roll to an even 1/8-inch thickness and ensure butter pieces are pea-sized before chilling. Dock with a fork if blind-baking.
What’s the secret to extra-flaky layers?
Cold butter is key! Use European-style butter (82%+ fat) and keep everything chilled. The “business letter” fold creates more layers—rotate 90 degrees between folds for best results.

- 6 Bean Chili Recipe: Hearty, Smoky Depth That Gets Richer Over Time - September 26, 2026
- 2 Gallon Red Sangria Recipe: Bold Spice and Fruit Fusion for Crowds - September 26, 2026
- 5 Star Apple Bread Recipe: Spiced Apple Swirl With Buttery Crust - September 26, 2026