
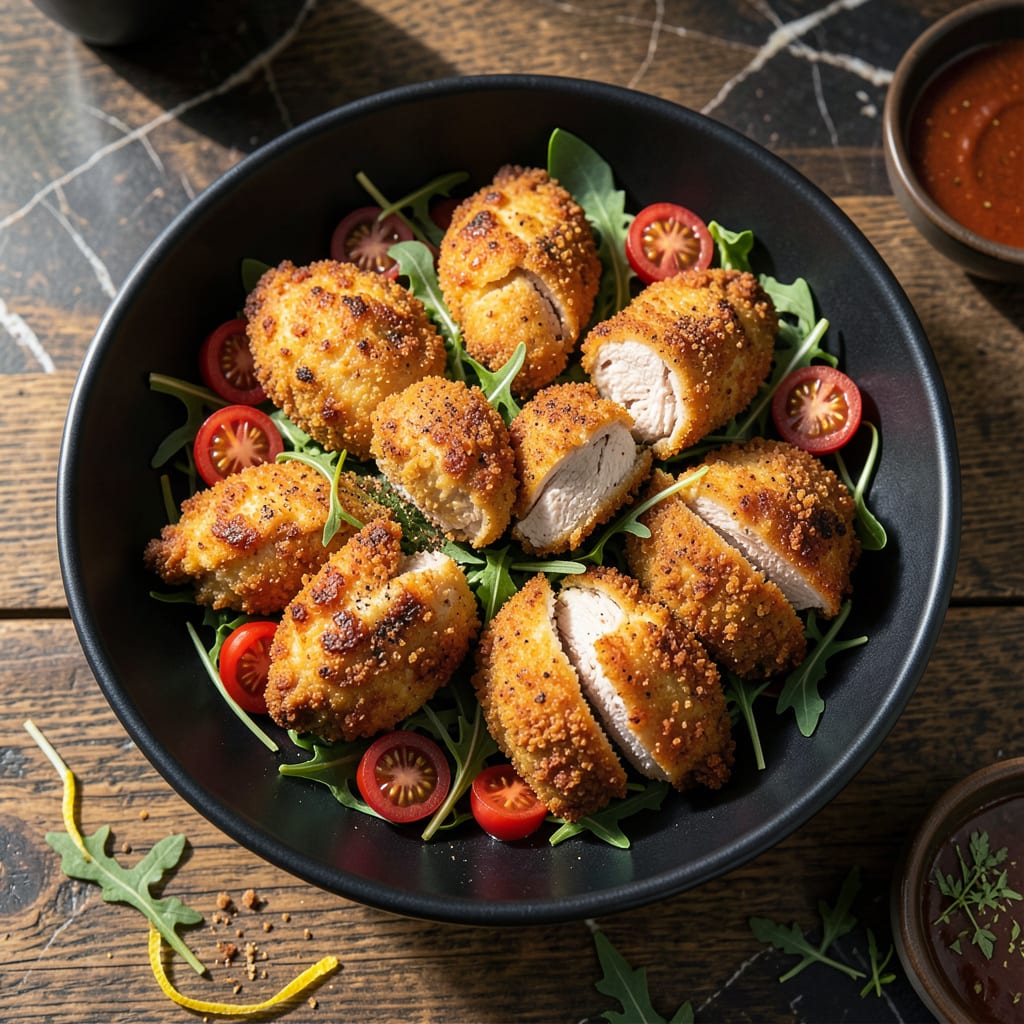
This oven-fried chicken delivers a crispy coating without the deep fryer. I developed this method to achieve that satisfying crunch while keeping it light and healthy.
By baking at a high temperature, you get golden, crispy results with minimal oil. It’s a proven technique that transforms simple ingredients into a dish the whole family will love.
Ingredients for Low Fat Oven Fried Chicken
Crispy results start with these light, flavorful ingredients for oven-baked perfection.
| Ingredient | Amount | Notes |
|---|---|---|
| Boneless Skinless Chicken Breasts 🍗 | 1 ½ lb | Pounded to even thickness |
| Buttermilk 🥛 | 1 cup | Low-fat variety preferred |
| All-Purpose Flour 🌾 | ¾ cup | For initial dredging |
| Cornstarch 🌾 | ¼ cup | Creates extra crispiness |
| Panko Breadcrumbs 🍞 | 1 ½ cups | Whole wheat for extra fiber |
| Paprika 🌶️ | 1 tbsp | Sweet or smoked variety |
| Garlic Powder 🧄 | 1 tsp | Freshly ground preferred |
| Onion Powder 🧅 | 1 tsp | Adds depth to seasoning |
| Salt 🧂 | 1 tsp | Diamond Crystal kosher preferred |
| Black Pepper 🌶️ | ½ tsp | Freshly ground for best flavor |
| Olive Oil 🫒 | 2 tbsp | Light variety for spraying |
| Egg Whites 🥚 | 2 whole | For binding coating |
| Dried Thyme 🌿 | ½ tsp | Optional for herb notes |
[recipeingredientscaler]
The chicken is the foundation here. Boneless, skinless breasts from Whole Foods or your local butcher ensure even cooking and maximum crispiness. Pounding them to uniform thickness prevents dry spots. For the breading, panko (found in the Asian aisle at most Kroger stores) creates that essential crunch without deep frying. Look for whole wheat panko for added fiber and nutrients.
No buttermilk? Low-fat Greek yogurt thinned with milk works in a pinch. Out of panko? Crushed cornflakes or whole wheat breadcrumbs can substitute—though the texture won’t be identical. The cornstarch is key for crispiness, but arrowroot powder works too. For a gluten-free version, swap the flour for almond flour and use gluten-free panko.
The coated chicken can rest in the fridge for up to 2 hours before baking. Leftovers keep well for 3-4 days in an airtight container. Reheat in the oven at 375°F for 10-12 minutes to restore crispiness. Avoid microwaving—it’ll turn the coating soggy.
Why You’ll Love This Recipe
- One Pan Magic: I toss everything on a sheet pan and let the oven do the work—no frying mess, no splatter.
- Crispy Perfection: The panko and cornstarch give it that golden crunch while the buttermilk keeps the chicken juicy inside.
- Weeknight Hero: Honestly, it’s my go-to for busy evenings when I need dinner fast but still want that fried chicken satisfaction.
- Budget Friendly: Panko and chicken breasts stretch far, and leftovers taste just as good the next day in a wrap or salad.
Step-by-Step Instructions for Low Fat Oven Fried Chicken
Here’s the method. Straightforward, tested, works every time.
Step 1: Prep and Marinate the Chicken
Begin by pounding the 1.5 lb Boneless Skinless Chicken Breasts to an even ½-inch thickness using a meat mallet. This ensures uniform cooking and prevents dry spots. Place the pounded chicken in a shallow dish and pour the 1 cup Buttermilk over it, turning to coat completely.
Let the chicken marinate in the refrigerator for at least 30 minutes, or up to 4 hours. The buttermilk tenderizes the meat and helps the coating adhere better. Cover the dish with plastic wrap to prevent the chicken from drying out.
Step 2: Prepare the Breading Station
In a medium bowl, whisk together the 0.75 cup All-Purpose Flour, 0.25 cup Cornstarch, 1 tbsp Paprika, 1 tsp Garlic Powder, 1 tsp Onion Powder, 1 tsp Salt, and 0.5 tsp Black Pepper. The cornstarch is crucial here—it creates that ultra-crispy texture without deep frying.
In a separate bowl, lightly beat the 2 whole Egg Whites. Place the 1.5 cups Panko Breadcrumbs in a third bowl. For extra flavor, I stir the 0.5 tsp Dried Thyme into the panko. This three-step breading station ensures maximum crunch.
Step 3: Bread and Coat the Chicken
Remove the chicken from the buttermilk, letting any excess drip off. Dredge each piece in the flour mixture, pressing gently to adhere. Shake off any excess flour, then dip into the egg whites, allowing any excess to drip off. Finally, press each piece firmly into the panko breadcrumbs, turning to coat completely.
Place the breaded chicken on a wire rack set over a baking sheet. This setup allows air to circulate around the chicken, preventing soggy bottoms. Let the chicken rest for 10 minutes to help the coating set before baking.
Step 4: Bake to Crispy Perfection
Preheat your oven to 425°F. Line a large baking sheet with parchment paper and lightly brush or spray it with the 2 tbsp Olive Oil. Arrange the breaded chicken on the prepared sheet, leaving space between pieces to ensure even browning.
Bake for 20-25 minutes, flipping halfway through, until the chicken is golden brown and the internal temperature reaches 165°F. For extra crispiness, I broil for the last 2-3 minutes, watching closely to prevent burning. The coating should be uniformly crisp and the chicken juicy and tender.
Pro Tips For Making Low Fat Oven Fried Chicken
- Preheat the Pan: Sounds weird, but pop your baking sheet in the oven while it preheats to 425°F—this guarantees the panko gets crispy without extra oil. I learned this the hard way after pulling out sad, soggy chicken twice.
- Press Hard on Crumbs: Really shove those panko breadcrumbs into the chicken so they stick—lightly pressing just means they’ll fall off during baking. A firm press makes a real difference for that crunch.
- Skip the Overcrowding: Leave at least an inch between each piece on the sheet, or they’ll steam instead of crisp. After burning three batches from crowding, I finally figured out spacing is non-negotiable.
- Buttermilk Overnight: Soak the chicken in buttermilk for 12-24 hours if you can—I was skeptical until I tried it, but the texture goes from dry to juicy every single time. Even 30 minutes helps, but longer is better.
Perfect Pairings for These Flavors
Side Dish Pairings
A crisp kale salad with lemon-tahini dressing balances the crunch of this dish beautifully. I toss 4 cups chopped kale with 2 tbsp tahini and 1 tbsp lemon juice. Roasted sweet potato wedges add a touch of natural sweetness that complements the savory coating perfectly.
Light Sauce Options
For dipping, I love a simple Greek yogurt ranch—mix ½ cup low-fat Greek yogurt with 1 tsp dried dill and ½ tsp garlic powder. A spicy honey mustard made with 2 tbsp Dijon and 1 tbsp honey adds a sweet-heat contrast that elevates every bite. 💛
Vegetable Sides
Steamed green beans with a sprinkle of slivered almonds add texture without heaviness. I blanch them for 3-4 minutes then toss with 1 tsp olive oil. For something heartier, try roasted Brussels sprouts with a balsamic glaze—they caramelize beautifully in the oven.
Starch Companions
A small portion of quinoa pilaf with herbs makes this meal more substantial. I cook 1 cup quinoa in 2 cups low-sodium chicken broth for extra flavor. Mashed cauliflower with 1 tbsp light cream cheese offers a creamy, low-carb alternative to traditional mashed potatoes. 🌟
Nutrition Facts
Frequently Asked Questions
Can I use chicken thighs instead of breasts?
Yes, but adjust the cooking time. Thighs stay juicier but need 25-30 minutes at 425°F to reach 165°F internally. Pound them evenly for consistent crispiness.
How do I prevent the coating from falling off?
Press firmly when breading and let it rest 10 minutes before baking. The buttermilk marinade helps adhesion too. Use a wire rack for even air circulation.
What’s the best way to reheat leftovers?
Use the oven at 375°F for 10-12 minutes to restore crispiness. Avoid microwaving—it makes the coating soggy. Store leftovers in an airtight container for up to 4 days.
Can I make this gluten-free?
Swap all-purpose flour for almond flour and use gluten-free panko. Cornstarch remains safe. The texture will differ slightly but still delivers great crunch.

- 5-Lb Sirloin Tip Roast Recipe: Slow-Braised to Juicy, Caramelized Crust - September 25, 2026
- 3 Onion Dip Mix Recipe: Bold, Savory Blend for Game Day Crowds - September 25, 2026
- 7 Eleven Buffalo Chicken Rollers Recipe: Spicy Kick and Creamy Twist in 20 Minutes - September 25, 2026