
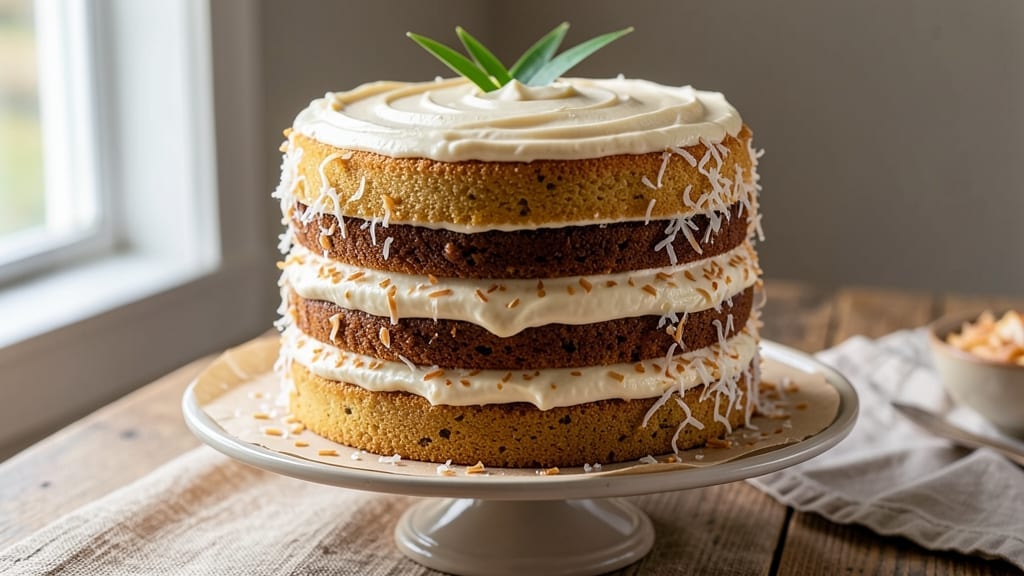
A 4-layer coconut cake with vanilla, chocolate, and cream cheese layers is the ultimate showstopper for any celebration. This recipe delivers restaurant-quality results with perfectly balanced flavors and a moist, tender crumb.
The secret lies in baking each layer evenly and letting the cake rest between assembly steps to ensure clean slices every time.
What makes this cake truly special is the combination of textures and flavors—light vanilla sponge, rich chocolate layers, and velvety cream cheese filling that ties everything together. The coconut cream frosting adds a tropical touch, while toasted coconut flakes on top provide a beautiful finish.
It’s the kind of dessert that feels indulgent yet is simple enough for home baking.
With precise layering techniques and a foolproof recipe, you’ll achieve a cake that’s as impressive to look at as it is to eat. Each bite offers a perfect balance of sweetness, creaminess, and coconut aroma. The frosting is smooth and stable, ensuring your cake holds its shape beautifully.
Perfect for birthdays, holidays, or just because—this cake is sure to impress. Whether you garnish it with fresh fruit or extra toasted coconut, it’s a dessert that feels like a hug in every slice. Let’s get baking!
Ingredients for 4 layer coconut cake
Twelve essential ingredients for layers of tropical vanilla, rich chocolate, and velvety cream cheese bliss.
| Ingredient | Amount | Notes |
|---|---|---|
| All-Purpose Flour 🌾 | 4 cups | Sifted for light texture |
| Unsalted Butter 🧈 | 2 cups | Room temperature for creaming |
| Granulated Sugar 🍚 | 3 cups | Divided for layers |
| Large Eggs 🥚 | 8 whole | Room temperature |
| Vanilla Extract 🌿 | 2 tbsp | Pure extract preferred |
| Baking Powder 🍞 | 1 tbsp | Plus 1 tsp for chocolate layer |
| Salt 🧂 | ½ tsp | Fine sea salt |
| Shredded Coconut 🥥 | 2 cups | Toasted for flavor |
| Coconut Milk 🥥 | 13 ½ oz | Full-fat canned preferred |
| Cream Cheese 🧀 | 16 oz | Room temperature for filling |
| Powdered Sugar 🍚 | 5 cups | For frosting |
| Heavy Cream 🥛 | 1 ½ cups | Chilled for frosting |
| Dark Chocolate Chips 🍫 | 1 ½ cups | Semisweet for chocolate layer |
| Cocoa Powder 🍫 | ½ cup | Unsweetened for chocolate layer |
The coconut milk is non-negotiable—full-fat canned gives that authentic tropical richness. Grab the 13.5 oz BPA-free cans from Trader Joe’s or Costco for bulk savings. Toast your shredded coconut first (350°F for 5-7 minutes) to deepen its flavor—unsweetened is best. For the butter, I always use Land O’Lakes unsalted because it’s reliable, but European-style like Plugrá takes this cake to the next level. The cream cheese? Philadelphia brand is a must—it whips up smoother than store brands.
No vanilla extract? Seeds from a vanilla bean (scraped and soaked in warm water) work beautifully, but pure extract is easier. Running short on powdered sugar? Granulated sugar + 1 tbsp cornstarch makes a decent substitute in a pinch. For the chocolate layer, Ghirardelli chips melt perfectly, but any high-quality semisweet will do. The cocoa powder matters too—Dutch-processed gives a smoother finish, while natural cocoa adds more depth. Swap the heavy cream for whipping cream if that’s what you’ve got, but it won’t be quite as stable for the frosting.
Toasted coconut keeps for 2 weeks in an airtight container, but it loses flavor fast. Store the cake layers in the fridge (covered) for up to 3 days before assembling—this prevents sogginess. The frosting? Make it 2 days ahead and store in the fridge for perfect texture. Once fully assembled, this cake stays fresh at room temperature for 4 days or in the fridge for 1 week. Freeze individual layers (unfrosted) for 3 months if you’re prepping ahead.
Why You’ll Love This Recipe
- Here’s the kicker: it’s cheaper than ordering dessert. Butter, sugar, eggs—basic pantry stuff that stretches far. Plus, leftovers? They disappear faster than I can say “second slice.”
- No Fuss Layers: I swear by this recipe because it’s basically foolproof—whisk the batter, fold in shredded coconut, and repeat. No piping, no stress, just four simple layers that stack like magic.
- Tropical Magic: That first bite? Pure coconut euphoria. The buttery vanilla sponge soaks up the sweetened coconut filling, while the toasted coconut on top adds crunch. It’s like a vacation in a box.
- Party Ready: This cake handles crowds like a champ. Bake it ahead, slice it later—it stays moist for days. Perfect for birthdays, potlucks, or even a lazy Sunday when you want to impress without slaving.
Step-by-step instructions for 4 layer coconut cake
This tropical masterpiece combines vanilla, chocolate, and cream cheese layers for a showstopping dessert.
Prepare the Vanilla and Chocolate Cake Layers
Preheat your oven to 350°F. Grease and line four 8-inch round cake pans with parchment paper. In a large bowl, cream together 2 cups unsalted butter and 1½ cups granulated sugar until light and fluffy—this should take about 3-4 minutes. Add 4 large eggs one at a time, mixing well after each addition. Stir in 1 tbsp vanilla extract and ½ tsp salt. Sift in 1 cup all-purpose flour and ½ tbsp baking powder, mixing just until combined.
Divide the batter evenly between two of the prepared pans. For the chocolate layer, whisk ½ cup cocoa powder into the remaining 1 cup flour and ½ tbsp baking powder. Add this to the remaining ½ cup butter, 1 cup sugar, 4 eggs, 1 tbsp vanilla, and ½ tsp salt, mixing until smooth. Pour into the other two pans. Bake all layers for 25-30 minutes, or until a toothpick comes out clean. Let cool in pans for 10 minutes, then transfer to a wire rack to cool completely.
Make the Coconut Milk Syrup and Cream Cheese Filling
In a saucepan, combine 13.5 oz coconut milk and ½ cup granulated sugar. Bring to a gentle simmer over medium heat, stirring until the sugar dissolves completely—about 3-4 minutes. Remove from heat and let cool slightly. This syrup will soak into the layers for moisture and flavor. Meanwhile, beat 16 oz cream cheese and 1 cup powdered sugar until smooth and creamy. Set aside for the filling.
Toast the 2 cups shredded coconut in a dry skillet over medium heat for 2-3 minutes, stirring constantly, until golden brown. Spread the toasted coconut evenly on a parchment-lined tray and let cool completely. This adds a delightful crunch to the final cake.
Assemble the Cake Layers with Frosting
Once all layers are completely cool, level the tops if needed. Place the first vanilla layer on a cake stand or plate. Brush the top lightly with ¼ cup coconut milk syrup, then spread ¼ of the cream cheese filling evenly over the layer. Repeat with the chocolate layer, another brush of syrup, and another ¼ of the filling. Top with the second vanilla layer, followed by the final chocolate layer.
For the frosting, whip 1.5 cups heavy cream and 5 cups powdered sugar together until stiff peaks form. Spread a thin layer of frosting over the entire cake to seal, then add the remaining frosting, creating swirls or smooth peaks as desired. Press the toasted coconut onto the sides and top for texture and flavor. Chill the cake in the refrigerator for at least 4 hours (or overnight) before slicing.
Add Chocolate Chips and Garnish
Before serving, melt 1.5 cups dark chocolate chips in a microwave-safe bowl in 20-second intervals, stirring between each interval until fully melted. Drizzle the melted chocolate over the chilled cake in decorative swirls. Garnish with additional toasted coconut or fresh berries for a pop of color. This step adds a rich, decadent finish that ties all the layers together.
The cake is best served at room temperature, so let it sit for 15-20 minutes before slicing. Each bite will deliver a perfect balance of moist vanilla, rich chocolate, creamy filling, and tropical coconut flavors—pure indulgence in every layer!
Pro Tips For Making 4 Layer Coconut Cake
- Whip Butter & Sugar Slow: DESCRIPTION: I learned this the hard way—rushing the butter-sugar mix leaves air bubbles that collapse, making your cake dense. Use a stand mixer on medium-high for 3-4 minutes until it’s pale and fluffy, not just creamy. That extra minute makes all the difference in texture.
- Sift Dry Ingredients Twice: DESCRIPTION: Skip this, and you’ll end up with lumps in your batter, especially in a layered cake where even distribution matters. Sift the flour and sugar mix into the bowl before folding it in—yes, even if your recipe says otherwise. Your layers will be smoother, and the crumb will be lighter.
- Don’t Overmix the Layers: DESCRIPTION: I used to treat cake batter like pancake batter—mix until it’s really combined. Wrong move. Gently fold the dry ingredients into the wet just until no streaks remain. Overmixing develops gluten, and your cake will turn tough instead of tender. Stop when it looks barely combined.
- Chill the Cake Between Layers: DESCRIPTION: Sounds weird, but it works—let each layer cool for 10 minutes after baking, then chill in the fridge for 15-20 minutes before adding the next. This prevents the buttercream from melting into a soupy mess and keeps your cake from collapsing under the weight of all those layers. (Your future self will thank you.)
Make-ahead tips for this 4 layer coconut cake
Pre-Bake Prep
Bake all four cake layers 1 day ahead and store them in airtight containers at room temperature. This prevents sogginess when assembling later. I wrap each layer individually in plastic wrap and place them in a single layer on a tray—this keeps them stable and prevents doming.
Label each layer (vanilla/chocolate) to avoid confusion during assembly. 💫
Frosting Timeline
Make the coconut cream frosting 2 days before serving and refrigerate it in an airtight container. The longer it rests, the smoother and more stable it becomes.
When ready to assemble, let it sit at room temperature for 30 minutes before whipping to room temperature. This prevents graininess in your final frosting. 🥛
Layering Strategy
Assemble the cake 4-6 hours before serving to allow flavors to meld. Use a serrated knife to level any uneven tops before adding filling. I find a laser level tool helps create perfectly even layers.
Place the cake in the fridge for 2 hours after assembly to set the frosting before adding final garnishes. 🌟
Storage Hacks
Store the fully assembled cake in the fridge for up to 5 days if not serving immediately. For longer storage, freeze the cake (unfrosted) for 1 month by wrapping each layer in plastic and aluminum foil.
Thaw at room temperature for 2-3 hours before reassembling. The frosting can be remade fresh after thawing. ❄️
Garnish Prep
Toast your coconut flakes 2 weeks ahead and store them in an airtight container. Melt the chocolate chips 1 day before serving and store in the fridge in a small jar.
Reheat gently in the microwave before drizzling to maintain smoothness. Fresh berries should be added just before serving to keep them vibrant. 🍓
Serving Prep
Take the cake out of the fridge 1 hour before serving to bring it to room temperature. This ensures clean slices and optimal texture. Use a hot knife (dipped in hot water) for perfectly smooth cuts.
Arrange slices on a platter with a dusting of powdered sugar for an elegant finish. 🍰
Nutrition facts
Frequently asked questions
Can I substitute regular milk for coconut milk in the syrup?
While you can use regular milk, the authentic tropical flavor comes from the coconut. For a lighter coconut taste, try a 1:1 mix of coconut milk and regular milk. For a richer flavor, use 100% coconut milk—just reduce the sugar slightly since coconut milk is naturally sweet. The syrup is key for moisture, so don’t skip it entirely!
How do I keep the layers from shifting when stacking?
Use a cake turntable for stability, and always place the heaviest layers (chocolate) on the bottom. Chill the cake in the fridge for 2 hours after assembly to set the frosting. For extra security, freeze the cake (unfrosted) for 30 minutes before adding frosting—this creates a solid base.
What’s the best way to level uneven cake layers?
Use a serrated knife or a cake leveler for clean cuts. Place the cake on a plate and gently shave off the top until even. For stubborn domes, use a hot knife (dipped in hot water) to slice through smoothly. Leveling ensures even filling distribution and a polished final look.
Can I make this cake gluten-free?
Yes! Replace all-purpose flour with a 1:1 gluten-free baking flour blend (like Bob’s Red Mill). Add ½ tsp xanthan gum to improve texture. For the chocolate layer, use a gluten-free cocoa powder. Test your blend first—some require extra moisture, so adjust the coconut syrup slightly if needed.
Why did my cake layers crack after baking?
Cracking usually happens from overmixing or opening the oven door too soon. Mix the batter just until combined (no streaks), and avoid peeking while baking. Let layers cool in pans for 10 minutes before removing. If cracks appear, they’re harmless—just frost and serve as usual!

- 6 Bean Chili Recipe: Hearty, Smoky Depth That Gets Richer Over Time - September 26, 2026
- 2 Gallon Red Sangria Recipe: Bold Spice and Fruit Fusion for Crowds - September 26, 2026
- 5 Star Apple Bread Recipe: Spiced Apple Swirl With Buttery Crust - September 26, 2026