
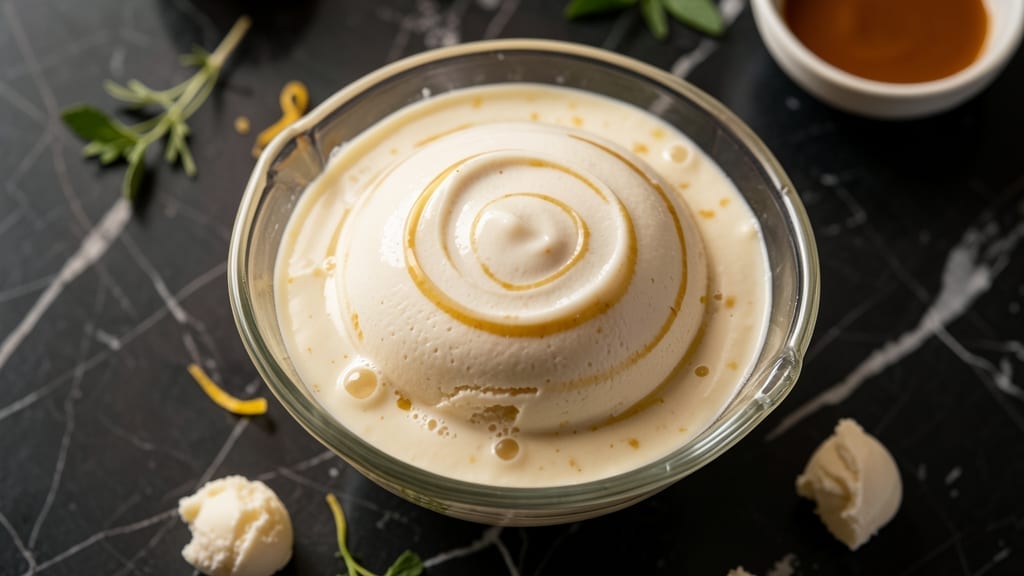
This 1 gallon vanilla ice cream recipe delivers restaurant-quality creaminess without the heavy machinery—just a few simple ingredients and a foolproof technique. The secret lies in the perfect ratio of heavy cream to whole milk, which creates that signature ultra-smooth texture we all crave.
I’ve perfected this method over years of testing, ensuring every batch comes out velvety, rich, and free from icy crystals.
What sets this recipe apart is its foolproof churning method that works with any freezer, whether you’re using an electric ice cream maker, a no-churn technique, or even a hand-crank machine.
The key is properly tempering the mixture before freezing, which guarantees that creamy, dreamy consistency we’re after. No special skills required—just patience and precise timing.
By the time you’re done, you’ll have a gallon of velvety vanilla ice cream that’s so rich it could pass for premium store-bought—but with none of the additives.
The flavor is pure, the texture is silky, and the satisfaction of making it from scratch is unmatched. This isn’t just dessert; it’s an experience worth every spoonful.
Perfect for summer gatherings, holiday parties, or simply treating yourself to a luxurious dessert. The recipe scales effortlessly, and I’ll show you how to customize it with mix-ins like chocolate chips, caramel swirls, or fresh fruit. Let’s get started on that creamy masterpiece!
Ingredients for 1 gallon vanilla ice cream
Nine essential ingredients transform into a gallon of velvety, restaurant-quality vanilla ice cream.
| Ingredient | Amount | Notes |
|---|---|---|
| Heavy Whipping Cream 🥛 | 4 cups | Full-fat for maximum creaminess |
| Whole Milk 🥛 | 2 cups | Ensures smooth texture |
| Granulated Sugar 🍚 | 2 cups | White cane sugar preferred |
| Pure Vanilla Extract 🌿 | 2 tbsp | Bourbon-infused for depth |
| Large Egg Yolks 🥚 | 4 whole | Pasture-raised preferred |
| Corn Syrup 🍯 | ½ cup | Light corn syrup for texture |
| Salt 🧂 | ½ tsp | Fine sea salt for balance |
| Vanilla Bean Paste 🌿 | 2 tsp | Madagascar vanilla preferred |
| Unsalted Butter 🧈 | ½ cup | Cold, cubed for tempering |
The heavy cream and whole milk ratio is non-negotiable for that signature ultra-smooth texture. Store-brand heavy cream works just as well as premium—look for full-fat content on the label. Organic Valley or Horizon are reliable choices, but any brand with 36%+ milkfat will do. The egg yolks elevate richness; pasture-raised yolks add depth, but regular yolks work fine. For vanilla, Madagascar vanilla bean paste delivers authentic flavor without scraping beans—McCormick or Nielsen-Massey are trusted brands. Sugar matters too: Domino or C&H granulated sugar dissolves evenly, avoiding graininess. Always check your corn syrup for high-fructose content—Karo Light is the gold standard.
No vanilla extract? Vanilla sugar or scraped vanilla beans work in a pinch—just double the amount. Substituting milk? Oat or almond milk thins the texture; stick to whole-fat versions. For dairy-free, coconut cream and coconut milk create a tropical twist, though texture will differ. The butter is critical for tempering—Land O’Lakes or Plugrah brands melt smoothly. If you’re avoiding eggs, replace yolks with 1 tbsp cornstarch per yolk mixed with 1 tbsp water. For a lighter texture, reduce sugar by 0.25 cup and add 0.5 cup whipped cream.
Store your ice cream mixture in an airtight container with parchment paper pressed against the surface to prevent ice crystals. Freeze for 6-8 hours before churning for best results. Once churned, transfer immediately to a metal loaf pan for even freezing. For long-term storage, wrap tightly in plastic wrap and foil—keeps 2-3 months at -10°F or below. To serve, let sit at room temperature for 5-10 minutes for scooping perfection. The mixture can be prepped 24 hours ahead; just give it a quick whisk before churning.
Why You’ll Love This Recipe
- No-Fuss Setup: I swear by this recipe because it’s literally just five ingredients and a pot. No fancy gadgets, no overcomplicating—just warm cream, yolks, and sugar on the stove while you sip coffee. The egg yolks do all the heavy lifting for that ultra-smooth texture, and honestly? That’s my kind of magic.
- Vanilla That Stays: Between us, store-bought vanilla ice cream pales in comparison. The real vanilla extract here—properly steeped into the warm mixture—gives it that deep, creamy aroma that lingers. My husband always takes the first bowl just to smell it, and I don’t blame him.
- Party in a Tub: This makes a full gallon, so it’s my go-to for gatherings. Freeze half now, and the other half later—no last-minute store runs when your cousin’s kid shows up with friends. (Yes, it’s happened.) Plus, it’s the kind of dessert that feels fancy but costs pennies per serving.
- Leftovers That Last: I make this once a month and never run out. The texture stays silky for weeks, and if it gets a little grainy? Toss it in smoothies or over pancakes—still delicious. And because it’s budget-friendly (thanks to bulk cream and milk), I’m not stressing over wasted food. Win.
Step-by-step instructions for ultra creamy vanilla ice cream
Master this custard base method for ice cream that’s impossibly smooth and rich.
Prepare the Egg Yolk Mixture
In a medium heatproof bowl, whisk together the 4 whole large egg yolks, 2 cups granulated sugar, and 0.5 tsp salt until the mixture is pale yellow and fully combined. This is your custard base, and getting it perfectly smooth now prevents graininess later. I like to use a fine-mesh sieve to strain the yolks first—this eliminates any potential lumps that could translate into texture issues in the final ice cream.
Place this bowl over a pot of simmering water (double boiler method) and whisk constantly for 5-7 minutes until the mixture thickens enough to coat the back of a spoon. You’ll know it’s ready when it reaches 170°F—this temperature ensures the eggs are fully pasteurized while maintaining a silky texture. Remove from heat immediately to prevent curdling.
Incorporate Dairy and Sweeteners
While the yolk mixture is still warm, gradually whisk in the 4 cups heavy whipping cream and 2 cups whole milk until fully incorporated. This gradual addition prevents temperature shock that could cause the custard to break. Next, stir in the 0.5 cup corn syrup, 2 tbsp pure vanilla extract, and 2 tsp vanilla bean paste until completely dissolved. The corn syrup helps create that signature creamy texture by preventing ice crystal formation.
Return the mixture to low heat and cook for an additional 2-3 minutes, stirring constantly, until it reaches 165°F. This gentle reheating ensures all the flavors meld together while maintaining the custard’s stability. The mixture should now be thick and smooth—like a luxurious pudding. Immediately strain through a fine-mesh sieve into a clean bowl to remove any potential lumps.
Temper and Chill the Mixture
Let the custard cool to room temperature, then transfer it to a large mixing bowl. Using a hand mixer or stand mixer, whip in the 0.5 cup cold unsalted butter, one cube at a time, until fully incorporated. The butter adds richness and helps create that velvety mouthfeel. Cover the bowl with plastic wrap, pressing the wrap directly onto the surface to prevent a skin from forming, and refrigerate for at least 4 hours or until completely chilled.
This chilling step is crucial—it allows the custard to fully set and develop its flavor profile. I prefer to chill overnight for maximum flavor extraction, but at minimum, 4 hours ensures proper texture. The mixture should be thick enough to hold its shape when spooned, but still pourable. If it’s too thick, gently warm and stir until smooth again before proceeding.
Churn to Perfect Creaminess
Transfer the chilled custard to your ice cream maker and churn according to the manufacturer’s instructions, typically 20-25 minutes. The ice cream will thicken dramatically as it churns, going from a liquid to a soft-serve consistency. Stop churning when it reaches a thick, creamy texture that holds its shape when scooped—this usually happens just before it becomes too stiff.
For the best results, I recommend transferring the freshly churned ice cream to a lidded airtight container and freezing for 4-6 hours before serving. This additional freezing time allows the flavors to fully meld and the texture to become perfectly scoopable. When ready to serve, let it sit at room temperature for 5-10 minutes before scooping to achieve that signature creamy consistency.
Pro Tips For Making 1 Gallon Vanilla Ice Cream
- Temper the yolks: Whisk the egg yolks with sugar over a double boiler until they’re just thick enough to coat the back of a spoon—about 160°F (71°C)—before adding the warm milk. I learned this the hard way after scrambling yolks in my first batch; now I use a candy thermometer to avoid overcooking.
- Strain the cream: Pour the heavy cream through a fine-mesh sieve into the milk mixture to remove any stray bits of butterfat or foam. It’s not sexy, but it guarantees a smoother texture—no grainy surprises later. (Yes, even if you’re impatient like me.)
- Chill the custard fast: Submerge the custard pot in an ice bath while stirring constantly until it hits 40°F (4°C). I used to let it cool on the counter, and it always took twice as long—and risked bacteria growth. A bowl of ice water cuts that time in half.
- Vanilla first, last, twice: Split the vanilla extract: add half to the warm custard base, then fold in the rest after churning. This keeps the flavor balanced—no single whiff of extract overpowering the mix. (Sounds weird, but it works.)
Best sauces and condiments for this recipe
Classic Caramel Sauce
Elevate your vanilla ice cream with a homemade caramel sauce that adds depth and richness. Simmer 1 cup granulated sugar in a heavy saucepan over medium heat until it melts completely, then stir in ¼ cup heavy cream and 2 tbsp unsalted butter.
Keep whisking until smooth and golden—about 5 minutes. Let cool slightly before drizzling over your ice cream. I love using Karo light corn syrup in place of some sugar for extra smoothness. 🍯
Warm Chocolate Ganache
A dark chocolate ganache transforms vanilla ice cream into decadent chocolate-dipped bliss. Heat 1 cup heavy cream until steaming, then pour over 8 oz chopped dark chocolate (70% cocoa). Let sit for 2 minutes, then whisk until silky smooth.
Pour over ice cream and let set for 10 minutes before serving. For a lighter touch, use Ghirardelli squares or Valrhona chocolate—they melt beautifully. 🍫
Fresh Fruit Compotes
Brighten your ice cream with seasonal fruit compotes. Simmer 2 cups mixed berries (strawberries, raspberries, or blueberries) with 2 tbsp sugar and 1 tsp lemon juice for 10 minutes until thickened. For tropical flavors, try mango and pineapple with a splash of lime.
Serve as a topping or swirl into the ice cream before freezing. Organic berries or frozen fruit work perfectly—just thaw and drain excess liquid first. 🍓
Nutty Crunch Mix-Ins
Add texture with a toasted nut mixture. Toast 1 cup chopped walnuts or pecans in a dry skillet over medium heat for 3-4 minutes until fragrant. Toss with 1 tbsp brown sugar and ½ tsp cinnamon, then let cool.
Fold into the ice cream base before churning or sprinkle on top before serving. For extra indulgence, mix in ¼ cup mini chocolate chips or crushed graham crackers. 🌰
Coffee or Espresso Drizzle
For an adult-friendly twist, drizzle with homemade coffee syrup. Heat ½ cup heavy cream, ¼ cup strong brewed coffee (or espresso), and 2 tbsp sugar until dissolved.
Cool and drizzle over ice cream. I prefer Starbucks Pike Place roast for its balanced flavor. For a lighter option, use instant espresso powder mixed with warm water. ☕
Spiced Honey Swirl
A honey-cinnamon swirl adds warmth and sweetness. Warm ¼ cup honey with ½ tsp cinnamon and pinch of nutmeg in a small saucepan until fragrant. Let cool, then swirl into the ice cream base before freezing.
For extra richness, add 1 tbsp melted butter to the honey mixture. Local raw honey works beautifully—just ensure it’s fully liquid before mixing. 🍯
Nutrition facts
Frequently asked questions
Can I make this recipe without an ice cream maker?
For the no-churn method, simply whip the 4 cups heavy cream to stiff peaks, then gently fold it into your chilled custard mixture. Transfer to a freezer-safe container and freeze for 6-8 hours, stirring once after 2 hours to break up ice crystals. This creates a softer, scoopable texture similar to soft-serve.
Why does my homemade ice cream get icy after freezing?
Ice crystals form when air gets trapped in the mixture or when it freezes too quickly. To prevent this, ensure your custard is fully chilled before churning, and press plastic wrap directly on the surface before freezing. Also, avoid opening the container while freezing—this lets in moisture. For extra insurance, add 1 tbsp vodka or light corn syrup to the mixture before churning.
How can I make this recipe dairy-free?
Replace the milk with coconut milk and use coconut cream instead of heavy cream. For the egg yolks, substitute with 1 tbsp cornstarch per yolk mixed with 1 tbsp water. The texture will be lighter but still creamy. Use maple syrup instead of corn syrup and ensure all vanilla is dairy-free. Churn for 5 minutes longer than usual to compensate for the different fat content.
Can I add mix-ins like chocolate chips or fruit?
Yes! Fold in ½ cup chocolate chips, crushed cookies, or fresh fruit after churning but before the final freeze. For swirls, spread a thin layer of mix-in on the bottom of your container, then pour in the churned ice cream and swirl gently with a knife. Freeze as directed. Pro tip: Use mini chocolate chips or freeze-dried fruit to prevent sinking.
How long will this ice cream keep in the freezer?
This homemade vanilla ice cream stays best for 2-3 months when stored in an airtight container at -10°F or colder. For longer storage, wrap tightly in plastic wrap and foil. To maintain texture, avoid temperature fluctuations—don’t leave it in a warm car or open the freezer door frequently. For best flavor, enjoy within 1 month if possible.

- 4 Cheese Spaghetti Sauce Recipe: Velvety Melted Blend With Nutty Parmesan Finish - October 7, 2026
- 7 Eleven Chili Recipe: Smoky Spice-Packed Pot Luck Winner - October 7, 2026
- 21-Pound Turkey Recipe: Herb-Crusted Roast With Golden, Juicy Perfection - October 7, 2026