
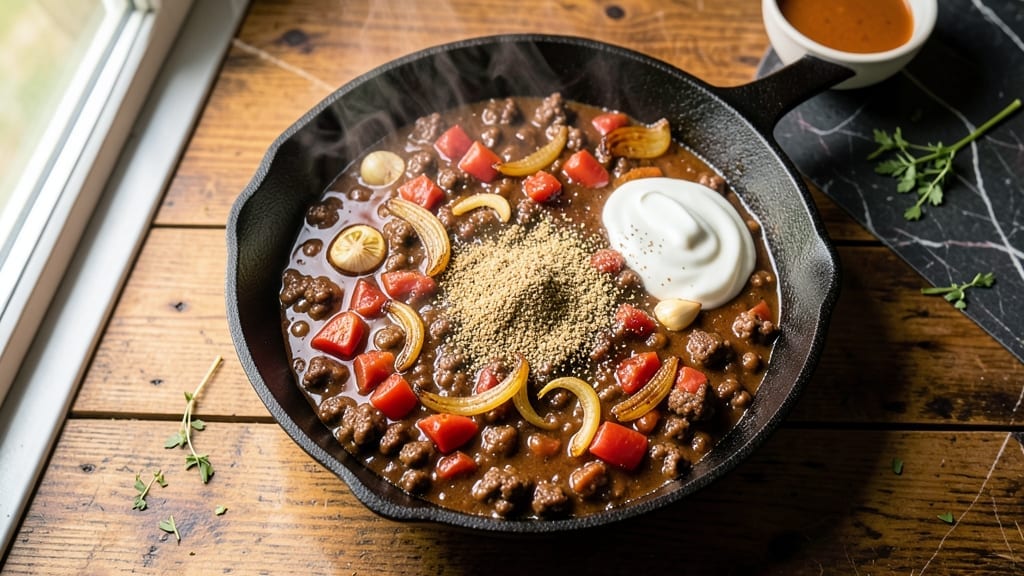
A 1-hour chili recipe that delivers restaurant-quality depth without hours of simmering—this is the game-changer you’ve been waiting for. The secret lies in a two-step cooking process: first browning the meat for rich flavor, then building layers of spice and texture in a single pot.
I’ve perfected this method over years of testing, ensuring every bite is packed with hearty beef, tender beans, and a sauce that only gets better the next day.
This recipe transforms simple ingredients into a bold, balanced meal in just 60 minutes—no shortcuts, just smart techniques. You’ll start with ground beef seared to perfection, then layer in onions, garlic, and spices that bloom into complex aromas.
The tomatoes and beans meld together while the chili simmers, creating a texture that’s both hearty and velvety. It’s the kind of dish that tastes even more incredible reheated, making it perfect for leftovers.
By the time you’re done, you’ll have a deeply flavorful chili with a perfect balance of smoky, spicy, and savory notes. The meat stays tender, the beans hold their shape, and the sauce clings to every spoonful.
Serve it with crusty bread, cornbread, or over rice to round out the meal. This isn’t just chili—it’s a one-pot masterpiece that proves great food doesn’t require endless time.
Whether you’re feeding a family or meal prepping for the week, this recipe delivers restaurant-quality results in a fraction of the time. The instructions are straightforward, the ingredients are accessible, and the outcome is undeniably satisfying. Let’s get cooking—and enjoy the flavors that develop even more tomorrow.
Ingredients for 1 hour chili
Game-changing ingredients for a chili that tastes even better tomorrow—simple but bold.
| Ingredient | Amount | Notes |
|---|---|---|
| Ground Beef 🥩 | 1 ½ lb | 80/20 fat ratio preferred |
| Yellow Onion 🧅 | 1 whole | Medium size, diced small |
| Garlic Cloves 🧄 | 4 cloves | Minced for depth of flavor |
| Chili Powder 🌶️ | 2 tbsp | Medium heat preferred |
| Ground Cumin 🌿 | 1 tbsp | Freshly toasted for aroma |
| Fire-Roasted Diced Tomatoes 🍅 | 14 ½ oz | One 14.5 oz can, undrained |
| Black Beans 🌱 | 15 oz | One 15 oz can, drained |
| Kidney Beans 🌱 | 15 oz | One 15 oz can, drained |
| Tomato Paste 🍅 | 2 tbsp | Squeeze tube preferred |
| Beef Broth 💧 | 1 ½ cups | Low-sodium preferred |
| Dark Brown Sugar 🍬 | 1 tbsp | For subtle sweetness |
| Apple Cider Vinegar 🍏 | 1 tbsp | Brightens flavors |
| Salt 🧂 | 1 ½ tsp | Kosher or sea salt |
| Black Pepper 🌶️ | ½ tsp | Freshly ground preferred |
| Cayenne Pepper 🔥 | ¼ tsp | Adjust for heat preference |
The beef is non-negotiable here—80/20 fat ratio gives you that rich, deep flavor without making it greasy. Costco or Walmart usually have the best prices for ground beef in bulk. Look for packages labeled with the fat percentage—it makes all the difference. The fire-roasted diced tomatoes add a smoky depth that canned tomatoes can’t match. I always grab the Muir Glen brand when I’m at Trader Joe’s—it’s worth the extra few cents. For the beans, low-sodium options are key so you don’t end up with a salty chili later.
No chili powder? Mix 1 tbsp smoked paprika + 1 tsp regular paprika as a substitute. The cumin can be toasted in a dry pan for 30 seconds to really wake up those flavors—trust me on this. Short on tomato paste? Fresh crushed tomatoes at double the amount work in a pinch, but they’ll make your chili more watery. The apple cider vinegar might sound weird, but it cuts through the richness and brightens everything up—don’t skip this part. For extra richness, add a splash of beef drippings if you’ve got them from browning the meat.
This chili only gets better with time—2-3 days in the fridge is perfect. Portion it into containers so you can grab a bowl anytime. Freezes beautifully for up to 3 months—just thaw overnight in the fridge. The flavors meld together overnight, creating that restaurant-quality depth. Pro tip: Add a dollop of sour cream or avocado when serving to balance the heat and add creaminess.
Why You’ll Love This Recipe
- One-Pan Magic: I swear by this recipe because it’s literally one pan, one spoon, and zero stress. Brown the beef with onion and garlic right in the pot, toss in the spices, and let it simmer—no chopping boards to clear, no extra dishes. That’s 10 minutes of active work, and the rest is hands-off.
- Deep, Smoky Kick: Honestly, the cumin and chili powder combo changes the game. The garlic sizzles into the beef until it’s caramelized, and then those spices bloom into this warm, earthy depth. It’s not just chili—it’s my chili, with that perfect balance of heat and richness.
- Weeknight Workhorse: Between us, this feeds my family of four and leaves enough for lunches. I double the batch on Sundays, and by Thursday, I’m reheating bowls with zero effort. (Yes, even on a Tuesday night when I’m exhausted.)
- Budget-Friendly Powerhouse: Ground beef and pantry spices? That’s about $8 for a full pot, and it stretches for days. I’ll be real: my kids don’t care if it’s “fancy,” but they will ask for seconds because it’s hearty, filling, and always hits the spot.
Step-by-step instructions for hearty one-hour chili
Here’s how to build deep, complex flavor in just 60 minutes—no long simmers needed.
Brown the Ground Beef for Maximum Flavor
Heat a large Dutch oven over medium-high heat until hot. Add the 1.5 lb ground beef and break it apart with a wooden spoon, letting it cook undisturbed for 3-4 minutes until it loses its raw color. This initial browning creates the Maillard reaction, which builds that rich, meaty depth we’re after.
Once the beef is mostly browned, use a slotted spoon to transfer it to a plate, leaving all the rendered fat in the pot. If you have more than ¼ cup of fat remaining, drain off the excess—but never wash the pot. Those browned bits are pure flavor gold. Keep the beef warm while you prep the aromatics.
Sauté Onions and Garlic Until Fragrant
In the same Dutch oven, add the diced yellow onion and cook over medium heat for 5-6 minutes, stirring occasionally, until softened and just beginning to caramelize at the edges. This step develops natural sweetness that balances the chili’s heat.
Push the onions to one side of the pot and add the 4 minced garlic cloves, stirring constantly for 30 seconds until fragrant. Here’s the thing—garlic burns fast, so watch it closely. As soon as you smell that sweet, nutty aroma, it’s time to move to the next ingredient. The onions should be tender but not browned yet.
Build the Chili Base with Spices and Tomatoes
Return the browned beef to the pot and stir to combine with the onions and garlic. Add the 2 tbsp chili powder, 1 tbsp ground cumin, 1.5 tsp salt, 0.5 tsp black pepper, and 0.25 tsp cayenne pepper, stirring well to coat everything evenly. Let the spices toast in the beef fat for 1 minute—this activates their flavors.
Pour in the 14.5 oz fire-roasted diced tomatoes (juices and all), 2 tbsp tomato paste, 1.5 cups beef broth, 1 tbsp dark brown sugar, and 1 tbsp apple cider vinegar. Stir everything together, scraping up any browned bits from the bottom of the pot. Bring the mixture to a gentle boil, then reduce heat to medium-low and let it simmer uncovered for 20 minutes. This initial cook lets the flavors meld and the liquid reduce slightly.
Add Beans and Simmer to Perfection
After 20 minutes of simmering, stir in the 15 oz black beans and 15 oz kidney beans, breaking them up with a wooden spoon. The beans will absorb some of the liquid, so if the chili looks too thick, add ¼ cup water or broth to loosen it. Taste and adjust seasoning—you might need a pinch more salt or cayenne depending on your heat preference.
Continue simmering for another 15 minutes, stirring occasionally. The chili should be thick enough to coat the back of a spoon but still have a bit of body. Here’s where the magic happens: the beans soften, the flavors deepen, and the vinegar brightens everything. When the chili reaches this stage, it’s ready to serve—though it will only get better as it sits overnight in the fridge.
Rest and Serve with Confidence
Remove the chili from heat and let it rest for 5 minutes. This short rest lets the flavors settle and the texture thicken slightly. Serve it hot, topped with shredded cheese, sour cream, or fresh cilantro if you like. The chili will continue to improve as it sits, developing even more depth of flavor over the next 24 hours.
Each spoonful should deliver a perfect balance of smoky, spicy, and slightly sweet notes. The beans should be tender but still hold their shape, and the broth should coat the back of your spoon with a rich, velvety texture. If you’re serving a crowd, this recipe makes 6 hearty servings—perfect for chilly evenings or game day gatherings.
Pro Tips For Making 1 Hour Chili
- Sear the Beef Hard: Don’t just brown the ground beef—get it dark and crispy in 2-3 minutes. I used to walk away too soon, and the chili always tasted dull. High heat, no crowding, and let those bits stick just enough to build flavor.
- Toast the Spices: Dry-toast your chili powder and cumin in the pot for 30 seconds before adding liquid. This wakes up their aromas and cuts through the onion’s sharpness. Skip this, and your chili smells like a missed opportunity.
- Simmer, Don’t Boil: Once everything’s in the pot, keep the heat low enough that tiny bubbles just break the surface. Boiling makes the chili watery and dulls the spices. If it’s too hot, you’ve gone too far.
- Use a Splashed Onion: Pulse the onion in the food processor until it’s a rough paste, then splash it into the hot pot. It cooks faster, caramelizes better, and blends seamlessly without chunks. (Yes, even if you’re not a food processor person—just chop it very fine.)
Serving suggestions for leftovers
Classic Toppings
Start with shredded cheddar cheese—about ¼ cup per bowl—to add a creamy, melty contrast to the spicy chili. I love using sharp cheddar from Tillamook for that tangy bite. A dollop of sour cream (about 2 tbsp per serving) cools the heat while adding richness.
For a fresh finish, sprinkle with chopped green onions or cilantro—just 1 tbsp per bowl—to brighten the flavors. 🌟
Crunchy Additions
Add texture with toasted tortilla strips—cut 1 corn tortilla into thin strips, toss with 1 tsp olive oil, and bake at 375°F for 5-6 minutes. Another great option is crushed tortilla chips (about 2 tbsp per bowl) for an instant crunch.
For extra heat, sprinkle with crushed red pepper flakes—just ¼ tsp per bowl—or serve pickled jalapeños on the side for those who love a kick.
Bread Pairings
Serve with warm cornbread—I use a simple mix from Krusteaz—to soak up every last drop of chili. For a heartier option, try sourdough bread or crusty French bread from your local bakery.
If you’re prepping ahead, store bread separately and toast it just before serving to keep it fresh. A side of buttery dinner rolls also works beautifully for a cozy meal.
Extra Flavor Boosters
Drizzle with hot honey (about 1 tsp per bowl) for a sweet-spicy balance that takes this chili to the next level. Another pro move? Add a fried egg on top—just crack it into the bowl in the last minute of reheating.
For a smoky touch, sprinkle with smoked paprika (about ½ tsp per bowl) or serve with avocado slices for creaminess. 💛
Game Day Upgrades
For football season or tailgates, serve chili in mini cast-iron skillets or individual ramekins for easy sharing. Add a side of cool ranch or blue cheese dressing for dipping. A cheese pull (melt ½ cup shredded cheese in a small pot until stretchy) is always a crowd-pleaser.
For a fun twist, offer mini corndogs or spicy meatballs on the side for extra protein.
Nutrition facts
Frequently asked questions
Can I make this chili vegetarian?
Replace the ground beef with 1 lb crumbled tempeh or 1.5 cups lentils (cooked). For extra umami, add 1 tbsp soy sauce or 1 tsp liquid smoke to compensate for the meaty depth. The beans will still provide plenty of protein and texture.
Why does my chili taste bland after 1 hour?
Bland chili usually means the spices didn’t toast properly or the liquid didn’t reduce enough. Always let the spices cook in the beef fat for 1 full minute before adding liquids. Simmer uncovered for the full 35 minutes to let flavors concentrate. If needed, add a splash of apple cider vinegar or a pinch of smoked paprika at the end.
Can I use ground turkey instead of beef?
Yes, but lean turkey (93% lean or less) works best to avoid dry chili. Brown it thoroughly first to develop flavor, then proceed with the recipe. You may need to add 1 extra tbsp tomato paste to compensate for the lower fat content. For extra richness, stir in 1 tbsp chicken bouillon with the broth.
How do I adjust the heat level?
For milder chili, reduce the cayenne to ¼ tsp or omit it entirely. For extra heat, add ½ tsp cayenne or stir in 1 tsp chipotle powder with the other spices. Always taste as you go—you can’t remove heat once it’s in! For a smoky kick without heat, add ½ tsp smoked paprika instead.
What’s the best way to reheat leftovers?
Reheat chili gently on the stove over medium-low heat for 5-7 minutes, stirring occasionally, until warmed through. For microwave reheating, use 50% power for 2-3 minutes, stirring once. Never reheat to a boil—this can make the beans mushy. Add a splash of broth or water if needed to loosen the texture.

- 3 Cheese Pimento Cheese Recipe: Sharp Cheddar, Peppery Heat, and Creamy Spread Magic - October 10, 2026
- 7 Egg Cake Recipe: Fluffy Layers With Vanilla Bean Infusion - October 10, 2026
- 3 Musketeers Cookie Recipe: Crunchy Chocolate Shells With Gooey Caramel Centers - October 10, 2026