
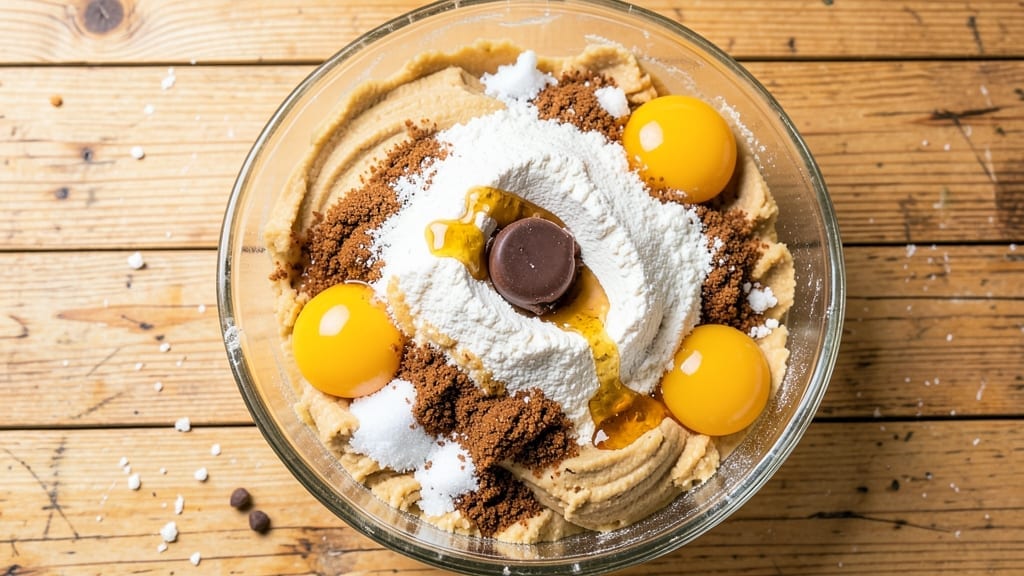
This 1960s Toll House cookie recipe brings back the golden era of buttery, crisp-edged cookies with melty chocolate chips—just like your grandmother made. The secret lies in the perfect balance of brown and white sugar, creating that signature caramelized flavor and tender crumb that defines classic Toll House cookies.
I’ve tested this recipe dozens of times to ensure it delivers the nostalgic taste that made these cookies a household staple for decades.
The recipe stays true to the original while incorporating modern baking techniques for foolproof results. With just five simple ingredients—including real butter and semi-sweet chocolate chips—you’ll achieve cookies that are crisp around the edges and perfectly soft in the center.
The dough requires minimal mixing, making this an ideal project for both beginners and experienced bakers looking to recreate a piece of culinary history.
What makes these cookies truly special is their ability to transport you back to the 1960s with every bite. The aroma of vanilla and chocolate fills your kitchen as they bake, while the buttery flavor lingers long after the last cookie disappears.
This recipe produces a batch of about 24 cookies, perfect for sharing with family or enjoying as a mid-afternoon treat.
For those who love customization, you can experiment with variations like adding chopped nuts or a sprinkle of sea salt. The original Toll House recipe was designed to be adaptable, and these cookies are no exception.
Whether you’re baking for tradition or simply craving a taste of the past, this recipe delivers the authentic experience you’re looking for.
Ingredients for 1960 toll house cookie
Five simple ingredients plus chocolate chips—just like grandma made, but with modern foolproof techniques.
| Ingredient | Amount | Notes |
|---|---|---|
| Unsalted Butter 🧈 | 1 cup | Cold, cubed for even mixing |
| Packed Brown Sugar 🍯 | 1 cup | Light or dark, packed tight |
| Granulated White Sugar 🍚 | 1 cup | Standard grocery brand |
| Pure Vanilla Extract 🌿 | 2 tsp | Bottled, not imitation |
| Large Eggs 🥚 | 2 whole | Room temperature preferred |
| All-Purpose Flour 🌾 | 3 ½ cups | Sifted, spooned lightly |
| Baking Soda 🧂 | ½ tsp | Freshly opened |
| Sea Salt 🧂 | 1 tsp | Fine grain, not iodized |
| Semi-Sweet Chocolate Chips 🍫 | 2 cups | Nestlé Toll House preferred |
The butter is non-negotiable here—real butter gives those crisp edges and melty centers. Kirkland or Land O’Lakes are my go-tos, but any unsalted works. Pack the brown sugar tight—use a spoon to press it down—this makes all the difference. The chocolate chips? Nestlé Toll House is the original, but any semi-sweet will do. If you’re feeling fancy, swap half for white chocolate chips. The vanilla? Bottled is best—imitation tastes like perfume. And for the love of cookies, don’t skip the sea salt. It cuts the sweetness perfectly.
No butter? Vegetable shortening works in a pinch—though purists will notice the difference. Short on brown sugar? White sugar plus 1 tbsp molasses mimics the flavor. Eggs not available? Flax eggs (2 tbsp ground flaxseed + 6 tbsp water) work for a vegan twist. The chocolate chips can be chopped bars if that’s what you’ve got—just chop them small. And if you’re out of vanilla, vanilla sugar (1 tsp) is a sneaky substitute. The flour? King Arthur or Gold Medal are reliable, but any all-purpose will do. Just sift it—this prevents lumps.
This dough keeps for 3 days in the fridge, wrapped tight. For longer storage, portion into balls and freeze—bake straight from frozen, adding 1-2 minutes. The cookies reheat beautifully—30 seconds in the microwave brings back that fresh-from-the-oven crunch. Double the batch and freeze half—nothing beats warm cookies straight from the freezer. And if you’re making these for a crowd, use two cookie sheets to avoid overcrowding. Trust me, it’s worth the extra minute.
Why You’ll Love This Recipe
- No-Fuss Mixing: I swear by this recipe’s simplicity—just cream butter and sugars, toss in eggs and vanilla, then fold in the chocolate chips. No food processor, no complicated steps, just a bowl and a spoon.
- Chocolate-Chip Bliss: That perfect balance of gooey brown sugar caramel and crisp edges? It’s all thanks to the creamed butter and sugars melting just right. Honestly, the first bite makes you want to bake another batch immediately.
- Party-Proof Favorite: These cookies freeze like a dream, so I always make a double batch for gatherings. They’re sturdy enough to pack in lunches but still taste fresh—no one will guess they’ve been sitting in the freezer.
- Budget-Friendly Staples: Butter, sugar, eggs, and chocolate chips? You’re using pantry basics that won’t break the bank. Plus, the recipe stretches easily—great for feeding a crowd without overspending.
Step-by-step instructions for 1960s Toll House cookies
Here’s the classic method that delivers those perfect, nostalgic cookies with crispy edges and gooey centers.
Cream the Butter and Sugars Together
In a large mixing bowl, combine the 1 cup unsalted butter (cold and cubed) with the 1 cup packed brown sugar and 1 cup granulated white sugar. Using a hand mixer or stand mixer with the paddle attachment, beat on medium speed for 3-4 minutes until the mixture is light, fluffy, and nearly doubles in volume.
Here’s the thing—this creaming step is where the magic happens. You’re incorporating air into the butter, which creates those beautiful crackly tops and helps the cookies spread just enough. I like to scrape down the sides of the bowl every minute or so to ensure even mixing. The mixture should be pale and thick, almost like whipped cream, before moving to the next step.
Add Eggs and Vanilla Extract
With the mixer running on low speed, add the 2 whole large eggs one at a time, mixing well after each addition. After both eggs are incorporated, add the 2 teaspoons pure vanilla extract and mix for another 30 seconds until fully combined.
The eggs help bind everything together, while the vanilla adds that classic Toll House flavor. You’ll notice the mixture might look slightly curdled after adding the eggs, but don’t worry—once you incorporate the dry ingredients, it will come together perfectly. This is also a good time to give the bowl another quick scrape to make sure everything is evenly mixed.
Combine Dry Ingredients and Fold in Chocolate
In a separate medium bowl, whisk together the 3.5 cups all-purpose flour, 0.5 teaspoon baking soda, and 1 teaspoon sea salt. Gradually add this dry mixture to the wet ingredients, mixing on low speed just until combined. Be careful not to overmix—you should still see a few small flour streaks in the dough.
Once the dry ingredients are incorporated, remove the bowl from the mixer and gently fold in the 2 cups semi-sweet chocolate chips using a silicone spatula. You want to distribute them evenly throughout the dough, but don’t overwork it. The chocolate should be visible in chunks, not completely mixed in. This ensures you get those delicious pockets of melted chocolate in every bite.
Chill the Dough for Perfect Texture
Cover the mixing bowl with plastic wrap and refrigerate the dough for at least 30 minutes, but ideally 1 hour. This chilling step is absolutely crucial—it prevents the cookies from spreading too much in the oven and helps develop that perfect texture.
I know it seems like a long wait, but trust me on this one. Cold dough also means the cookies hold their shape better, giving you those classic Toll House rounds with crispy edges and soft centers. If you’re really impatient, you can pop the dough in the freezer for 15-20 minutes—just make sure it’s well-chilled before scooping.
Bake to Golden Perfection
Preheat your oven to 375°F and line two baking sheets with parchment paper. Using a cookie scoop or tablespoon, drop the chilled dough onto the prepared sheets, spacing the cookies about 2 inches apart—they’ll spread slightly as they bake. For classic Toll House size, use about 1 tablespoon of dough per cookie (this should yield about 24 cookies total).
Bake for 9-11 minutes until the edges are golden brown and the centers look just slightly underdone. The tops should have those beautiful crackly lines, but they’ll continue to set as they cool. Let the cookies rest on the baking sheet for 2-3 minutes before transferring to a wire rack to cool completely. The first few minutes out of the oven are when they’re at their absolute best—warm, gooey, and perfect.
Pro Tips For Making 1960 Toll House Cookie
- CREAM BUTTER FIRST: Use cold butter straight from the fridge—no need to soften it first. The dough will handle it better, and the cookies stay chewier instead of spreading into flat pancakes.
- MEASURE BROWN SUGAR FAST: Pack that brown sugar tightly into the cup—no fluffing, just press it down hard. I learned this the hard way when my first batch turned out too dry because I skimped on the volume.
- SKIP THE OVERMIXING: Mix just until the flour disappears—about 10 strokes max. Overworking the dough makes tough cookies, and nobody wants that with Toll House’s signature tender crumb.
- BAKE TWO RACKS AT ONCE: Place cookie sheets on the top and bottom racks—this guarantees even baking without crowding. I used to bake one sheet at a time, but this cuts the time in half and gives you crisp edges every time.
Troubleshooting great 1960 toll house cookie
Dough Too Soft?
If your dough feels too soft or sticky after mixing, you likely need more flour. Add 1-2 tablespoons at a time until the dough holds together when pressed.
Overworking it can make cookies tough, so mix just until combined. Chilling the dough for 1 hour helps firm it up—this prevents excessive spreading during baking. 🧈
Cookies Spread Too Much?
Over-spreading usually happens when the dough isn’t chilled enough or the oven runs hot. Let the dough rest in the fridge for at least 1 hour (or freeze for 15 minutes if short on time).
Also, check your oven temperature with an oven thermometer—many ovens run 25°F hotter than set. Bake at 350°F if your cookies are flattening too much.
Chocolate Not Melting?
If the chocolate chips stay firm after baking, your oven isn’t hot enough or the baking time is too short. Increase the temperature to 375°F and bake for 11-12 minutes.
For extra gooeyness, place a small bowl of water on the oven rack during baking—this creates steam that helps melt the chocolate faster. 🍫
Cookies Too Dense?
Dense cookies often result from overmixing the dough or using too much flour. Mix the dry ingredients into the wet just until combined—stop when small flour streaks remain.
Also, ensure your butter is cold (not softened) and don’t skip the chilling step. For extra tenderness, replace ½ cup of flour with ½ cup cake flour.
Baking Sheet Issues
Dark or non-stick baking sheets absorb heat differently, causing uneven baking. Use light-colored, heavy-duty sheets (like Wilton Perfect Results) for even browning. Avoid glass—it can cause cookies to bake too quickly on the bottom.
Line sheets with parchment paper to prevent sticking and ensure easy release. Rotate pans halfway through baking for even heat distribution.
Storage Problems
Cookies lose freshness when exposed to air. Store them in an airtight container with a piece of bread to absorb moisture (the bread keeps them soft!). For longer storage, freeze cookies on a tray first, then transfer to a freezer bag.
Reheat in the oven at 300°F for 3-5 minutes to restore crispness. Never microwave—they’ll turn rubbery. ❄️
Nutrition facts
Frequently asked questions
Why does the original 1960 Toll House recipe use both brown and white sugar?
The brown sugar adds moisture and caramel flavor, while the white sugar creates that signature crisp edge. Together, they create the perfect balance of chewy centers and crispy edges that define classic Toll House cookies. The brown sugar also helps the cookies spread slightly during baking, giving that classic round shape.
Can I substitute butter with something else?
For the most authentic flavor, stick with unsalted butter—it’s essential for that rich, buttery taste. However, if you’re avoiding dairy, you can use vegetable shortening (though the texture will be slightly different) or coconut oil (cooled and solid). Just know the cookies won’t have the same depth of flavor.
How do I make these cookies vegan?
Replace the butter with vegan butter or coconut oil, use flax eggs (2 tbsp ground flaxseed + 6 tbsp water per egg), and swap the vanilla extract for vanilla sugar. For chocolate chips, choose dairy-free brands. The texture will be slightly denser, but still delicious!
What’s the secret to getting those perfect crackly tops?
The crackly tops come from proper creaming (beating the butter and sugars for 3-4 minutes) and chilling the dough before baking. Also, bake at 375°F—any hotter, and the tops will brown too quickly. Let the cookies cool on the sheet for 2-3 minutes before transferring to prevent cracking too soon.
How can I tell when the cookies are done baking?
Look for golden brown edges and a slightly underdone center—they’ll firm up as they cool. The tops should have those classic crackly lines, but the center should still look soft. A toothpick inserted should come out with a few moist crumbs, not wet batter. Overbaking makes them dry!

- 6 Bean Chili Recipe: Hearty, Smoky Depth That Gets Richer Over Time - September 26, 2026
- 2 Gallon Red Sangria Recipe: Bold Spice and Fruit Fusion for Crowds - September 26, 2026
- 5 Star Apple Bread Recipe: Spiced Apple Swirl With Buttery Crust - September 26, 2026