
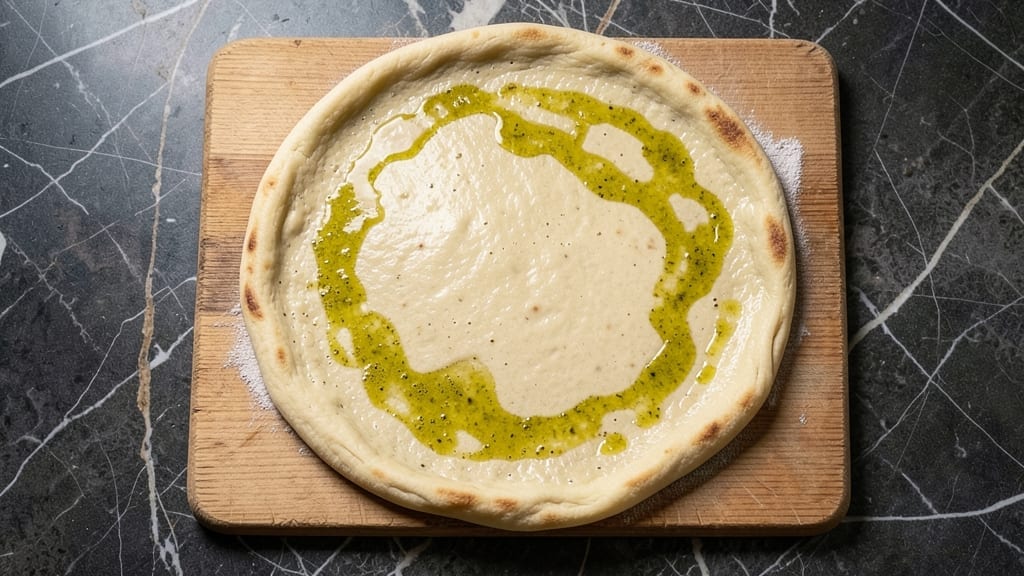
A 48-hour pizza dough recipe transforms ordinary pizza night into a gourmet experience with flavor and texture that store-bought dough can’t match. The secret lies in cold fermentation, where time works its magic to develop complex flavors and a chewy, airy crumb that’s impossible to replicate quickly.
I’ve perfected this method after years of experimentation, and the results speak for themselves—every slice tastes like it came from a high-end pizzeria.
This recipe requires minimal effort but delivers maximum flavor. You’ll mix, knead, and let the dough rest in the refrigerator for two days, allowing the yeast and flour to work their magic slowly.
The long fermentation breaks down gluten for a tender texture while developing deep, savory notes that make this dough truly special. No special equipment is needed—just patience and a little planning ahead.
By the time you’re ready to bake, your dough will be perfectly elastic and flavorful, ready to be stretched into a crispy, chewy crust. The slow fermentation also makes this dough easier to digest and more forgiving when shaping.
Whether you’re making classic Margherita or loaded deep-dish, this dough will be the star of your pizza night.
The beauty of this method is its versatility. Use half the dough for a thin-crust pizza and the rest for a thick, focaccia-style bread. The possibilities are endless, and the flavor only gets better with each batch.
Let’s get started on creating dough that will change how you make pizza forever.
Ingredients for 48hr pizza dough
Eight simple ingredients transform into restaurant-quality pizza dough with just two days of patience.
| Ingredient | Amount | Notes |
|---|---|---|
| All-Purpose Flour 🌾 | 3 ½ cups | King Arthur or bread flour preferred |
| Instant Yeast 🍞 | ¼ tsp | Active dry works too |
| Granulated Sugar 🍚 | ½ tsp | Helps yeast activate faster |
| Salt 🧂 | 1 tsp | Diamond Crystal preferred |
| Extra-Virgin Olive Oil 🫒 | 1 tbsp | For dough elasticity |
| Warm Water 💧 | 1 ¼ cups | 105-110°F ideal |
| Semolina Flour 🌾 | ¼ cup | For dusting dough |
| Cornmeal 🌽 | ¼ cup | For work surface |
The flour is everything here. King Arthur or bread flour gives that perfect chewy texture, but all-purpose works too if that’s what you’ve got. I always grab my flour from Whole Foods—their organic bread flour has a little more protein, which helps with gluten development. If you’re using all-purpose, add an extra tablespoon. The yeast? Instant yeast is easiest since you don’t need to proof it first, but active dry works fine if you let it bloom in warm water for 5 minutes. And for the love of pizza, don’t use expired yeast—it’s the most common mistake that kills good dough.
No instant yeast? Active dry yeast works—just dissolve it in warm water with sugar first and let it sit for 5-10 minutes until frothy. Running short on olive oil? Avocado oil or melted butter both work, though olive oil gives that authentic flavor. The warm water is critical—too hot kills the yeast, too cold and it won’t activate. 105-110°F is ideal. No thermometer? Test with your wrist—the water should feel warm but not hot to the touch. And if you’re worried about sugar, don’t be—this tiny amount just helps the yeast wake up faster without affecting flavor.
This dough keeps beautifully. Once shaped, store it in the fridge for up to 5 days—the flavor actually improves with more fermentation time. For longer storage, freeze portions for up to 3 months. I like to wrap each portion tightly in plastic wrap, then place in a freezer bag. When ready to use, thaw overnight in the fridge. The beauty of this dough is its versatility—use it for thin-crust pizza, thick focaccia, or even calzones. And if you make extra? Freeze half for your next pizza night.
Why You’ll Love This Recipe
- No-Fuss Mixing: Mixing this dough takes all of five minutes—just flour, yeast, sugar, salt, and olive oil tossed together in a bowl. No kneading, no waiting for the dough to chill, just stir and let it do its magic while you sip your coffee.
- Deep, Authentic Flavor: That 48-hour rise? It’s what turns this dough into something special—the sugar feeds the yeast slowly, the olive oil keeps it tender, and the salt balances everything just right. You’ll taste the difference in every chewy, crisp-edged bite.
- Weeknight Hero: Between us, this dough is my secret weapon for lazy nights. Make it on Sunday, store it in the fridge, and pull it out whenever you need a quick, satisfying meal—no last-minute grocery runs, no stress.
- Budget-Friendly Stretch: Five simple ingredients, one dough that stretches across multiple meals. Use half for tonight’s pizza, save the rest for tomorrow’s garlic knots or flatbread. It’s the kind of recipe that makes every dollar count.
Step-by-step instructions for 48-Hour pizza dough
This slow fermentation transforms ordinary flour into extraordinary pizza dough.
Mix the Dough with Precision
In a large bowl, combine the 3.5 cups all-purpose flour, 0.25 tsp instant yeast, 0.5 tsp granulated sugar, and 1 tsp salt. The sugar helps activate the yeast faster, while the salt balances flavors and strengthens the dough structure. Whisk these dry ingredients together to eliminate any lumps.
Make a well in the center and add the 1 tbsp extra-virgin olive oil and 1.25 cups warm water (105-110°F). The water should be warm enough to dissolve the sugar but not hot enough to kill the yeast. Use a wooden spoon to gradually incorporate the dry ingredients into the wet, mixing until a shaggy dough forms. Avoid overmixing at this stage—you want to preserve gluten development for the fermentation process.
Knead Until Elastic
Turn the dough onto a lightly floured surface and knead for 8-10 minutes until smooth and elastic. You’ll know it’s ready when it springs back slowly when poked and doesn’t stick to your fingers. I like to use the “windowpane test” here—stretch a small piece of dough thin enough to see light through it without tearing.
During kneading, the gluten strands align, creating that signature chewy texture. If the dough feels too sticky, add just enough of the 3.5 cups all-purpose flour to make it workable—you want to minimize extra flour but enough to handle it comfortably. Once kneaded, shape the dough into a loose ball and place it back in the bowl.
First Fermentation (The Magic Happens)
Cover the bowl tightly with plastic wrap or a damp towel and let the dough ferment at room temperature for 12 hours. This initial fermentation develops flavor and allows the yeast to work its magic. You’ll see the dough nearly double in size—this is when the gluten relaxes and flavors meld.
I like to place the dough in a warm spot, like near the oven with the light on, to maintain a consistent temperature. After 12 hours, the dough should be puffy and jiggly when gently shaken. If it hasn’t risen much, give it another 2-3 hours—patience here pays off with superior flavor. This is where the dough develops its signature depth that store-bought simply can’t match.
Cold Proof for 36 Hours
After the initial fermentation, transfer the dough to the refrigerator and let it cold-proof for 36 hours. This slow fermentation develops complex flavors and improves texture. The cold also strengthens the gluten, making the dough easier to handle later. I place mine in a sealed container to prevent drying.
During this time, the dough will continue to ferment slowly, developing those incredible aromatic compounds. You can check on it after 24 hours—if it’s still puffy and jiggly, it’s ready. If not, give it another 12 hours. The cold proofing is where the dough transforms from good to extraordinary. When you’re ready to use it, let it sit at room temperature for 1-2 hours before shaping to make it more pliable.
Shape and Rest Before Use
Once the dough has rested at room temperature, turn it out onto a surface dusted with 0.25 cup semolina flour. Divide it into 4 equal balls (about 1 pound each) and shape them into smooth, round boules. The semolina flour prevents sticking and adds a nice texture to the crust.
Place the shaped dough balls on a tray dusted with 0.25 cup cornmeal (this prevents sticking and adds a nice crunch). Cover loosely with plastic wrap and let them rest at room temperature for 30 minutes before using. This final rest allows the gluten to relax, making the dough easier to stretch and resulting in a perfectly crispy yet chewy crust. Now you’re ready to shape your pizzas!
Pro Tips For Making 48hr Pizza Dough
- WEIGH THE FLOUR: I learned this the hard way—scooping flour from the bag packs dough too loosely. Use a kitchen scale for precise 500g (or 4 cups packed) measurements. The dough’s hydration balance hinges on this, and guesswork leads to either a gummy mess or a rock-hard crust.
- COOL THE DOUGH: After the 48-hour cold proof, pull it out 1–2 hours before shaping—no need to wait until fully room temp. The outer layer will soften enough to stretch while keeping the center cool enough to handle. (Yes, even if you’re impatient like me.)
- SALT THE OIL: Dissolve the dough’s salt in the olive oil before mixing—it disperses better than sprinkling it in later. This ensures even flavor distribution, especially if you’re using a high-quality EVOO that might otherwise overpower the dough.
- STRETCH, DON’T PULL: When shaping, use your fingertips to gently press and stretch from the center outward, rotating the dough as you go. Yanking creates tough gluten strands; this method keeps the crust tender. (Your future self will thank you.)
Perfect pairings for 48hr pizza dough
Classic Topping Pairings
For a timeless Margherita, use your fermented dough as the foundation and top with san marzano tomatoes (their sweetness shines), fresh mozzarella di bufala (creamy and rich), and fresh basil leaves.
Drizzle with extra-virgin olive oil and a pinch of flaky sea salt—this combo lets the dough’s flavor truly shine. 🌿
Meat Lover’s Upgrade
Add spicy soppressata and pepperoni for a meaty punch, then finish with shaved parmigiano-reggiano and a sprinkle of red pepper flakes. The dough’s chewy texture holds up perfectly to the fatty meats, while the cold fermentation reduces the risk of soggy crust.
I like to pre-cook the meats slightly to render their fats.
Vegetarian Powerhouse
Load up with roasted eggplant, caramelized onions, goat cheese, and sun-dried tomatoes. The dough’s complex flavors balance the sweetness of the eggplant and tang of the goat cheese beautifully. For extra depth, add a drizzle of balsamic glaze after baking—it cuts through the richness perfectly.
Breakfast Pizza Twist
Use half the dough for a morning pizza topped with ricotta cheese, caramelized garlic, crispy prosciutto, and a sprinkle of fresh arugula. The fermented dough’s mellow flavor lets the breakfast ingredients take center stage without overpowering.
Add a fried egg on top right before serving for that ultimate brunch experience.
Dessert Pizza Surprise
Yes, pizza dough makes amazing dessert! Top with mascarpone cheese, fresh strawberries, and a drizzle of honey. For a Nutella version, spread the chocolate-hazelnut spread on the dough before baking, then add banana slices and toasted hazelnuts. The dough’s subtle sweetness complements the dessert toppings beautifully.
Sauce Alternatives
Skip tomato sauce entirely for a white pizza—brush the dough with garlic-infused olive oil, top with ricotta, shaved parmesan, and fresh herbs like thyme or rosemary.
For a BBQ chicken pizza, use ½ cup BBQ sauce (I love Sweet Baby Ray’s) with grilled chicken, red onions, and smoked mozzarella. The dough’s flavor profile works with any sauce style.
Nutrition facts
Frequently asked questions
Can I use this dough for anything besides pizza?
This 48-hour fermented dough works perfectly for focaccia, calzones, or even garlic knots. The slow fermentation creates an incredibly versatile base that handles different shapes and toppings beautifully. For focaccia, shape it into a rectangle and dimple with your fingers before baking.
What if my dough doesn’t rise after 12 hours?
Check your yeast first—it may be expired. Try activating 0.25 tsp active dry yeast in ¼ cup warm water with 0.5 tsp sugar for 5-10 minutes. If it doesn’t foam, replace the yeast. If yeast is fine, place the dough in a warmer spot (like near your oven with light on) for another 2-3 hours. Cold environments slow fermentation.
How do I know when the dough is ready to use?
After cold proofing, gently press the dough—it should spring back slowly (not immediately). When you’re ready to shape, let it sit at room temperature for 1-2 hours until it becomes pliable. The dough should feel soft but still hold its shape when poked. If it’s too sticky, dust with more semolina flour.
Can I make this dough without a stand mixer?
Yes! Hand-kneading works perfectly. Use a dough scraper to help fold and turn the dough on a floured surface for 8-10 minutes. The key is consistent pressure—push, fold, and rotate until smooth and elastic. For extra strength, add 1 extra tablespoon flour if needed, but keep it minimal to avoid dry dough.
Why does my dough smell sour after cold proofing?
That’s normal! The 36-hour cold fermentation creates lactic acid, which gives the dough its signature tangy flavor. If the smell is overly sharp or unpleasant, your dough may have over-fermented. Use it immediately for best results, or reduce future cold proofing to 24 hours if you prefer a milder taste.

- 3 Cheese Pimento Cheese Recipe: Sharp Cheddar, Peppery Heat, and Creamy Spread Magic - October 10, 2026
- 7 Egg Cake Recipe: Fluffy Layers With Vanilla Bean Infusion - October 10, 2026
- 3 Musketeers Cookie Recipe: Crunchy Chocolate Shells With Gooey Caramel Centers - October 10, 2026