
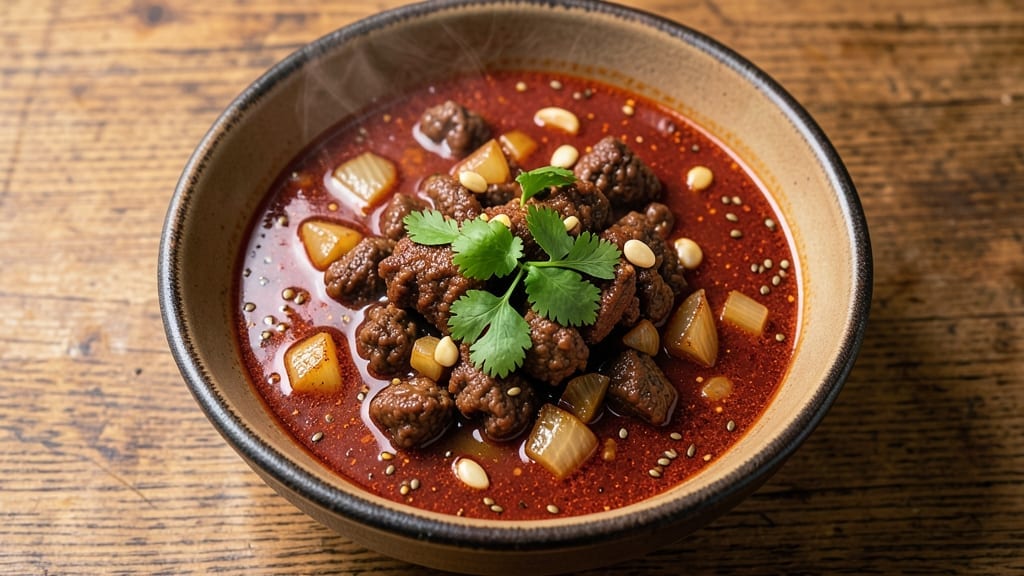
A 2 lb meat chili recipe that delivers deep, smoky flavor in one pot is the ultimate weeknight solution when you crave hearty, comforting food. This isn’t your basic chili—it’s a rich, slow-simmered blend of tender beef, caramelized onions, and beans that soak up every layer of spice and warmth.
The secret lies in browning the meat first, which builds a flavor foundation that transforms ordinary ingredients into something extraordinary. Trust me, this is the kind of chili that disappears faster than you can say “second helping.”
What sets this recipe apart is the balance of bold spices and slow cooking, which lets the flavors meld into something truly satisfying.
You’ll start with ground beef and onions that develop a deep, caramelized richness, then layer in beans, tomatoes, and a blend of chili powder and cumin for that signature smoky depth. The result? A chili so flavorful it’ll have everyone asking for the recipe—and begging for more.
It’s the kind of dish that feels like a hug in a bowl, perfect for cold evenings or game day gatherings.
By the time you’re done, you’ll have a pot of deep-smoky chili with tender beef, hearty beans, and a sauce so rich it coats every spoonful. The aroma alone will have your kitchen smelling like a cozy diner, and the taste?
That’s where the magic happens—each bite delivers a perfect harmony of spice, meatiness, and warmth. This isn’t just chili; it’s a foolproof, restaurant-quality dish that’s easier to make than you’d think.
Serve it up with all the fixings—sharp cheddar, sour cream, and green onions—but honestly, the chili stands strong on its own. Leftovers taste even better the next day, so make a big batch. This is the kind of recipe that becomes a staple in your rotation. Let’s get cooking!
Ingredients for 2 lb meat chili
Sixteen ingredients, one pot, a flavor explosion that’ll have everyone begging for seconds.
| Ingredient | Amount | Notes |
|---|---|---|
| Ground Beef (Chuck) 🥩 | 2 lb | 80/20 fat ratio preferred |
| Yellow Onion 🧅 | 1 ½ lb | Diced, medium size |
| Garlic Cloves 🧄 | 6 cloves | Minced, fresh preferred |
| Chili Powder 🌶️ | 2 tbsp | Smoked or mild variety |
| Ground Cumin 🌿 | 1 tbsp | Toasted for deeper flavor |
| Paprika 🌶️ | 1 tbsp | Smoked for extra depth |
| Diced Tomatoes 🍅 | 28 oz | San Marzano preferred |
| Black Beans 🫘 | 1 lb | Drained and rinsed |
| Kidney Beans 🫘 | 1 lb | Drained and rinsed |
| Tomato Paste 🍅 | 2 tbsp | Squeeze tube preferred |
| Beef Broth 💧 | 2 cups | Low sodium preferred |
| Dark Brown Sugar 🍚 | 1 tbsp | For caramelized depth |
| Salt 🧂 | 1 ½ tsp | Kosher or sea salt |
| Black Pepper 🌶️ | ½ tsp | Freshly ground preferred |
| Cayenne Pepper 🔥 | ¼ tsp | Adjust for heat preference |
The beef is non-negotiable—chuck roast gives you that melt-in-your-mouth texture, while 80/20 fat ratio keeps it juicy. Grab the ground chuck from the back of the meat case—it’s usually cheaper and fresher. Onions? Yellow or red work, but stay away from sweet onions—they’ll make your chili taste like dessert. The garlic? Fresh is a must—jarred garlic has zero punch. Pro tip: Toast the spices in a dry pan for 30 seconds before adding them to the pot—this wakes up their flavor and makes your whole kitchen smell amazing.
No smoked paprika? Regular paprika plus a dash of liquid smoke gets you close. Short on beans? Lentils or pinto beans work in a pinch (just adjust liquid). The San Marzano tomatoes are worth the splurge—they’re sweeter and less acidic, but any good-quality canned tomatoes will do. Running low on tomato paste? Crushed tomatoes plus a pinch of sugar mimics the thickness. And if you’re worried about the brown sugar making your chili too sweet, don’t be—it caramelizes beautifully and adds a deep, almost molasses-like richness that balances the heat.
This chili only gets better with time—24 hours in the fridge lets the flavors meld into something truly magical. Portion it out into airtight containers for easy lunches, and it’ll keep for 4-5 days. Freezing? Divide into meal-sized portions and it’ll stay good for 3 months. The best part? The longer it sits, the more the spices soak in, and the meat gets even more tender. Double the batch—you’ll want leftovers, trust me.
Why You’ll Love This Recipe
- One-Pot Magic: I swear by this recipe—just brown the beef, toss in the onions and garlic, then let the spices work their magic. No extra pots, no fuss, and the deep, smoky aroma fills the whole kitchen by the time it’s done.
- Spice Perfection: That toasted cumin and chili powder? Chef’s kiss. The beef soaks up the flavors while it simmers, giving you a rich, hearty bite that’s neither too sweet nor too spicy—just right. Honestly, the first time I made it, I went back for seconds before it even cooled.
- Weeknight Workhorse: Between us, this is my go-to when I’m too tired to think but still need dinner. It’s the kind of dish that tastes even better the next day, so I often make a double batch—half for tonight, half for tomorrow’s lunch. (Yes, even on a Tuesday night.)
- Budget-Friendly Feast: Two pounds of chuck stretches far enough to feed four hungry people, and the rest? Freezer-friendly for months. I’ll be real: it’s the kind of recipe that makes grocery day feel like a win, because you’re getting serious flavor without breaking the bank.
Step-by-step instructions for deep-smoky beans and beef chili
Here’s how to build a rich, smoky chili that simmers into perfect harmony.
Brown the Beef for Maximum Flavor
Heat a large Dutch oven or heavy pot over medium-high heat until hot. Add the 2 lb ground beef (chuck) in batches, breaking it apart with a wooden spoon as it cooks. Let each batch brown for 3-4 minutes until the meat loses its raw color and develops a deep brown crust.
This browning step is non-negotiable—it develops the Maillard reaction that creates deep, meaty flavor. Don’t rush it, and resist the urge to stir constantly. Let the beef form thick, flavorful patties before breaking them up. Once fully browned, drain all but 1 tablespoon of the rendered fat from the pot.
Sauté Aromatics Until Fragrant
Add the 1.5 lb diced yellow onion and 6 cloves minced garlic to the pot with the browned beef. Cook for 5-6 minutes until the onions soften and turn translucent, and the garlic releases its pungent aroma. Stir occasionally to prevent burning.
Here’s the thing—don’t walk away. Garlic burns in seconds, and burnt garlic ruins everything. When the garlic turns golden and smells heavenly, you’re ready for the next step. The onions should be soft enough to pierce easily with a fork but still hold their shape.
Build the Spice Base
Reduce heat to medium-low and stir in the 2 tbsp chili powder, 1 tbsp ground cumin, 1 tbsp paprika, 1.5 tsp salt, 0.5 tsp black pepper, and 0.25 tsp cayenne pepper. Cook for 1-2 minutes until the spices are fragrant and the raw taste disappears.
This is where the magic happens. The spices toast slightly in the rendered fat, releasing their essential oils and creating that irresistible chili aroma. I like to press the spices directly onto the meat with a spoon to ensure they stick and infuse properly. Don’t skip this step—it’s what separates good chili from great chili.
Add Liquids and Simmer
Pour in the 28 oz diced tomatoes, 2 tbsp tomato paste, 2 cups beef broth, and 1 tbsp dark brown sugar. Stir well to combine, scraping up any browned bits from the bottom of the pot. Bring to a gentle boil, then reduce heat to low and let it simmer uncovered for 45-60 minutes.
During this time, the chili will thicken naturally as the liquid reduces. Stir occasionally, but not constantly—you want to develop a slight crust on the bottom for extra flavor. The chili should bubble gently but not vigorously. Real talk: this is where patience pays off. The longer it simmers, the deeper the flavors become.
Incorporate Beans and Finish
Gently stir in the 1 lb drained and rinsed black beans and 1 lb drained and rinsed kidney beans. Simmer uncovered for another 15-20 minutes until the beans are heated through and the chili reaches your desired consistency. Taste and adjust seasoning if needed—you might want to add a pinch more salt or cayenne.
You’ll know it’s perfect when the beans are hot throughout and the chili has thickened to a rich, stew-like consistency. The beans should be tender but still hold their shape. Let the chili rest off the heat for 5 minutes before serving—this allows the flavors to meld completely. Serve hot with your favorite toppings like shredded cheese, sour cream, or chopped green onions.
Pro Tips For Making 2 Lb Meat Chili
- Brown the Beef First: Don’t skip the initial sear—break the beef into rough chunks and cook them in a dry skillet over medium-high heat until they lose their raw color. This step adds depth of flavor that simmering alone can’t match, and it prevents your chili from tasting like ground beef straight from the package.
- Sweat, Don’t Sauté, the Onion: After browning the beef, lower the heat and cook the diced onion in the same pot until it’s translucent, not golden. High heat caramelizes it too fast, burning before the garlic gets a chance to mellow out. Patience here means no bitter aftertaste.
- Bloom the Spices Separately: Toast the chili powder and cumin in the empty pot for 30 seconds before adding the onions—just until you smell their aroma. This wakes up their flavors without burning them, and it guarantees they don’t clump into flavorless dust in your chili.
- Simmer Longer, Stir Less: Let the chili bubble away uncovered for at least 45 minutes, stirring only once or twice. Over-mixing keeps the fat churned up and makes the texture greasy. The crust that forms on top? That’s where the best flavor hides—just break it up at the end.
Common mistakes when making perfect results
Skipping the Browning Step
This is the biggest rookie mistake I see—skipping the beef browning step. That rich, caramelized crust is where 90% of your chili’s flavor develops through the Maillard reaction. When you skip it, your chili tastes flat and one-dimensional.
I’ve made this mistake myself, and honestly, it’s a game-changer once you experience the difference. Take the extra 5-10 minutes to properly brown your meat in batches—your taste buds will thank you. 🔥
Overcrowding the Pot
Don’t try to cook all 2 lbs of beef at once unless your pot is 12 inches or larger. Overcrowding steams the meat instead of browning it, leading to pale, watery beef that releases moisture into your chili.
Cook in two batches if needed, and always use a heavy-bottomed pot like a Dutch oven to maintain even heat distribution. I learned this the hard way with my first chili attempt—my beef turned out gray and soggy. Trust me, patience here pays off in flavor. 💡
Ignoring the Spice Toasting
Many home cooks add spices directly to the pot without toasting them first. This is a missed opportunity to develop maximum flavor.
When you toast your chili powder, cumin, and paprika for 1-2 minutes in the rendered beef fat, you release their essential oils and create a fragrant aroma that transforms your chili.
I like to press the spices directly onto the meat with a spoon to ensure they stick and infuse properly. This simple step takes your chili from good to restaurant-quality. 🌶️
Not Deglazing Properly
After browning the beef, those flavorful browned bits (fond) stuck to the bottom of your pot are pure gold. When you add your onions and garlic, they should sizzle and release those caramelized flavors.
If you don’t scrape up those bits with a wooden spoon, you’re losing layers of depth in your chili. I make it a point to scrape and stir vigorously to incorporate every last bit—it makes a noticeable difference in the final product. 💫
Rushing the Simmering Time
Some recipes call for 30 minutes of simmering, but that’s not enough time for the flavors to truly meld. Your chili needs at least 1 hour of gentle simmering to develop its full depth. The longer it cooks, the more the spices and meat infuse into the sauce.
I often simmer mine for 90 minutes when I have time—it’s worth the wait for that rich, complex flavor. Patience here is key to avoiding a bland chili. ⏰
Adding Beans Too Early
Beans have a tendency to break down and turn mushy if added too soon. They need to be added after the initial 45-60 minutes of simmering when the chili has already developed its base flavor. Adding them earlier can make your chili too thin and the beans overcooked.
I like to add them in the final 15-20 minutes so they heat through without losing their texture. This simple timing adjustment keeps your beans perfect—firm but tender. 🫘
Nutrition facts
Frequently asked questions
Can I use ground turkey instead of beef?
Ground turkey works beautifully and makes this a lighter option. Use 2 lbs lean ground turkey (93/7 ratio) and add 1 tablespoon olive oil to the pot when browning to prevent drying. The cooking time will be slightly shorter—simmer for 30-40 minutes after adding liquids, as turkey cooks faster than beef.
How do I make this chili spicier?
For extra heat, add 1 extra teaspoon of cayenne pepper or ½ teaspoon of crushed red pepper flakes when toasting the spices. You can also stir in 1 chopped jalapeño (seeds removed for mild heat) with the beans. For smoky heat, add ½ teaspoon of smoked paprika or a dash of liquid smoke at the end.
Can I make this chili in an Instant Pot?
Yes! Brown the beef in a skillet first, then transfer to your Instant Pot with all other ingredients. Cook on high pressure for 15 minutes, then quick-release. The beans may need an additional 5-10 minutes of natural release time to heat through. For thicker chili, reduce the broth by ½ cup to account for the Instant Pot’s moisture retention.
Why does my chili turn out too thin?
Thin chili usually means too much liquid or not enough simmering time. First, check your measurements—reduce broth by ½ cup if needed. For future batches, simmer uncovered for 10-15 extra minutes to thicken naturally. If it’s still too thin, mix 1 tablespoon cornstarch with 2 tablespoons water and stir in at the end.
How long will leftovers keep?
Store chili in airtight containers in the fridge for up to 5 days or freeze for 3 months. The flavors actually improve over time! For best texture, reheat on the stove over medium-low heat with a splash of water or broth. Microwaving can make beans mushy—avoid if possible.
