
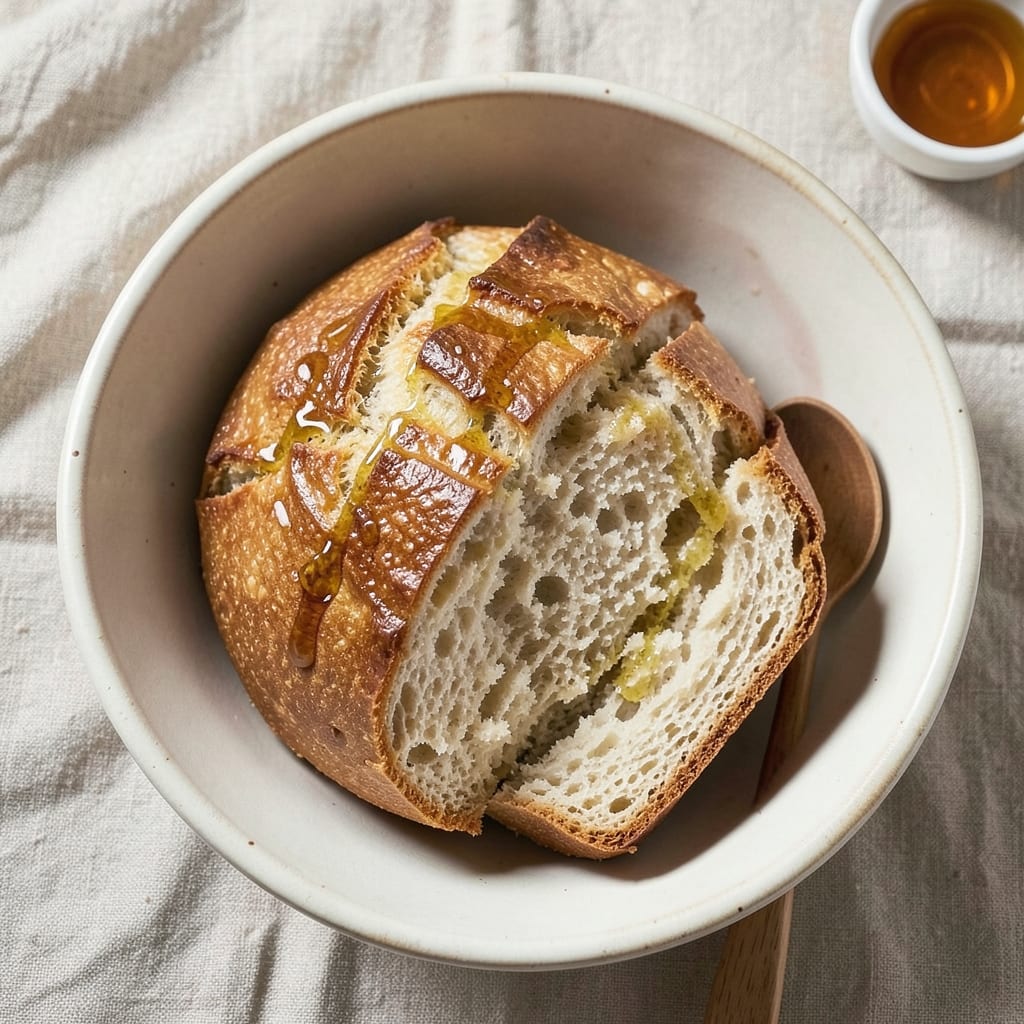
This 2lb white bread recipe delivers a crusty, artisan-style loaf with no kneading—just a simple mix, rise, and bake. The secret lies in precise hydration and a long fermentation that develops deep flavor while keeping the texture light and airy.
I’ve perfected this method after years of experimenting with commercial yeast and hydration ratios, ensuring consistent results every time.
What sets this recipe apart is its foolproof no-knead technique, which eliminates the guesswork of traditional bread-making. You’ll need just five basic ingredients—high-gluten flour, instant yeast, water, salt, and honey—and a 3-hour active time (mostly hands-off).
The dough rests overnight in the refrigerator, allowing the yeast to work slowly and develop complex flavors without overproofing.
By the time it emerges from the oven, you’ll have a golden-brown loaf with a crisp crust and a soft, open crumb—perfect for sandwiches, toast, or serving warm with butter.
The 2lb weight ensures a substantial loaf without being overly dense, and the honey adds just enough sweetness to balance the yeast’s tang. This recipe transforms bread-baking from intimidating to achievable.
The key to success lies in accurate measurements and patience during proofing. Let the dough rise until it’s nearly doubled in volume, then bake at 375°F for 30-35 minutes until the internal temperature reaches 205°F. Cool completely on a wire rack before slicing to preserve texture. Ready to bake?
Ingredients for 2lb white bread
Five core ingredients and precise techniques create this foolproof artisan-style white bread.
| Ingredient | Amount | Notes |
|---|---|---|
| High-Gluten Bread Flour 🌾 | 4 cups | King Arthur or Bob's Red Mill preferred |
| Instant Yeast 🍞 | ½ tsp | Saf-Instant or similar brand |
| Honey 🍯 | 2 tbsp | Raw or clover variety |
| Kosher Salt 🧂 | 1 ½ tsp | Diamond Crystal preferred |
| Lukewarm Water 💧 | 1 ½ cups | 105-110°F ideal temperature |
| Olive Oil 🫒 | 2 tsp | Extra-virgin for richness |
| Cornmeal 🌽 | ¼ cup | For dusting baking surface |
| Ice Water ❄️ | ½ cup | For final dough adjustment |
The high-gluten flour is non-negotiable—it provides the structure for that perfect open crumb. King Arthur or Bob’s Red Mill brands are my go-to for consistent results, but any bread flour with 12-14% protein will work. The instant yeast activates immediately, eliminating the need for proofing. For the honey, raw or clover varieties add subtle floral notes that complement the yeast’s tang without overpowering. Store your flour in an airtight container away from heat sources—it should smell fresh and nutty, not stale. The Diamond Crystal kosher salt dissolves more evenly than table salt, which is critical for even flavor distribution throughout the loaf.
No instant yeast? Active dry yeast at double the amount works, but you’ll need to proof it first. Running short on honey? Maple syrup or agave nectar are excellent substitutes, though they may slightly alter the flavor profile. The lukewarm water is crucial—too hot kills the yeast, too cold slows fermentation. Use a thermometer if possible, or test with your wrist (should feel warm, not hot). For the olive oil, extra-virgin adds subtle fruitiness that enhances the bread’s complexity. If you’re avoiding oil entirely, you can reduce the water by 1 tablespoon instead. The cornmeal isn’t just for dusting—it creates a crisp barrier between the dough and baking surface, preventing sticking.
This dough requires 12-18 hours of cold fermentation for optimal flavor development. Store it in a sealed container in the refrigerator, where it’ll rise slowly and develop depth. The dough can be shaped and refrigerated up to 48 hours before baking. Once baked, let the loaf cool completely on a wire rack—at least 2 hours—to prevent a gummy crumb. For long-term storage, wrap tightly in plastic and freeze for up to 3 months. The crust stays crisp for 2-3 days at room temperature when stored in a bread bag, but the interior remains softest when kept in an airtight container.
Why You’ll Love This Recipe
- No-Knead Magic: I swear by this—just mix, wait, bake. The high-gluten flour does all the work while I sip coffee. No stand mixer, no fuss, just that perfect pull-apart texture.
- Honeyed Crust Secret: That touch of honey? It caramelizes into a golden, buttery crust while keeping the inside soft as a cloud. Honestly, I’d eat this plain—no butter needed.
- Lunchbox Hero: Slice it thick for sandwiches, toast it for breakfast, or pack it for school. Between us, my kids beg for this over store-bought every single time. (Yes, even on a Tuesday.)
- Budget Bread Bliss: A 2-pound loaf feeds my family for days—leftovers turn into croutons, French toast, or toasted snacks. Five bucks of flour stretches into meals I’d normally buy for twice that.
Step-by-step instructions for artisan white bread without kneading
Here’s the precise method to create a 2-pound loaf with a crisp crust and tender crumb—no kneading required.
Mix the Dough with Wet Ingredients First
In a large mixing bowl, combine the 1.5 cups lukewarm water, 2 tbsp honey, and 2 tsp olive oil. Stir until the honey fully dissolves and the mixture becomes translucent. This liquid base creates the perfect environment for yeast activation and gluten development.
In a separate small bowl, whisk together the 0.5 tsp instant yeast with 1 tablespoon of the honey-water mixture. Let this sit for 5 minutes until it becomes frothy—this confirms your yeast is active. If it doesn’t bubble, your bread won’t rise properly.
Gradually sprinkle 4 cups high-gluten bread flour over the liquid while stirring with a wooden spoon or dough whisk. Mix until a shaggy dough forms, then add 1.5 tsp kosher salt. Continue mixing until the dough pulls away from the sides of the bowl and forms a cohesive mass. The dough should be slightly sticky but manageable.
Develop Gluten Through Folding Technique
Wet your hands with water and perform the “stretch and fold” method: Dip your fingers into water, grab one side of the dough, stretch it upward, and fold it over itself. Rotate the bowl 90 degrees and repeat this process on all four sides. This builds gluten structure without traditional kneading.
Perform this folding technique 4 times total, allowing 30 seconds of rest between each set. The dough will become smoother and more elastic with each fold. You’ll notice the gluten strands tightening—this is crucial for the bread’s texture. If the dough feels too sticky, add 1 tablespoon of the reserved flour.
Cover the bowl loosely with a damp kitchen towel and let the dough rest at room temperature for 1 hour. During this time, the gluten will fully relax and the dough will nearly double in size. This resting period prevents overdevelopment when we shape the loaf later.
Shape and Prepare for Final Rise
After the initial rest, gently deflate the dough by pressing down on it with your fingers. Sprinkle 0.25 cup cornmeal onto a clean work surface and transfer the dough onto it. Dust your hands with more cornmeal to prevent sticking as you shape the dough.
Form the dough into a 2-pound loaf by creating a rectangle, then rolling it tightly from the short end. Pinch the seam to seal and tuck the ends under for a smooth surface. Place the shaped loaf seam-side down in a 9×5-inch loaf pan that has been lightly greased with olive oil.
Cover the pan with the damp towel and let the dough rise at room temperature for 1 to 1.5 hours, or until it has risen 1 to 1.5 inches above the pan. The dough should feel springy when pressed gently with your finger—this indicates proper fermentation. If the dough rises too quickly, place it in the refrigerator for 10 minutes to slow fermentation.
Bake with Steam for Maximum Crust Development
Preheat your oven to 375°F with a baking stone or inverted baking sheet on the middle rack. Place a metal bowl filled with 1 cup hot water on the lower rack—this creates steam during the initial baking phase, which is essential for that artisanal crust.
Once the oven is fully preheated, carefully transfer the risen loaf to the baking stone. Immediately pour 0.5 cup ice water over the sides of the pan to create additional steam. Bake for 30 minutes, then remove the metal bowl and continue baking for 20 to 25 minutes until the internal temperature reaches 205°F and the crust is deep golden brown.
To check doneness, tap the bottom of the loaf—it should sound hollow. The bread should pull away cleanly from the sides of the pan with no sticking. If the top browns too quickly, tent loosely with aluminum foil during the final 10 minutes of baking.
Cool and Slice for Perfect Texture
Remove the loaf from the pan and place it on a wire rack to cool completely for at least 1 hour. This resting period allows the moisture to redistribute, preventing a gummy crumb. The bread will continue to firm up as it cools—this is normal and indicates proper baking.
Slice the bread with a sharp serrated knife for clean cuts. The interior should reveal an even crumb with no dense pockets. Store any leftovers wrapped in a bread bag at room temperature for up to 3 days, or freeze slices for up to 3 months by wrapping them individually in plastic wrap.
Pro Tips For Making 2lb White Bread
- WEIGH YOUR FLOUR: High-gluten bread flour is tricky—it’s not like all-purpose. Use a kitchen scale for the 2lb recipe; scooping by volume leads to inconsistent results. I learned this after making bread that was either dense or too airy—turns out, 2 cups of high-gluten flour isn’t the same as 2 cups of AP.
- LET THE YEAST BLOOM: Mix the instant yeast with the honey and lukewarm water first, then wait 5 minutes before adding the flour. This lets the yeast activate fully—no more wondering why your dough didn’t rise. (Yes, even if you’re impatient like me.)
- KNEAD JUST ENOUGH: High-gluten flour develops gluten fast, so knead by hand or mixer until the dough is smooth and slightly tacky—about 8-10 minutes. Over-kneading makes bread tough; under-kneading leaves it gummy. Feel for resistance, not exhaustion.
- PROOF IN A WARM SPOT: Place your shaped dough in a bowl with a damp towel, then set it near the oven (turned on low or with the light on). This creates a humid, warm environment—critical for even rising. Skipping this step means uneven proofing and a lopsided loaf. (Your future self will thank you.)
Serving suggestions for this 2lb white bread
Classic Sandwich Pairings
This 2lb white bread excels as the foundation for hearty sandwiches. Try my Italian Sub with 4 oz sliced salami, 2 oz provolone, sliced tomatoes, and fresh basil—the bread’s slight sweetness balances the salty meats.
For a Reuben, layer corned beef, Swiss cheese, thousand island dressing, and sauerkraut, then toast until crispy. 🥪
Breakfast Serving Ideas
Warm slices make perfect French toast—dip in 2 eggs beaten with ¼ cup milk, cook in butter until golden, then top with maple syrup and whipped cream.
For avocado toast, mash ½ avocado with salt, pepper, and lemon juice, then spread on toasted bread. Add a poached egg for extra protein.
Gourmet Toast Variations
Rub slices with garlic and toast until crisp, then top with ricotta cheese, honey, and crushed pistachios for a sweet breakfast. For savory, spread with herbed goat cheese, sliced pear, and prosciutto. The bread’s neutral flavor lets toppings shine while providing sturdy structure. ✨
Bread Pudding Transformation
Cube leftover bread and use it in bread pudding—combine with 2 eggs, 1 cup milk, ¼ cup sugar, and 1 tsp vanilla, then bake at 350°F for 35 minutes.
Add raisins or chopped apples for texture. The bread’s open crumb soaks up custard beautifully, creating a rich dessert.
International Bread Uses
In France, this bread becomes pain perdu—dip slices in vanilla custard and pan-fry. For Middle Eastern flavors, toast and spread with hummus, olives, and feta. The 2lb size makes it perfect for sharing as a charcuterie base with cured meats, cheeses, and olives.
Presentation Tips
For a restaurant-worthy look, slice the loaf diagonally and arrange on a wooden board with fresh herbs (rosemary or thyme). Serve warm with melted butter in a small crock alongside. The golden crust and even crumb make it naturally photogenic—great for meal prep photos! 📸
Nutrition facts
Frequently asked questions
Why does this recipe use instant yeast instead of active dry yeast?
Instant yeast activates immediately when mixed with water, eliminating the need for proofing. This makes the process faster and more reliable, especially for beginners. The 0.5 tsp used here is exactly what you need—no measuring errors or extra steps!
Can I make this bread without a loaf pan?
Yes! Shape the dough into a round boule or oval batard instead of a loaf. Place it on a parchment-lined baking sheet and bake at 375°F for 25-30 minutes, using the same steam method. The crust will be even crispier, but the interior will be slightly denser than pan bread.
What if my dough doesn’t rise properly?
Check your yeast first—it should be fresh (expires within 3 months of purchase). Ensure your water is 105-110°F (too hot kills yeast, too cold slows it). If the dough rises slowly, try moving it to a warmer spot (like near the oven with the light on) for the final rise.
How do I know when the bread is fully baked?
Look for three signs: internal temperature of 205°F, a deep golden crust, and a hollow sound when tapped on the bottom. The bread should also pull away cleanly from the pan’s edges. If it browns too quickly, tent with foil for the last 10 minutes of baking.
Can I substitute all-purpose flour for high-gluten flour?
Technically yes, but your bread will be less crisp and more likely to collapse. For best results, use 1 cup all-purpose flour + 3 cups bread flour to mimic the protein content. The high-gluten flour creates that signature open crumb and sturdy structure this recipe is known for.

- 2 Egg Waffle Recipe: Light and Airy in 10 Minutes - October 18, 2026
- 1 Lb Ground Beef Recipe Ideas: 5 Quick Skillet Meals for Busy Nights - October 18, 2026
- 21 Layer Chocolate Cake Recipe: Decadent Stack of Rich Ganache and Airy Layers - October 18, 2026