
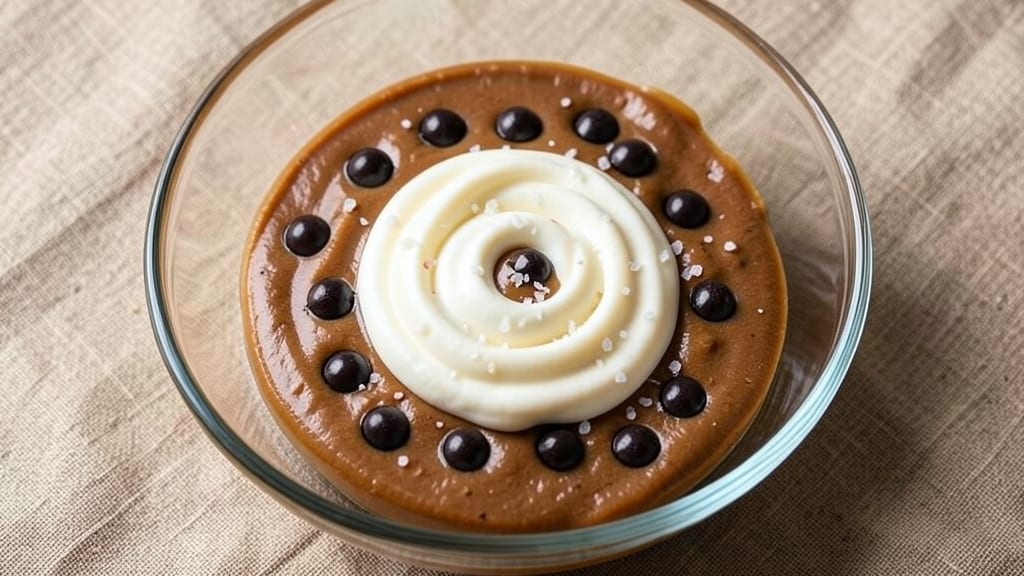
This 3-ingredient peanut butter fudge recipe with marshmallow cream delivers decadent, no-bake richness in just 10 minutes—no fancy equipment or cooking skills required. The secret lies in marshmallow cream, which binds everything together while creating that signature silky, melt-in-your-mouth texture.
I developed this recipe after craving something simple yet indulgent, and it became an instant favorite for quick dessert cravings.
The beauty of this recipe is its simplicity: just creamy peanut butter, marshmallow cream, and a pinch of salt (or optional chocolate chips for extra decadence). The marshmallow cream acts as both a binder and a sweetener, eliminating the need for sugar or eggs while ensuring the fudge sets perfectly.
It’s the kind of dessert that feels like a treat but comes together faster than you can say “no-bake.”
What you’ll end up with is a smooth, velvety fudge with a rich peanut butter flavor and just the right amount of sweetness. The texture is firm yet tender, cutting cleanly without crumbling—ideal for portioning into squares or breaking into bite-sized pieces.
This recipe is foolproof for beginners, but even experienced bakers will appreciate how effortlessly it delivers restaurant-quality results.
Best of all, it requires no oven or stovetop—just a microwave and a little patience for setting. Store it in the fridge for up to a week, or keep it at room temperature for a few days if your kitchen stays cool.
For variations, try adding chocolate chips, crushed peanuts, or a sprinkle of sea salt for extra depth. Let’s make this fudge!
Ingredients for 3 ingredient peanut butter fudge recipe with marshmallow cream
Three ingredients, one microwave, and pure indulgence in minutes.
| Ingredient | Amount | Notes |
|---|---|---|
| Creamy Peanut Butter 🥜 | 1 cup | Natural, unsweetened preferred |
| Marshmallow Cream 🍬 | 1 cup | Fluff brand recommended |
| Sea Salt 🧂 | ½ tsp | Fine grain for even distribution |
| Dark Chocolate Chips 🍫 | ½ cup | Optional for extra decadence |
The peanut butter makes all the difference here—natural, unsweetened is ideal since it avoids added sugars that can alter the texture. Fluff marshmallow cream is non-negotiable for that signature marshmallow fudge flavor (the other brands just don’t cut it). I always grab Fluff at Costco—it’s cheaper and lasts forever. For the chocolate chips, Enjoy Life brand is my go-to since it’s vegan-friendly and melts beautifully. If you’re feeling extra fancy, toast the peanut butter in the microwave for 30 seconds first—it deepens the flavor without any extra effort.
No marshmallow cream? Mini marshmallows melted with a splash of coconut oil works in a pinch, though the texture won’t be quite as smooth. Running low on peanut butter? Sunflower seed butter gives a similar texture and works perfectly. The salt is optional but worth it—Maldon flaky sea salt adds that gourmet touch without overpowering. For a nutty crunch, fold in crushed peanuts at the end. And if you’re worried about the fudge being too rich, the chocolate chips actually balance it out by adding a contrasting texture.
This sets in about 10 minutes in the fridge, but patience is key—don’t rush it. Store in an airtight container for up to 1 week in the fridge, or 3 months frozen. I like to portion it into small squares right after it sets—makes for perfect single-serving treats. If your kitchen gets warm, keep it chilled to prevent melting. The fudge actually tastes better the next day as all the flavors meld together.
Why You’ll Love This Recipe
- No-Fuss Magic: I swear, this takes less effort than microwaving leftovers. Just melt peanut butter and marshmallow cream together, fold in chocolate chips, and let it set—no baking, no stress. That’s it.
- Rich & Salty Bliss: The peanut butter gives this fudge its deep, nutty soul, while the marshmallow cream keeps it silky smooth. A pinch of sea salt? Suddenly, it’s restaurant-quality without the pretension.
- Party or Pajamas: Between us, this is my go-to for last-minute gifts (wrap it in parchment, tie a ribbon) or when I’m too tired to cook. The chocolate chips add little bursts of texture that make it feel special—no matter the occasion.
- Budget Win: I make a whole batch for under $5 and it lasts forever. Store it in the fridge for weeks, or even freeze portions for quick treats. Honestly, it’s the kind of recipe that makes me feel like I’m feeding people fancy things without breaking the bank.
Step-by-step instructions for no-bake peanut butter fudge
This ultra-simple method delivers velvety, rich fudge with just four ingredients—no oven required.
Combine Peanut Butter and Marshmallow Cream
In a medium microwave-safe bowl, combine the 1 cup Creamy Peanut Butter and 1 cup Marshmallow Cream. I always use a glass or ceramic bowl for even heating—metal can cause hot spots. Stir with a silicone spatula until completely smooth, scraping the bottom and sides to ensure no unmixed pockets remain.
Microwave in 30-second intervals on high power, stirring vigorously between each interval. You’re looking for a thick, ribbon-like consistency that holds its shape when you lift the spatula—about 1 to 1.5 minutes total. Overmixing can incorporate air, so stop as soon as it reaches 160°F on an instant-read thermometer. The mixture should be hot but not bubbling.
Fold in Salt and Chocolate
Immediately remove the bowl from the microwave and let it cool for 1 minute—just enough to handle safely. Sprinkle the 0.5 tsp Sea Salt evenly over the surface. Using the same spatula, gently fold the salt into the mixture in a figure-eight motion. This ensures even distribution without creating salt clumps that could make individual bites too salty.
Next, add the 0.5 cup Dark Chocolate Chips and fold them in using the same technique. Work quickly but carefully—chocolate melts fast. You want the chips to soften slightly but not fully dissolve. If you notice the mixture thickening too much, microwave it again in 10-second bursts until it reaches 150°F, stirring between each burst. The fudge should coat the back of a spoon but still hold its shape when dropped from a spoon.
Pour and Set
Line an 8×8-inch baking dish with parchment paper, leaving an overhang on all sides for easy removal. Pour the fudge mixture into the prepared dish and smooth the top with the spatula. Tap the dish gently on the counter a few times to release any air bubbles that may have formed during mixing. This ensures a clean, smooth surface when it sets.
Refrigerate the fudge for at least 2 hours—this is crucial for proper texture. You’ll know it’s ready when it’s firm enough to hold its shape but still soft enough to slice cleanly. For best results, let it chill overnight in the fridge. The longer it sets, the richer and creamier the texture becomes. If you’re impatient, you can speed up the process by placing the dish in the freezer for 30 minutes, but the texture won’t be as refined.
Cut and Serve
Once fully set, remove the fudge from the refrigerator and let it sit at room temperature for 5 minutes to soften slightly. This makes it easier to slice without tearing. Using a sharp knife, cut the fudge into 16 equal squares—about 2 inches per side. For clean cuts, dip the knife in hot water between slices to prevent sticking.
Serve immediately or store in an airtight container in the refrigerator for up to 1 week. The fudge will keep its creamy texture if stored properly, though the chocolate chips may soften slightly at room temperature. For a decadent touch, dust the top with an extra pinch of sea salt before serving. Each bite should deliver a perfect balance of rich peanut butter, sweet marshmallow cream, and a subtle salty crunch from the chocolate.
Pro Tips For Making 3 Ingredient Peanut Butter Fudge Recipe With Marshmallow Cream
- Mix on Low: Your blender’s going to work harder than you think—start on low speed and gradually increase. I learned this the hard way after overheating my peanut butter and ending up with a greasy mess instead of smooth fudge. Let the machine do the work, not you.
- Use Room-Temp Butter: If your marshmallow cream’s in the fridge, take it out 30 minutes before mixing—cold butter makes the fudge grainy. I was skeptical until I tried it; now I double-check the jar’s temperature before starting.
- Don’t Rush the Set: After pouring the fudge into the pan, let it sit for 45 minutes before cutting—no peeking. I resisted the urge to slice early, and the pieces fell apart like sad cake. Patience here guarantees clean cuts.
- Salt Last: Sprinkle the sea salt after the fudge’s fully set and cut—otherwise, it sinks into the marshmallow cream and disappears. A light hand here makes the flavor pop without overpowering. (Yes, even if you’re impatient like me.)
Regional styles of this 3 ingredient peanut butter fudge recipe with marshmallow cream
Southern Sweet Tooth
In the South, this fudge gets a maple syrup twist—swap the marshmallow cream for ¼ cup maple syrup mixed with ½ cup mini marshmallows melted until smooth. The syrup adds a caramel-like depth that pairs perfectly with the peanut butter.
I first tried this version at a Mississippi roadside stand, and it became my go-to for potlucks. 🍯
Midwest Crunch
Up north, they love adding ½ cup crushed graham crackers or chopped pecans for texture. The graham crackers give it a cookie-like crunch, while pecans add a buttery richness.
This variation is a hit at Wisconsin fudge festivals, where vendors sell it in squares with a side of vanilla ice cream. I recommend toasting the pecans first for extra flavor.
West Coast Vegan Twist
California bakers often make this nut-free by using sunflower seed butter instead of peanut butter. They also add vegan chocolate chunks and a sprinkle of crushed pretzels for a salty-sweet contrast.
This version is a staple at LA vegan dessert pop-ups. The pretzels add a satisfying crunch that balances the creamy texture perfectly.
Northeast Salted Caramel
New England cooks elevate this fudge with a caramelized onion swirl. Cook ½ cup finely chopped onions in 1 tbsp butter until soft, then mix into the marshmallow cream before combining with peanut butter.
Top with flaky sea salt and caramel drizzle before setting. This version is inspired by Maine’s love of sweet-and-salty flavor combos.
Texas BBQ Fusion
For a bold twist, add ½ cup BBQ sauce (like Starkist BBQ) to the marshmallow cream before mixing. Stir in chopped bacon bits and crushed peanuts for a smoky, sweet, and salty fudge that’s perfect with ice cream.
This fusion is a hit at Texas state fairs and brings a whole new dimension to the classic recipe. 🌶️
Pacific Northwest Berry Blast
In the Pacific Northwest, they fold in ½ cup mashed raspberries or blueberries along with the chocolate chips. The berries add a tart contrast that cuts through the richness.
This version is a favorite at Seattle farmers’ markets and pairs beautifully with a scoop of coconut milk ice cream. The berries keep the fudge moist for days.
Nutrition facts
Frequently asked questions
Can I make this fudge without marshmallow cream?
Yes, but the texture will be different. Replace 1 cup marshmallow cream with ½ cup mini marshmallows melted with 2 tbsp coconut oil in the microwave. Stir until completely smooth, then proceed with the recipe. The result will be slightly less creamy but still delicious. For extra richness, add 1 tbsp powdered sugar to help bind the mixture.
Why did my fudge turn out too soft?
This usually happens if you didn’t chill it long enough or if the mixture was too warm when poured. For best results, refrigerate for at least 2 hours (overnight is ideal). If your kitchen is warm, place the dish in the freezer for 30 minutes to speed up setting. Also, ensure your peanut butter and marshmallow cream were at room temperature before mixing.
How do I store leftover fudge?
Store in an airtight container in the refrigerator for up to 1 week. For longer storage, freeze for up to 3 months. To prevent sticking, wrap individual squares in parchment paper. If the chocolate chips soften at room temperature, keep the fudge chilled until serving. The texture actually improves after 24 hours as flavors meld together.
Can I make this fudge nut-free?
Swap the peanut butter for sunflower seed butter or soy nut butter for a nut-free version. The texture remains creamy, though sunflower seed butter may have a slightly different flavor profile. For extra decadence, add vegan chocolate chunks or crushed pretzels as a topping. This works perfectly for those with nut allergies.
What’s the secret to clean cuts when slicing?
Let the fudge sit at room temperature for 5 minutes before slicing to soften slightly. Use a sharp knife and dip it in hot water between cuts to prevent sticking. For perfect squares, press down firmly and wipe the knife clean after each slice. If the fudge tears, it likely wasn’t chilled long enough—try refrigerating it for another 30 minutes.

- 3 Cheese Pimento Cheese Recipe: Sharp Cheddar, Peppery Heat, and Creamy Spread Magic - October 10, 2026
- 7 Egg Cake Recipe: Fluffy Layers With Vanilla Bean Infusion - October 10, 2026
- 3 Musketeers Cookie Recipe: Crunchy Chocolate Shells With Gooey Caramel Centers - October 10, 2026