
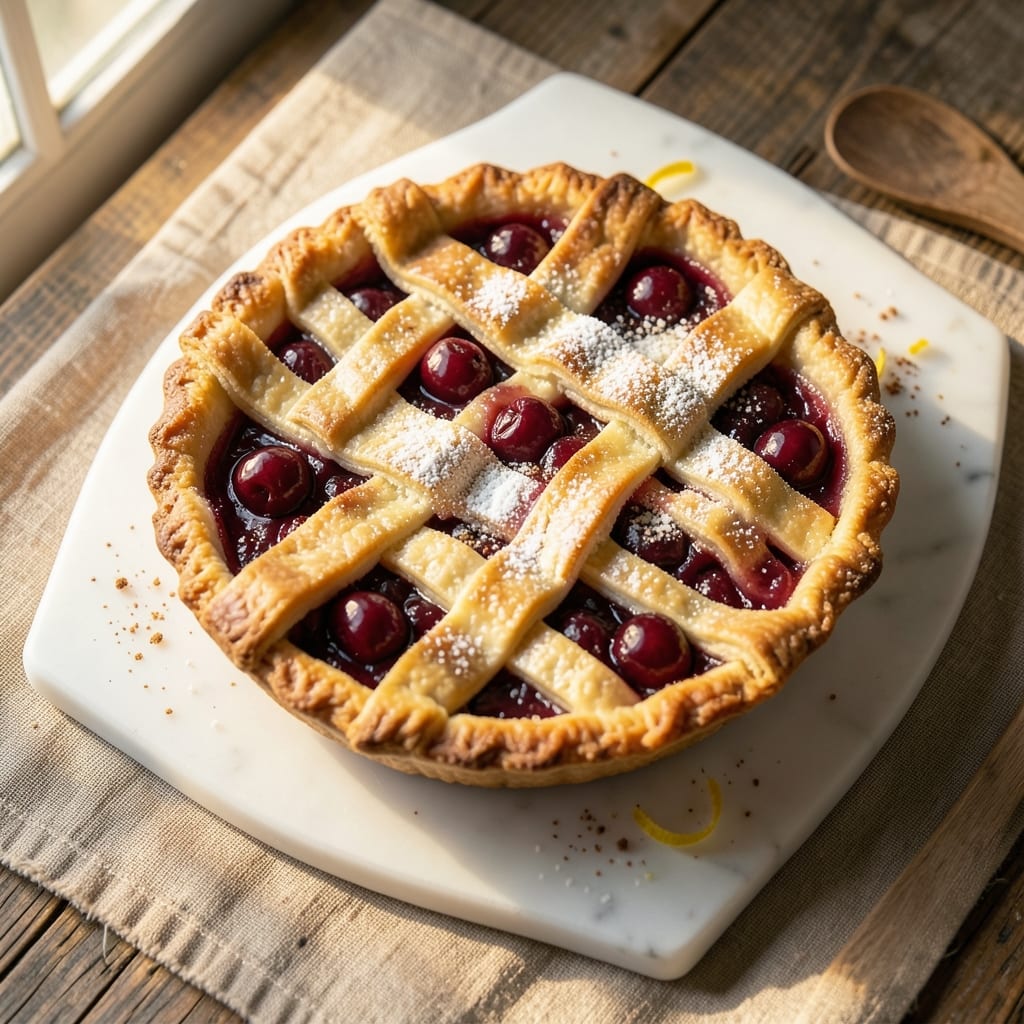
This 6-inch cherry pie recipe delivers restaurant-quality dessert in a portable, single-serving size—ideal for picnics, potlucks, or satisfying a single craving. The secret lies in balancing tart cherry filling with a buttery, flaky crust that holds its shape perfectly.
I’ve tested countless variations, and this method ensures a crisp yet tender lattice top that stays golden without burning, even in home ovens.
What sets this recipe apart is the foolproof technique for handling cherry fillings—no weeping, no soggy crusts. You’ll start with a classic pie dough (or use store-bought for convenience), then build layers of flavor through a spiced cherry mixture that thickens just enough to hold its shape.
The lattice crust isn’t just decorative; it creates those signature crispy, caramelized edges that make every bite irresistible.
By the time it emerges from the oven, you’ll have a perfectly balanced pie with a tender, flaky crust and a filling that’s tart-sweet with just the right amount of spice.
The lattice pattern adds visual appeal while ensuring even baking, so every slice delivers that ideal combination of textures—crisp, creamy, and juicy. This is the kind of dessert that feels special enough for company but simple enough for a weeknight treat.
Whether you’re serving it warm with vanilla ice cream or letting it cool for a handheld picnic dessert, this pie is designed to impress. The recipe scales easily for larger batches, but the 6-inch size makes it perfect for meal prep or gifting. Let’s get baking!
Ingredients for 6 inch cherry pie
Classic tartness meets buttery flakiness in this portable dessert masterpiece.
| Ingredient | Amount | Notes |
|---|---|---|
| Pitted Dark Sweet Cherries 🍒 | 2 ½ cups | Fresh or frozen, pitted and halved |
| Granulated Sugar 🍚 | 1 ¼ cups | For filling sweetness balance |
| All-Purpose Flour 🌾 | ¼ cup | For thickening filling |
| Lemon Juice 🍋 | 2 tbsp | Freshly squeezed for brightness |
| Cornstarch 🌽 | 1 tbsp | Prevents weeping filling |
| Ground Cinnamon 🌿 | 1 tsp | For warm spice depth |
| Salt 🧂 | ¼ tsp | Diamond Crystal preferred |
| Unsalted Butter 🧈 | 1 cup | Cold, cubed for crust |
| All-Purpose Flour 🌾 | 2 ½ cups | Plus 1 tbsp for dough |
| Ice Cubes ❄️ | ½ cup | For cold butter handling |
| Vanilla Extract 🌸 | 1 tsp | Pure vanilla for flavor |
| Egg Yolk 🥚 | 1 whole | For dough binding |
| Vanilla Ice Cream 🍦 | ½ cup | Optional serving suggestion |
The cherries make or break this pie—Bing or Rainier varieties work best for their natural sweetness and vibrant color. Trader Joe’s and Whole Foods often carry perfect pitted cherries in the summer, but frozen works just as well if you pit them yourself. For the filling, organic sugar adds subtle depth, but regular granulated works fine. The key is balancing tartness—start with the full amount of lemon juice, then adjust to taste. If using frozen cherries, thaw and drain them completely to prevent a soggy crust.
No fresh cherries? Canned pie filling in a pinch, but you’ll miss the fresh fruit’s natural juices. Short on cornstarch? Extra flour at half the amount works, but your filling might thicken differently. For the crust, store-bought pie crust saves time, but homemade gives that signature flakiness. The egg yolk is non-negotiable—it’s what creates that tender, layered texture. If you’re gluten-sensitive, swap the all-purpose flour for a 1:1 gluten-free blend, but expect slightly less flaky layers. The vanilla extract should be pure—imitation won’t give the same depth of flavor.
This pie keeps beautifully—3 days at room temperature wrapped in parchment, or 1 week in the fridge. For longer storage, freeze the fully baked (but cooled) pie for up to 3 months. To reheat, bake at 350°F for 10-15 minutes until warmed through. The lattice crust stays crisp even when reheated, making it perfect for picnics. I always make an extra crust—leftover dough freezes well for future pies or hand pies. The ice cubes in the dough are crucial—they keep the butter cold enough to create those perfect flaky layers.
Why You’ll Love This Recipe
- No Pitting Nightmare: I swear by this recipe because those stubborn cherry pits? Gone in seconds. Just toss the pitted cherries straight into the pan—no messy work, no sore fingers. The cornstarch thickens them perfectly without turning gluey, so you’re left with that just-right jammy texture.
- Sunshine in a Crust: That lemon juice splash? It’s the secret weapon. Brightens the deep sweetness of the cherries so every bite feels like summer—even when it’s gray outside. The sugar caramelizes just enough to make the filling taste like it’s been baking all day, not rushed.
- Picnic to Potluck: Six-inch pies are my go-to for anything. Pack them for a tailgate, slice one for a cozy dinner, or freeze half for when you’re too tired to bake. The crust holds up like a champ, and the filling stays luscious even after reheating—no sad, dry pie here.
- Budget-Friendly Luxury: Dark sweet cherries might sound fancy, but this recipe uses them smart. A single bag stretches across two pies, and the flour crust costs pennies compared to store-bought. Plus, leftovers? They disappear faster than I can say “second slice.”
Step-by-step instructions for 6-Inch cherry pie
Here’s how to create a perfectly balanced tart-sweet cherry filling and flaky crust every time.
Prepare the Cherry Filling
In a medium saucepan, combine the 2.5 cups pitted dark sweet cherries, 1.25 cups granulated sugar, 2 tbsp lemon juice, 1 tbsp cornstarch, 1 tsp ground cinnamon, and 0.25 tsp salt. Stir gently to distribute the spices evenly throughout the cherries.
Place the saucepan over medium heat and bring to a gentle simmer. Let it cook for 5-7 minutes, stirring occasionally, until the cherries begin to soften and the mixture thickens noticeably. You’ll know it’s ready when the filling coats the back of a spoon and the cherries release their juices freely. Remove from heat immediately to preserve the bright cherry flavor.
Transfer the filling to a bowl and let it cool completely before using. This cooling step is crucial—it prevents the filling from cooking too much when added to the crust later. If you’re using frozen cherries, make sure they’re fully thawed before starting this process.
Make the Pie Crust
In a large bowl, combine the 1 cup cold unsalted butter (cut into cubes), 2.5 cups all-purpose flour, 0.5 cup ice cubes, 1 tsp vanilla extract, and 1 whole egg yolk. Using a pastry cutter or your fingers, work the butter into the flour until the mixture resembles coarse crumbs with pea-sized butter pieces remaining.
Add 1-2 tablespoons of ice water, 1 tablespoon at a time, just until the dough begins to come together. Be careful not to overwork the dough—this can lead to a tough crust. Once the dough forms a rough ball, divide it into two equal portions. Flatten each portion into a 6-inch round disc, wrap in plastic wrap, and refrigerate for 30 minutes to firm up.
Preheat your oven to 375°F. Roll out one disc of dough on a lightly floured surface to fit a 6-inch pie dish, leaving a 1-inch overhang. Transfer the dough to the pie dish and trim the edges, leaving about ½ inch of excess dough. Crimp the edges with a fork or your fingers to create a decorative border.
Assemble and Bake the Pie
Pour the cooled cherry filling into the prepared pie crust, spreading it evenly to the edges. Brush the overhanging crust edges with a bit of cold water or egg wash to help seal the filling. Place the second disc of dough on top of the filling and press gently to create a lattice pattern or simply crimp the edges together to seal.
Cut 4-5 small slits in the top crust to allow steam to escape during baking. Place the pie on a baking sheet lined with parchment paper to catch any drips. Bake for 40-45 minutes, until the crust is golden brown and the filling is bubbling through the slits in the top crust.
Remove the pie from the oven and let it cool for at least 2 hours before serving. This cooling time is essential—it allows the filling to set properly and prevents the crust from becoming soggy. The pie will continue to firm up as it cools, resulting in that perfect balance of tart and sweet.
Serve with Vanilla Ice Cream
Slice the pie into 4 equal wedges using a sharp knife. For the best experience, serve each slice warm with a scoop of 0.5 cup vanilla ice cream. The contrast between the warm pie and cold ice cream creates a delightful balance that enhances the cherry flavor.
Store any leftovers in an airtight container in the refrigerator for up to 3 days. To reheat, warm slices at 350°F for 5-10 minutes to restore the crust’s crispiness and the filling’s warmth.
Pro Tips For Making 6 Inch Cherry Pie
- Prep Cherries Fast: Dump the pitted cherries into a bowl with 2 tablespoons sugar and 1 tablespoon lemon juice first—this jumpstarts the flavor while you handle the thickener. I used to skip this step and wondered why the filling tasted flat until I realized sugar needs time to draw out the juices.
- Thicken Slowly: Mix cornstarch with cold water (1:1 ratio) before adding it to the simmering cherries—this prevents lumps like glue. Pour it in a thin stream while stirring constantly, and let the mixture bubble for 2 full minutes after it clears. Rushing here turns your filling into a sad, grainy paste.
- Chill the Filling: Let the cherry mixture cool completely before assembling the pie—at least 30 minutes. Warm filling melts the butter in the crust faster than you can roll out dough, and that’s how you end up with a soggy bottom. (Yes, even if you’re impatient like me.)
- Brush, Not Drown: Use an egg wash (1 egg yolk + 1 tablespoon water) sparingly on the crust edges—just enough to seal, not drown. Overdoing it makes the crust soggy, and no one wants a 6-inch pie that’s basically a cherry pudding. A light brush is all you need for a golden, crisp finish.
Wine and beer pairings for these flavors
Light White Wine
A crisp Sauvignon Blanc from New Zealand or California complements the tart cherry filling beautifully. The bright acidity and citrus notes cut through the sweetness, making each bite refreshing.
I love Kim Crawford or Oyster Bay for their vibrant flavors that enhance the pie’s natural tartness. Serve slightly chilled to elevate the experience. 🍷
Rosé for Balance
For a lighter option, a dry Provence rosé offers a perfect balance with its delicate berry undertones. Look for Whispering Angel or Miraval—both pair wonderfully with cherry desserts. The subtle fruitiness mirrors the pie’s cherry flavor without overpowering it. Chill thoroughly before serving for the best pairing. 🌸
Sweet Dessert Wines
If you prefer something sweeter, a Moscato d’Asti or Riesling adds a luxurious touch. The slight sweetness harmonizes with the pie’s sugar, while the effervescence in Moscato cleanses the palate. I recommend Barefoot Moscato for affordability or Dr. Loosen Blue Slate Riesling for a premium choice. 🍇
Beer Pairings
A Belgian witbier like Hoegaarden or Stella Artois works surprisingly well with cherry pie. The citrusy notes and slight effervescence contrast the pie’s richness. For a darker option, try a honey ale—the caramel and floral flavors complement the cherry filling perfectly. 🍺
Non-Alcoholic Options
Don’t drink alcohol? Sparkling cherry lemonade or ginger beer with a splash of vanilla syrup mimics the wine’s refreshing qualities. For a richer option, sparkling apple cider enhances the pie’s tartness without alcohol. Serve chilled for the best experience. 🍹
Nutrition facts
Frequently asked questions
Can I use frozen cherries instead of fresh?
Frozen cherries work perfectly—just thaw and drain them completely before using. For best results, pit them yourself (or buy pre-pitted) and pat dry with a paper towel to prevent a soggy crust. The flavor will be just as vibrant when cooked properly.
How do I make the lattice crust without it falling apart?
Chill the dough for 30 minutes before rolling, and keep it cold while working. Use a sharp knife or pizza cutter to cut strips, then weave them gently—don’t press too hard. Brush the strips with egg wash before baking to help them hold together. A baking sheet under the pie catches any drips and keeps the crust crisp.
Why did my pie crust turn out tough instead of flaky?
Overworking the dough or using warm butter are the most common culprits. Keep everything cold, work quickly, and handle the dough minimally. The ice cubes in the recipe are key—they keep the butter cold enough to create those perfect flaky layers. If your crust feels tough, try adding 1 extra tablespoon of cold butter next time.
Can I make this pie ahead of time?
Yes! Assemble the pie (unbaked) and refrigerate for up to 24 hours before baking. For fully baked pies, store at room temperature (wrapped) for 3 days or refrigerate for 1 week. Freeze baked pies for up to 3 months—thaw overnight in the fridge before serving. The filling actually improves after resting!
What’s the secret to balancing tart and sweet flavors?
Start with the full amount of sugar, then taste the filling before baking. Adjust with 1-2 tbsp more sugar if needed, or add ½ tsp more cinnamon for warmth. The lemon juice is crucial—it brightens the cherries without overpowering. Always let the filling cool completely before assembling to prevent a runny pie.

- 6 Bean Chili Recipe: Hearty, Smoky Depth That Gets Richer Over Time - September 26, 2026
- 2 Gallon Red Sangria Recipe: Bold Spice and Fruit Fusion for Crowds - September 26, 2026
- 5 Star Apple Bread Recipe: Spiced Apple Swirl With Buttery Crust - September 26, 2026