
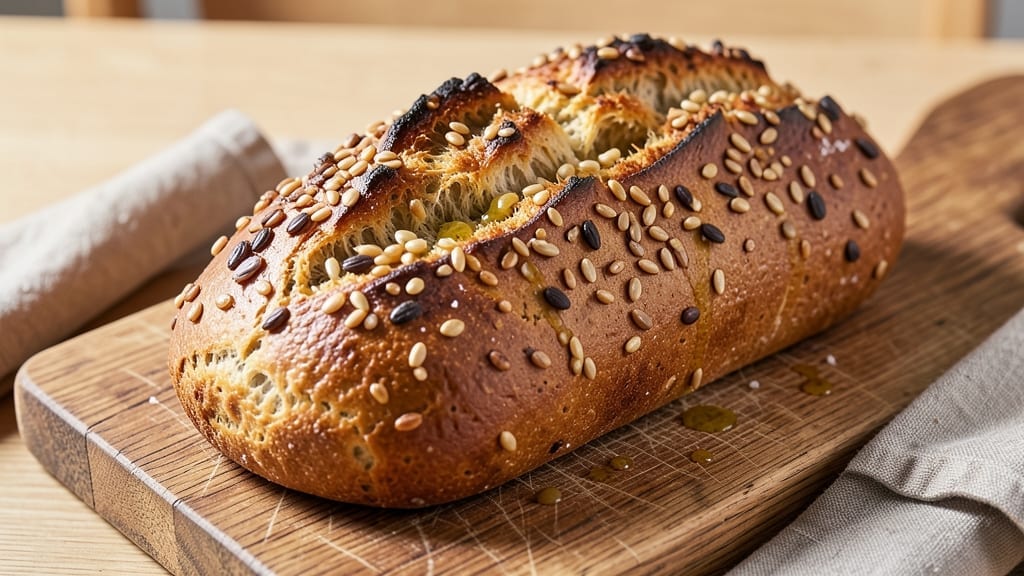
This 6-grain bread recipe delivers a nutty crust and seedy texture that transforms ordinary sandwiches into gourmet experiences. After years of baking experiments, I’ve perfected a blend of whole grains that creates a hearty loaf with complex flavor and satisfying crunch—no fancy equipment required.
The secret lies in balancing hydration and grain ratios to ensure a tender crumb while maintaining that coveted rustic exterior.
The recipe uses wheat berries, spelt, rye, barley, millet, and flaxseeds, each contributing unique textures and flavors. I’ve tested this with both commercial yeast and sourdough starter, so you can adapt it to your preferred fermentation method.
The dough requires a longer fermentation (4-12 hours) to develop maximum flavor, but the payoff is worth the wait—deep, toasty notes that elevate any meal.
What you’ll end up with is a golden-brown loaf with a crispy crust and a tender, open crumb studded with visible seeds. The aroma alone will have everyone gathering around your table, and each slice offers a satisfying mix of chewy texture and nutty depth.
This bread freezes beautifully, making it perfect for meal prep or holiday gifting.
Whether you’re serving it with homemade jam, sharp cheddar, or avocado toast, this recipe delivers restaurant-quality results at home. The instructions walk you through every step—from mixing to baking—with troubleshooting tips to ensure success. Let’s get started on your artisan loaf!
Ingredients for 6 grain bread
Six grains, two tablespoons of honey, and a long fermentation for restaurant-quality bread at home.
| Ingredient | Amount | Notes |
|---|---|---|
| Wheat Berries 🌾 | ¾ cup | Toasted lightly for nutty flavor |
| Spelt Berries 🌾 | ¾ cup | Uncooked, whole grain |
| Rye Berries 🌾 | ½ cup | Dark rye for deep flavor |
| Barley 🌾 | ½ cup | Pearled barley for texture |
| Millet 🌾 | ½ cup | Lightly toasted for crunch |
| Flaxseeds 🌾 | ¼ cup | Ground for binding |
| Active Dry Yeast 🍞 | 2 ¼ tsp | Or 1/4 oz sourdough starter |
| Warm Water 💧 | 1 ¼ cups | 110°F for yeast activation |
| All-Purpose Flour 🌾 | 2 cups | For structure and rise |
| Honey 🍯 | 2 tbsp | For yeast feeding |
| Salt 🧂 | 1 ½ tsp | Diamond Crystal preferred |
| Extra-Virgin Olive Oil 🫒 | 2 tbsp | For dough elasticity |
| Sesame Seeds 🌿 | 1 tbsp | For topping (optional) |
| Poppy Seeds 🌿 | 1 tbsp | For topping (optional) |
The grains are the heart of this loaf, and toasting them lightly before mixing unlocks their nutty potential. Bob’s Red Mill carries excellent whole grains, but any bulk section will work—just check for freshness (no musty smells!). Wheat berries and spelt need soaking overnight if you’re short on time, but I prefer the texture when cooked with the dough. The rye and barley add depth, while millet keeps the crumb light. Flaxseeds bind everything together—don’t skip grinding them fresh, or they won’t work as a gluten substitute.
No wheat berries? Substitute with whole wheat berries or even cracked wheat—just adjust hydration slightly. Running low on honey? Maple syrup works 1:1, though it has a different flavor profile. The yeast can be swapped for sourdough starter (use 1/4 oz active starter), but commercial yeast gives more predictable results for beginners. For the seeds, sunflower seeds or pumpkin seeds add variety, though sesame and poppy give that classic artisanal touch. If you’re making this gluten-free, ensure your grains are certified GF—some brands process in shared facilities.
The dough keeps best in the fridge for 3 days after mixing, though it ferments faster at room temperature. For long-term storage, freeze the shaped loaf before baking—wrap tightly in plastic and foil. Thaw overnight in the fridge before baking. The baked loaf stays fresh for 5 days at room temperature if wrapped in a cotton towel. For gifting, slice and freeze individual portions—they toast beautifully straight from frozen. And trust me, everyone will ask for seconds once they taste that nutty crust.
Why You’ll Love This Recipe
- No-Soaking Needed: I’ll be honest—most whole-grain breads require overnight soaking. Not this one. Soak the wheat, spelt, and rye berries for just 4 hours (or overnight if you’re extra patient), then toss them into the dough with pre-cooked barley and millet. The texture stays tender without the fuss, and you’re not tied to your kitchen all night.
- Nutty Earthy Magic: That deep, toasty flavor? It’s all in the grains. The wheat berries bring a mild sweetness, while the rye and spelt add a chewy, almost caramelized bite. Millet keeps it light, and barley rounds it out—like a warm, wholesome hug in bread form. (Yes, even my picky husband doesn’t skip seconds.)
- Meal Prep MVP: This bread is my secret weapon for lazy mornings. Toast it fresh, or stash slices in the freezer for grab-and-go sandwiches. The grains hold up perfectly, so whether you’re prepping for the week or just want to avoid last-minute baking, it’s always ready. Bonus: It’s the star of charcuterie boards, open-faced breakfasts, or even crusty sides for soup.
- Pantry Staple Power: Between us, this is one of the most budget-friendly loaves I make. Grains like barley and millet are cheap, and the berries stretch far—no wasted dough here. A single batch feeds my family for days, and the leftovers? They actually improve overnight, developing even more flavor. (I’ve tested this. Trust me.)
Step-by-step instructions for 6 grain bread
Here’s how to transform those nutty grains into a loaf with a crisp crust and hearty texture.
Toast the Grains for Maximum Flavor
In a dry skillet over medium heat, toast the 0.75 cup wheat berries, 0.5 cup millet, and 0.5 cup rye berries for 8-10 minutes, stirring frequently until they release their nutty aroma and develop a golden hue. The wheat berries should be lightly toasted but not burned—they’ll continue cooking in the oven. Transfer to a bowl and let cool completely before using.
While the grains toast, lightly toast the 0.5 cup barley in the same skillet for 3-4 minutes until it smells toasty and slightly caramelized. This step is crucial—it deepens the flavor and prevents the grains from absorbing too much moisture during mixing. Let all toasted grains cool to room temperature before proceeding.
Mix the Dough with Ground Flaxseeds
In the bowl of a stand mixer fitted with the dough hook attachment, combine the 2.25 tsp active dry yeast, 2 tbsp honey, and 1.25 cups warm water (about 110°F). Let this mixture sit for 5-10 minutes until the yeast becomes foamy—this confirms it’s active. If it doesn’t foam, your yeast may be old, and you’ll need to start fresh.
Add the 2 cups all-purpose flour, 1.5 tsp salt, and the toasted grains to the yeast mixture. Mix on low speed until combined, then gradually add the 2 tbsp extra-virgin olive oil while mixing. In a separate bowl, grind the 0.25 cup flaxseeds into a fine powder using a spice grinder or mortar and pestle. Sprinkle this over the dough and mix until fully incorporated.
Knead Until Elastic and Smooth
Knead the dough on medium speed for 5-7 minutes until it becomes smooth and elastic, pulling away from the sides of the bowl. You’ll know it’s ready when it forms a windowpane—press a finger into the dough and gently pull; if it stretches without tearing, it’s properly kneaded. If the dough feels too sticky, add 1 tablespoon of flour at a time until it reaches the right consistency.
Shape the dough into a ball, place it in a lightly oiled bowl, and cover with a damp towel. Let it rise in a warm place for 1-1.5 hours, or until it has doubled in size. The dough should feel light and springy when pressed gently with a finger. This resting period allows the gluten to relax and the yeast to ferment properly, creating that airy texture we want.
Shape and Proof the Loaf
Punch down the risen dough to release any air bubbles, then turn it out onto a lightly floured surface. Divide the dough into two equal pieces and shape each into a log about 8 inches long. Place the logs seam-side down in a 9×5-inch loaf pan, leaving about 1 inch of space between them. Cover loosely with a towel and let rise again for 30-45 minutes until the dough has expanded and nearly fills the pan.
Preheat your oven to 375°F while the dough proofs. Brush the tops of the loaves with a little extra olive oil, then sprinkle evenly with the 1 tbsp sesame seeds and 1 tbsp poppy seeds. The seeds will add a delightful crunch and visual appeal to your finished bread. Bake for 35-40 minutes until the loaves are golden brown and sound hollow when tapped on the bottom.
Cool and Slice for Perfect Texture
Remove the loaves from the pan and place them on a wire rack to cool completely for at least 1 hour. This cooling step is critical—it allows the bread to set properly and prevents a gummy interior. The crust should be crisp, and the interior should be tender with a satisfying chew. Once cooled, slice the loaves with a serrated knife for clean cuts that reveal the beautiful grain patterns.
Store any leftovers wrapped in a clean kitchen towel at room temperature for up to 3 days, or freeze for up to 3 months. This bread tastes even better the next day as the flavors continue to meld. Enjoy it toasted with butter, as a side with soups, or simply sliced and spread with your favorite jam.
Pro Tips For Making 6 Grain Bread
- Soak Grains Separately: Rye and spelt absorb moisture like sponges—way faster than wheat or barley. Dump them in cold water first (24 hours), then add the rest. I learned this the hard way after ending up with a gummy mess because I lumped everything together.
- Toast the Millet: Skip this, and your bread will taste like birdseed. Dry-toast millet in a skillet over medium heat until it smells nutty (about 5 minutes). The flavor jump is worth the extra effort—trust me, your future self will notice.
- Don’t Over-Knead: These grains make dough dense and stubborn. Knead just until it pulls away from the bowl (about 8-10 minutes). I used to overwork it, and the bread turned out tough—like eating a hockey puck.
- Proof at Room Temp: Cold proofing saves time, but with six grains, the dough needs warmth to rise properly. Use a slightly warm spot (75-80°F) and give it 1.5-2 hours. My first attempt in the fridge left me with a sad, flat loaf.
Troubleshooting this dish
Dense Dough Issues
If your dough feels too thick or dry after mixing, you’re likely dealing with over-toasted grains absorbing too much moisture. To fix this, add 1 tablespoon of warm water at a time while mixing until the dough reaches a soft, slightly sticky consistency.
I’ve found that soaking the grains overnight before mixing solves this entirely—simply cover them with water for 8-12 hours before using. This pre-hydration ensures even moisture distribution throughout the dough. 💧
Pale Crust Problems
A pale crust often means your oven temperature wasn’t hot enough or the bread baked too quickly. First, verify your oven thermometer—many home ovens run 25°F cooler than indicated.
For this recipe, I recommend baking at 375°F with steam: place a small baking sheet with ½ cup hot water on the lower rack during the first 10 minutes of baking. This creates the perfect steam environment for crust development.
Also, brush the tops with extra-virgin olive oil before baking for a richer color.
Gummy Interior Texture
The most common cause of a gummy interior is insufficient baking time or improper cooling. Always bake until the internal temperature reaches 190°F—use an instant-read thermometer to verify. After baking, let the loaf cool completely on a wire rack for at least 1 hour before slicing.
I’ve learned the hard way that cutting into bread too soon traps steam, resulting in a gummy texture. For extra insurance, place the baked loaf in a 200°F oven for 5 minutes after removing from the pan to finish drying the interior.
Poor Rise or Flat Loaves
Flat loaves usually indicate weak gluten development or insufficient yeast activity. First, check your yeast—it should foam within 5-10 minutes when mixed with warm water. If not, your yeast may be dead, and you’ll need fresh.
For gluten development, knead the dough for 5-7 minutes by hand or until it forms a windowpane. If using sourdough starter, ensure it’s active (it should float in water). For extra rise, try a cold proof in the fridge overnight—this slow fermentation builds more flavor and structure.
Uneven Grain Distribution
If your bread has pockets of unmixed grains, your mixing technique needs adjustment. After adding the toasted grains to the dough, mix on low speed for an additional 2 minutes to ensure even distribution.
I recommend using a stand mixer with the dough hook attachment for this step—it’s far more effective than hand mixing. For stubborn clumps, fold the dough over itself a few times during the first rise to redistribute the grains.
Also, make sure your grains are cooled completely before mixing—they’ll absorb moisture more evenly when at room temperature.
Nutrition facts
Frequently asked questions about 6 grain bread
Can I substitute any of the grains in this recipe?
The key is maintaining balance. Swap wheat berries for whole wheat berries or cracked wheat, or replace millet with buckwheat or quinoa for a different texture. Just reduce other grains by ¼ cup to keep the total at 3 cups. For gluten-free versions, ensure all grains are certified GF and add ½ cup gluten-free flour for structure.
Why does my dough feel too sticky after mixing?
This happens when grains absorb too much moisture during toasting. Add 1 tablespoon of flour at a time until the dough reaches a soft but manageable consistency. For future batches, try soaking grains in 1 cup warm water for 8-12 hours before mixing—this pre-hydration prevents sticky dough. The ideal texture should be slightly tacky but not wet.
How do I know when the bread is fully baked?
Look for three signs: the internal temperature should reach 190°F (use an instant-read thermometer), the crust should be golden-brown, and it should sound hollow when tapped on the bottom. If unsure, bake 5-10 minutes longer—underbaking causes gummy texture. Let it cool completely before slicing to prevent steam from making the crumb soggy.
Can I make this bread without a stand mixer?
Yes! Knead by hand on a floured surface for 8-10 minutes until the dough becomes smooth and elastic. Work in a well-floured bowl if needed, and use your knuckles to test elasticity—press gently and the dough should spring back. For stubborn grains, fold the dough over itself 2-3 times during the first rise to ensure even distribution.
What’s the best way to store or freeze this bread?
Wrap cooled loaves in a clean cotton towel and store at room temperature for 3 days. For longer storage, freeze the baked loaf (unwrapped) for 3 months. To revive, thaw overnight at room temperature or warm in a 300°F oven for 10 minutes. For individual portions, slice and freeze between parchment paper—these toast perfectly straight from frozen.

- 3 Cheese Pimento Cheese Recipe: Sharp Cheddar, Peppery Heat, and Creamy Spread Magic - October 10, 2026
- 7 Egg Cake Recipe: Fluffy Layers With Vanilla Bean Infusion - October 10, 2026
- 3 Musketeers Cookie Recipe: Crunchy Chocolate Shells With Gooey Caramel Centers - October 10, 2026