
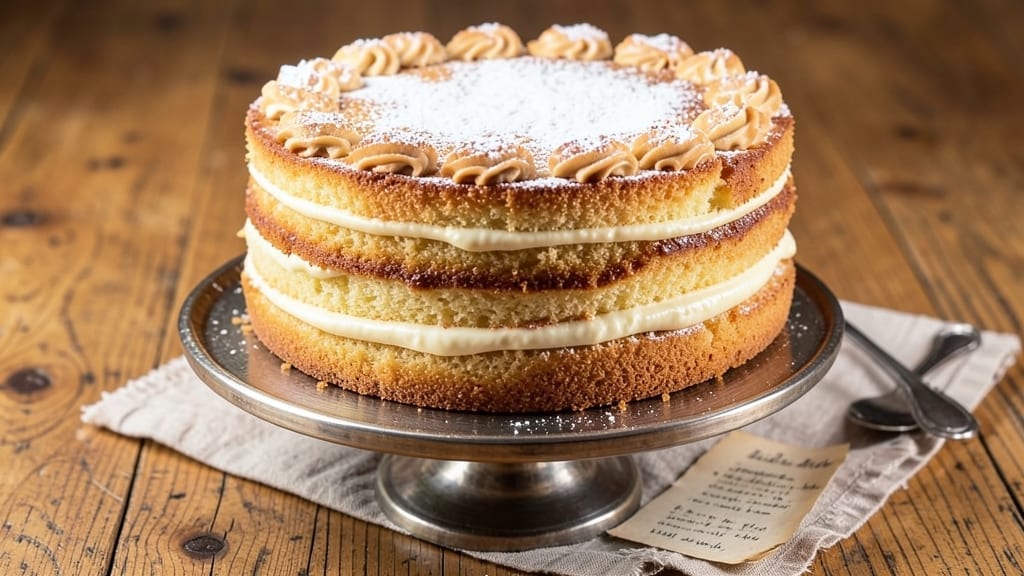
This 9 round cake recipe delivers the perfect balance of classic vanilla and rich chocolate layers that will impress even the most discerning dessert lovers. 🌟 The secret lies in precise layering techniques and a foolproof baking method that ensures moist, tender crumbs with just the right density—no dryness here.
Whether you’re celebrating a birthday, anniversary, or simply craving a showstopping treat, this recipe builds confidence with every step.
What sets this cake apart is its versatility—you can create a classic two-layer vanilla and chocolate combination or experiment with fillings like raspberry jam, chocolate ganache, or even a light coconut mousse.
The recipe includes detailed instructions for baking at 350°F, ensuring even doneness and a golden-brown finish that’s irresistible. No fancy equipment required, just a standard 9-inch round pan and a steady hand for level layers.
By the time you frost it with a smooth buttercream or drizzle it with a glossy chocolate glaze, you’ll have a cake that looks as stunning as it tastes—restaurant-quality without the fuss.
The layers stay perfectly structured, and the flavors harmonize beautifully, making every slice a moment worth savoring. Ready to bake a cake that steals the show?
This recipe also includes tips for common variations, like adding a crumb layer or incorporating fresh berries, so you can customize it to your taste. Whether you’re a beginner or a seasoned baker, the clear instructions and professional techniques will guide you to success every time.
Ingredients for 9 round cake
Twelve simple ingredients transform into a showstopping 9-inch layered cake with restaurant-quality finesse.
| Ingredient | Amount | Notes |
|---|---|---|
| All-Purpose Flour 🌾 | 3 cups | Sifted for light texture |
| Granulated Sugar 🍚 | 2 ½ cups | White or light brown |
| Unsalted Butter 🧈 | 1 ½ cups | Room temperature, softened |
| Large Eggs 🥚 | 6 whole | Room temperature for even mixing |
| Vanilla Extract 🌿 | 2 tbsp | Pure, high-quality extract |
| Baking Powder 🧂 | 1 ½ tsp | Aluminum-free for best results |
| Salt 🧂 | ½ tsp | Fine sea salt preferred |
| Milk 🥛 | 1 ½ cups | Whole milk for richness |
| Unsweetened Cocoa Powder 🍫 | ¾ cup | Natural or Dutch-process |
| Raspberry Jam 🍓 | 1 ½ cups | Seedless for clean layers |
| Chocolate Ganache 🍫 | 2 cups | Homemade or quality store-bought |
| Confectioners' Sugar 🍚 | 4 cups | Sifted for smooth buttercream |
| Heavy Whipping Cream 🥛 | 1 ½ cups | Cold for stiff peaks |
| Food Coloring 🎨 | 1 tsp | Optional, gel-based preferred |
| Parchment Paper 📄 | 2 sheets | For easy layer transfer |
The flour and cocoa powder are your foundation—King Arthur flour or Bob’s Red Mill for the best texture, and Dutch-process cocoa for richer color. Butter matters here: Plugrá or Land O’Lakes unsalted work perfectly, but avoid salted. Eggs should be large and room temperature—cold eggs cause dense layers. For the vanilla, McCormick Pure Vanilla Extract is my go-to, but any pure extract will do. Pre-sift your dry ingredients to avoid lumps, and measure carefully: 1 cup flour by volume can vary by 10% between brands. The 9-inch round pans should be lightly greased with butter and lined with parchment for easy release.
No vanilla extract? Vanilla bean paste at half the amount adds specks for visual appeal. Substituting milk? Heavy cream or coconut milk works, but texture may shift slightly. For the cocoa layer, natural cocoa powder gives a more rustic look, while Dutch-process yields a smoother finish. The raspberry jam can be swapped for strawberry or apricot preserves, but avoid chunky fillings—they disrupt layering. For the ganache, Ghirardelli chocolate chips melt perfectly, but avoid pre-made ganache with stabilizers. If you’re coloring the buttercream, gel food coloring is your best friend—liquid dyes bleed. And trust me on the parchment paper: it’s worth the extra minute to prevent sticking.
Store the cake layers wrapped tightly in plastic wrap at room temperature for 2 days, or freeze for up to 3 months. Buttercream keeps 5 days refrigerated or 6 months frozen. To assemble, let everything come to room temperature—cold layers crack under frosting. I always bake two layers at a time for the chocolate and vanilla, then alternate them with fillings. Level your cakes with a serrated knife before frosting for that restaurant-quality finish. The secret to clean layers? A bench scraper for smooth sides and a piping bag for precise borders. Don’t rush the chilling between layers—patience ensures perfect structure.
Why You’ll Love This Recipe
- You’re already using staples: flour, sugar, butter, eggs. No specialty ingredients, no last-minute grocery runs. And because it’s dense but moist, slices stay fresh for days—perfect for lunches or when you forget to bake ahead. (We’ve all been there.)
- No-Mix Hassle: The batter comes together in three bowls—no food processor, no weird ratios to memorize. Just fold the butter into sugar until it’s light and fluffy (that’s the magic), then whisk in eggs and vanilla like you’re painting. Honestly, my kids think it’s “boring” because it’s so simple—but they still fight over slices.
- Butter-Sugar Magic: That creamy butter-sugar blend? It’s what makes this cake dangerously tender. The vanilla doesn’t just perfume—it lingers in every bite, like a hug from your grandma’s kitchen. (Yes, even on a Tuesday night.)
- Layer or Stack: Need a single cake for a birthday? Done. Planning a tiered masterpiece for a wedding? These 9 rounds let you go wild—just add fondant or fruit preserves between layers. I’ve turned leftovers into trifle cups; my book club adores them for potlucks.
Step-by-step instructions for layered vanilla and chocolate magic
Here’s how to build a showstopping 9-inch cake with perfect layers and professional finishes.
👨🍳 Step 1: Prepare the Cake Pans and Vanilla Batter
Preheat your oven to 350°F and line the bottoms of three 9-inch round cake pans with the 2 sheets parchment paper. Grease the pans thoroughly with butter or baking spray—this ensures easy release later. I like to use a pastry brush for even coverage.
In a large mixing bowl, sift together the 3 cups all-purpose flour, 1.5 tsp baking powder, and 0.5 tsp salt. Set aside. In a separate bowl, beat the 1.5 cups softened unsalted butter and 2.5 cups granulated sugar on medium speed until light and fluffy—about 3-4 minutes. This step is crucial for airy layers.
Add the 6 whole large eggs one at a time, mixing well after each addition. Scrape down the sides of the bowl, then stir in the 2 tbsp vanilla extract and 1.5 cups milk. Gradually add the dry ingredients to the wet, mixing on low speed just until combined—don’t overmix or your cake will be tough.
👨🍳 Step 2: Prepare the Chocolate Batter and Bake Both Layers
For the chocolate layers, whisk the 0.75 cup unsweetened cocoa powder into the vanilla batter until smooth. Divide the batter evenly between the three pans—you’ll use two pans for vanilla layers and one for chocolate. I use a kitchen scale for precision, but a measuring cup works too.
Bake the vanilla layers for 25-30 minutes until a toothpick inserted in the center comes out clean. Rotate the pans halfway through for even baking. Remove from oven and let cool in pans for 10 minutes, then transfer to a wire rack to cool completely. Repeat with the chocolate batter.
🥘 Step 3: Assemble the Cake with Jam and Ganache Layers
Once all layers are completely cool, place the first vanilla layer on a cake stand or plate. Spread ½ cup raspberry jam evenly over the top, leaving a ½-inch border uncovered. This prevents soggy layers while adding fruity flavor.
Add the chocolate layer on top, then spread another ½ cup raspberry jam. Place the final vanilla layer on top. Gently press down to create a tight seal—this prevents shifting during transport. Now for the ganache: warm the 2 cups chocolate ganache slightly (about 30 seconds in the microwave) to make it pourable.
Pour the ganache over the top layer and let it drip slightly down the sides. Use an offset spatula to spread it evenly, creating a smooth, glossy finish. Chill the cake in the refrigerator for 30 minutes to set the ganache.
🍳 Step 4: Create the Buttercream and Decorate
In a stand mixer fitted with the whisk attachment, beat the 1.5 cups cold heavy whipping cream to stiff peaks. Gradually add the 4 cups sifted confectioners’ sugar and the 1 tsp food coloring (if using) on low speed until combined, then increase to medium-high for 2-3 minutes until light and fluffy.
Spread the buttercream evenly over the ganache layer using an offset spatula. For a smooth finish, dip the spatula in warm water and wipe clean between each swipe. Use a cake comb to create decorative lines or swirls on the sides. For extra flair, pipe rosettes or borders with the remaining buttercream.
⏰ Step 5: Chill and Serve for Perfect Texture
Return the decorated cake to the refrigerator for at least 2 hours before serving. This chilling time ensures clean slices and prevents the buttercream from melting. When ready to serve, use a sharp serrated knife—wipe it clean between slices for neat cuts.
Each slice should reveal beautiful layers of vanilla and chocolate separated by jam and ganache. The texture should be tender yet sturdy, with a balance of sweetness from the buttercream and tartness from the raspberry. Serve at room temperature for the best experience!
Pro Tips For Making 9 Round Cake
- Cream Butter Slowly: Dump cold butter into warm sugar? Bad idea. Whip the butter first until it’s pale yellow and fluffy—about 3-5 minutes—before adding the sugar. I learned this the hard way when my cake turned out dense and greasy; the butter needs to emulsify properly with the sugar to create that light, airy crumb.
- Sift the Flour Twice: Don’t just scoop flour from the bag—sift it once, then sift it again after mixing the wet ingredients. The first sift prevents lumps, but the second ensures even distribution, especially if your flour settled unevenly. Yes, it’s extra work, but it guarantees a smoother batter.
- Room-Temp Eggs Matter: Cold eggs from the fridge? They’ll curdle your butter mixture faster than you can say “overmixed batter.” Let them sit in warm water for 5 minutes before cracking—just enough to bring them to room temp without cooking them. Your cake’s texture will thank you.
- Stop Mixing at “Just Combined”: Overmixing is the silent killer of 9-round cakes. Once the flour disappears into the wet ingredients, stop. I used to think “more mixing = better,” but now I know: overworking the batter leads to tough, chewy layers. A quick fold with a spatula is all it takes.
Creative variations of this 9 round cake
Fruity Twist Variations
Swap raspberry jam for strawberry preserves or orange marmalade—both add vibrant color and complementary flavors. For a tropical vibe, use guava paste (thinned with lemon juice) between layers.
I’ve also had success with blackberry compote—simmer 2 cups blackberries, ¼ cup sugar, and 1 tsp lemon zest for 10 minutes until thickened. 🍓
Spiced Chocolate Layers
Enhance the chocolate layer by adding ½ tsp cinnamon and ¼ tsp espresso powder to the cocoa batter. For warmth, fold in 2 tbsp chopped toasted hazelnuts or 1 tbsp orange zest before baking.
These subtle spices deepen the flavor without overpowering the vanilla. A pinch of sea salt on the ganache layer also elevates the taste profile.
Nutty Crunch Additions
Press crushed pecans or toasted walnuts between layers for texture contrast. For a cohesive look, toast the nuts with 1 tbsp brown sugar and ½ tsp cinnamon until golden, then sprinkle evenly.
Alternatively, create a nutty buttercream by folding ½ cup chopped toasted almonds into the finished frosting. This adds a satisfying crunch to every bite.
Light and Airy Fillings
Replace jam with coconut mousse for a lighter texture. Whip 1 cup coconut cream with 2 tbsp powdered sugar until stiff, then fold in 1 tsp vanilla.
Chill for 2 hours before assembling. Another elegant option is lemon curd—its tangy brightness cuts through the richness of the chocolate and buttercream.
Seasonal Adaptations
For summer, infuse the buttercream with 1 tsp lime zest and top with fresh berries. In fall, add ½ cup caramelized apples (sautéed with 1 tbsp brown sugar and ½ tsp cinnamon) as a filling.
Winter calls for spiced pear compote—simmer 2 cups pears, ¼ cup honey, and 1 cinnamon stick until soft. 🍎
Gluten-Free Swap
Replace all-purpose flour with a 1:1 gluten-free baking flour (like Bob’s Red Mill GF Blend). Add ½ tsp xanthan gum to bind the batter. For the chocolate layer, use Dutch-process cocoa** to maintain moisture. These adjustments keep the cake’s structure intact while accommodating dietary needs.
Nutrition facts
Frequently asked questions
How do I prevent my 9-inch cake layers from cracking?
Let the cake layers cool completely in the pan for 10 minutes before transferring to a wire rack. Never stack warm layers—the temperature difference causes cracks. Also, avoid overmixing the batter and use a sharp serrated knife to level the tops. Chill the assembled cake for 30 minutes before frosting to stabilize the structure.
Can I bake this cake in a different-sized pan?
Yes, but adjust the baking time and temperature. For an 8-inch pan, bake at 325°F for 20-25 minutes, while a 10-inch pan needs 350°F for 30-35 minutes. Always check with a toothpick. The key is to bake until the center is set but still slightly springy—overbaking dries out the cake.
What’s the best way to store leftover cake?
Wrap each layer tightly in plastic wrap and store at room temperature for 2 days or freeze for 3 months. For the buttercream, refrigerate in an airtight container for 5 days or freeze for 6 months. To serve, let the cake sit at room temperature for 30 minutes before slicing—this prevents crumbs.
How do I make this cake gluten-free?
Replace the all-purpose flour with a 1:1 gluten-free baking blend (like Bob’s Red Mill) and add ½ tsp xanthan gum to the dry ingredients. For the chocolate layer, use Dutch-process cocoa powder to maintain moisture. Keep all other measurements the same, but expect slightly denser layers. Test the recipe first with a single layer to adjust texture.
Can I make this cake without an oven?
Not recommended for the cake layers themselves—oven baking creates the ideal structure. However, you can make a no-bake version by using store-bought cake layers (like vanilla and chocolate pound cake) and assembling with the same fillings and frostings. For the ganache, melt chocolate chips with heavy cream and let it set in the fridge. This works best for special occasions when baking isn’t an option.

- 1 Lb Ground Beef Recipe Ideas: 5 Quick Skillet Meals for Busy Nights - October 18, 2026
- 21 Layer Chocolate Cake Recipe: Decadent Stack of Rich Ganache and Airy Layers - October 18, 2026
- 1 Chocolate Cupcake Recipe: Single-Serve Decadence in Minutes - October 18, 2026