
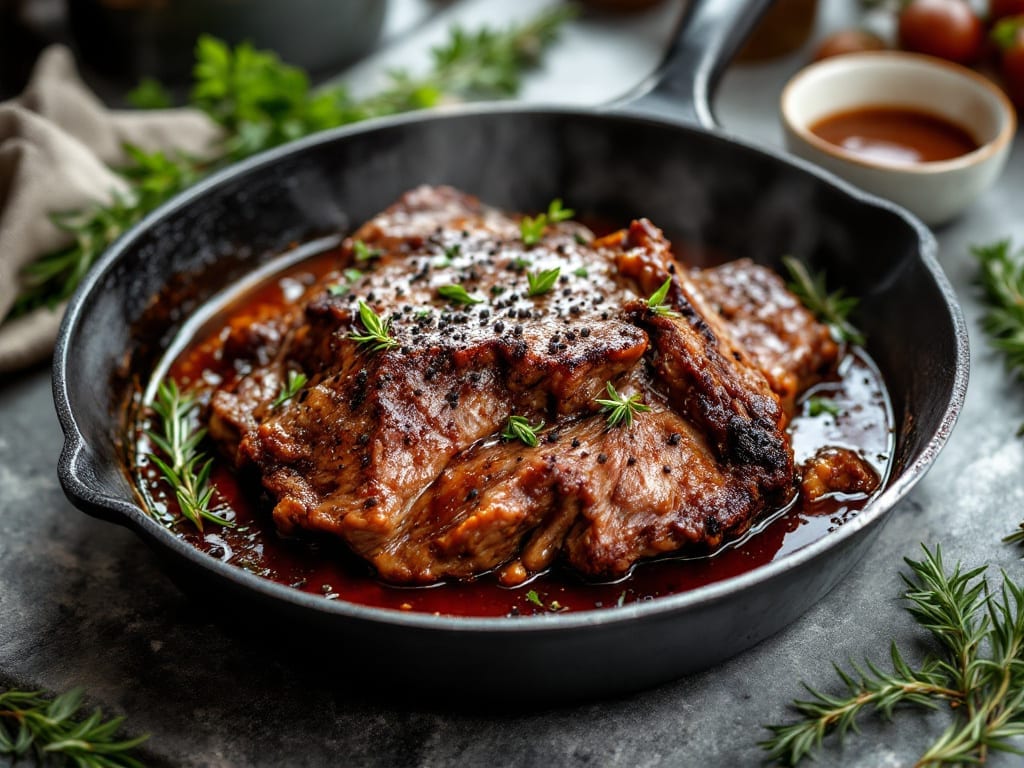
Bob Evans’ slow roasted pot roast delivers that signature restaurant-quality tenderness and rich, herbed gravy that makes every bite unforgettable. The secret lies in the slow cooking process—300°F for 3+ hours—which transforms tough beef into melt-in-your-mouth perfection while developing deep, smoky flavors.
I’ve recreated this classic dish after years of perfecting the timing and seasoning to match the iconic taste.
The key to success starts with a well-seasoned chuck roast, rubbed with a blend of herbs and spices that create that signature Bob Evans flavor profile. Slow cooking at low heat ensures the meat stays juicy while the outer layer develops a tender, caramelized crust.
This method isn’t just about patience—it’s about achieving restaurant-quality results at home with minimal effort after the initial prep.
What you’ll end up with is a pot roast so tender it practically falls apart, swimming in a velvety gravy that’s rich with beef drippings and aromatic herbs. The slow-roasted beef pairs beautifully with classic sides like buttery carrots, creamy mashed potatoes, and warm dinner rolls.
Every bite delivers that comforting, hearty satisfaction that makes this dish a family favorite.
Whether you’re serving a crowd or treating yourself to a cozy weeknight meal, this recipe delivers the same flavors that made Bob Evans a legend. The best part?
Once you master the slow-cooking technique, you’ll have a foolproof method for creating this classic dish time and time again. Let’s get started on recreating this timeless favorite.
Ingredients for bob evans slow roasted pot roast
Six ingredients for the beef, eight for the gravy—just good stuff you already have.
| Ingredient | Amount | Notes |
|---|---|---|
| Chuck Roast Beef 🥩 | 3 lb | With good marbling, center-cut preferred |
| Yellow Onion 🧅 | 1 whole | Large, sliced into wedges |
| Carrots 🥕 | 4 whole | Medium, peeled and halved |
| Celery Stalks 🌿 | 4 whole | Fresh, cut into 2-inch pieces |
| Garlic Cloves 🧄 | 6 cloves | Fresh, peeled and smashed |
| Beef Broth 💧 | 2 cups | Low-sodium preferred, homemade or quality store-bought |
| Red Wine 🍷 | 1 cup | Dry, like Cabernet Sauvignon |
| Tomato Paste 🍅 | 2 tbsp | Smooth, not chunky |
| Worcestershire Sauce 🍶 | 1 tbsp | Original, not low-sodium |
| Dried Thyme 🌿 | 1 tsp | Or 1 tbsp fresh thyme leaves |
| Dried Oregano 🍃 | 1 tsp | Italian variety preferred |
| Black Peppercorns 🌶️ | 1 tsp | Freshly cracked, not pre-ground |
| Salt 🧂 | 1 ½ tsp | Kosher or sea salt |
| All-Purpose Flour 🌾 | 2 tbsp | For gravy thickening |
| Cold Water 💧 | ½ cup | For gravy consistency |
The beef is everything here. Chuck roast with visible marbling is key—it stays juicy during slow cooking. Costco or Sam’s Club usually have it pre-cut, but if buying whole, ask the butcher to trim excess fat. Look for a roast that’s about 3 lbs for six servings—it should be bright red, not grayish. The onions, carrots, and celery (the classic mirepoix) add sweetness and depth, but don’t skimp on freshness—wilting veggies make the broth taste flat. I always grab these from the produce section the same day I pick up the beef.
No red wine? Beef broth with 1 tbsp balsamic vinegar works in a pinch. Fresh thyme is ideal, but dried works at one-third the amount (so that 1 tsp dried = 1 tbsp fresh). The tomato paste can be from a tube—Trader Joe’s has great ones that last forever. For Worcestershire, Lea & Perrins is the gold standard, but any decent brand will do. The flour for gravy? King Arthur or Gold Medal are my go-tos—they thicken smoothly without getting clumpy. And if you’re wondering about the Worcestershire—yes, it’s an acquired taste, but it’s what gives that signature Bob Evans depth.
This reheats like a dream—3-4 days in the fridge, 3 months frozen. I always make extra gravy and freeze it separately because it’s just as good the next day. For serving, I like to transfer the beef to a platter and keep it warm in a 200°F oven while I reheat the veggies and gravy on the stovetop. The gravy thickens as it sits, so adding a splash of broth or water brings it back to perfection. Leftovers? Taco night or pot roast sandwiches—trust me on this.
Why You’ll Love This Recipe
- Garlic Bomb Flavor: That crispy, caramelized edge on the beef? Pure satisfaction. The slow roast turns tough chuck into melt-in-your-mouth perfection, and the garlic cloves—roasted right in the mix—add a depth that makes this taste like a restaurant dish.
- Leftovers That Don’t Suck: Between us, most pot roast leftovers are sad. Not this one. The slow-cooked beef stays tender, and the veggies soak up all the flavor, so reheating is basically a free meal. (Yes, even on a Tuesday night.)
- Budget-Friendly Crowd-Pleaser: A 3-4 pound chuck roast feeds a family of four with room to spare, and the veggies stretch the meal further. Honestly, I’ve served this at potlucks, game nights, and even a last-minute dinner for out-of-town guests—no one ever complains.
Step-by-step instructions for Bob Evans slow roasted pot roast
Here’s how to create that signature Bob Evans flavor profile with tender beef and rich gravy.
Prepare the Roast and Vegetables
Begin by trimming any excess fat from the 3 lb chuck roast beef, leaving about ¼ inch. Pat the roast dry with paper towels – this helps create that beautiful browned crust we’re after. In a large bowl, combine the sliced 1 whole yellow onion, halved 4 whole carrots, cut 4 whole celery stalks, and 6 cloves smashed garlic. This vegetable mix will form the flavorful base for your pot roast.
In a small bowl, whisk together the 2 tbsp tomato paste, 1 tbsp Worcestershire sauce, 1 tsp dried thyme, 1 tsp dried oregano, 1 tsp freshly cracked black peppercorns, and 1.5 tsp salt. This aromatic blend will infuse the meat with deep, savory notes throughout the cooking process. Rub this mixture all over the roast, pressing it into the meat so it adheres well.
Sear the Roast for Maximum Flavor
Heat a large Dutch oven over medium-high heat. Add the seasoned 3 lb chuck roast beef and sear on all sides until deeply browned, about 5-6 minutes per side. This step is crucial – it develops the Maillard reaction that creates that rich, caramelized flavor. Don’t rush this; you want that beautiful crust that will eventually dissolve into the gravy.
Once the roast is well-browned, remove it from the pot and set it aside. In the same Dutch oven, add the prepared vegetable mixture and cook for 5 minutes, stirring occasionally. This pre-cooking step helps soften the vegetables and builds even more flavor in the cooking liquid.
Slow Cook to Perfection
Return the roast to the Dutch oven. Pour in the 2 cups beef broth and 1 cup red wine, scraping up any browned bits from the bottom of the pot. This deglazing captures all those delicious flavors that would otherwise be lost. Bring the liquid to a simmer, then cover the pot and transfer it to a preheated 300°F oven.
Cook the pot roast for 3 to 3½ hours, or until the meat is fork-tender. You’ll know it’s done when a meat thermometer inserted into the thickest part reads 203°F – this ensures it will be perfectly tender when sliced. The vegetables should be soft but still holding their shape. Here’s where patience pays off – the slow cooking process transforms tough beef into melt-in-your-mouth perfection.
Prepare the Herb Gravy
Once the roast is cooked, carefully remove it from the pot and transfer it to a cutting board. Tent it loosely with foil and let it rest for 15 minutes. This resting period is essential – it allows the juices to redistribute throughout the meat, ensuring each slice is moist and flavorful.
While the roast rests, place the Dutch oven with the cooking liquid over medium heat. Sprinkle in the 2 tbsp all-purpose flour and whisk vigorously to combine. Cook for 1-2 minutes, stirring constantly, until the mixture thickens slightly. Then gradually whisk in the ½ cup cold water until you achieve a smooth, velvety gravy with your desired consistency. Taste and adjust seasoning with additional salt or pepper if needed.
Carve and Serve
After the resting period, slice the 3 lb chuck roast beef against the grain into ¼-inch thick slices. The grain direction will be visible as lines running through the meat. Arrange the sliced roast on a platter with the cooked vegetables and ladle the herb gravy generously over the top. This presentation not only looks impressive but ensures every bite is packed with flavor.
Serve immediately with crusty bread or over mashed potatoes to soak up that delicious gravy. The combination of tender beef, flavorful vegetables, and rich gravy makes this a hearty, comforting meal perfect for family gatherings or cozy weeknight dinners. The slow cooking process ensures maximum tenderness, while the searing and gravy preparation create that signature Bob Evans restaurant flavor at home.
Pro Tips For Making Bob Evans Slow Roasted Pot Roast
- SEAR THE ROAST FIRST: I learned this the hard way—skipping the sear means flavorless gravy. Brown the chuck roast in batches over medium-high heat until deep crust forms (about 3-4 minutes per side), then remove it. That crust locks in juices and builds the foundation for the rich sauce.
- CHOP VEGETABLES UNIFORM: No one likes a mushy carrot or a celery spear poking through the meat. Cut onions, carrots, and celery into even ½-inch chunks—they’ll cook at the same rate, so nothing turns to mush while the roast finishes.
- DON’T SKIP THE BROWNING OF AROMATICS: The onions and garlic should sweat until soft but not caramelized—just golden edges. If you rush this, the base will taste flat. A splash of water or broth at the end helps deglaze, but the real magic happens when you let them cook low and slow for 5-7 minutes.
- USE A MEAT THERMOMETER: Guessing doneness leads to dry meat. Pull the roast at 195°F—it’ll rest and carry over to 203°F (the ideal Bob Evans texture). No thermometer? Cut into the thickest part; it should shred easily with a fork.
Common mistakes when making great bob evans slow roasted pot roast
Overcooking the Roast
I’ve seen this happen more than once—pot roast that’s so dry it crumbles at the slightest touch. The key is patience: 3-3½ hours at 300°F is ideal, but never exceed 4 hours. Overcooking past that point turns tender meat into shoe leather.
Use a meat thermometer to check for 203°F internal temperature—this ensures perfect doneness without drying out. If you’re unsure, err on the side of slightly undercooked; the residual heat will finish it during resting. 🌡️
Skipping the Sear
Some home cooks rush this step, but searing is non-negotiable for that signature Bob Evans crust. A well-browned surface locks in juices and creates the Maillard reaction that builds deep, caramelized flavor. I recommend using a cast-iron Dutch oven for even heat distribution.
If your roast isn’t deeply browned on all sides, it’ll lack the rich, savory depth that makes this dish special. Take your time—5-6 minutes per side is worth it.
Ignoring the Resting Time
This is where many home cooks cut corners, but resting the roast for 15 minutes after cooking is crucial. It allows juices to redistribute, ensuring each slice stays moist. I’ve seen people slice into pot roast immediately and end up with dry, disappointing results.
Cover it loosely with foil and let it rest—this simple step makes all the difference in texture and flavor. Trust the process!
Using the Wrong Cut of Beef
Chuck roast is specifically chosen for its marbling and collagen content, which breaks down during slow cooking to create tender, juicy meat. Substituting with sirloin or ribeye will leave you with tough, chewy results.
Look for a 3 lb chuck roast with visible fat marbling—this is what keeps the meat moist. If your butcher doesn’t have it pre-cut, ask for a center-cut piece for even better quality.
Overcrowding the Pot
Packing too many vegetables or using a pot that’s too small traps steam and can make the meat tough. Aim for a Dutch oven that’s about 3-4 inches deep and leaves at least ½ inch of space around the roast.
This allows proper heat circulation and prevents the meat from steaming instead of roasting. If your pot feels too crowded, cook the vegetables separately and add them back later.
Neglecting the Gravy
The gravy is what ties this dish together, so don’t skip the flour slurry step! Many cooks make the mistake of just whisking flour into the liquid without cooking it first, which can leave you with a clumpy, unappetizing mess.
Cook the flour for 1-2 minutes to toast it slightly before adding liquid—this removes the raw flour taste and creates a silky texture. Taste and adjust seasoning before serving; sometimes a pinch of salt or a splash of red wine brightens it up. 💫
Nutrition facts
Frequently asked questions
Why does Bob Evans pot roast need to cook so slowly?
The slow cooking process at 300°F is what transforms tough chuck roast into melt-in-your-mouth perfection. This low-and-slow method breaks down collagen in the meat, creating natural gelatin that keeps it incredibly tender. Plus, it allows all those herbs and spices to infuse deeply for that signature restaurant flavor.
Can I make this pot roast in an electric slow cooker?
Use the same ingredients and seasoning, then cook on Low for 8 hours or High for 5-6 hours. The key is to sear the roast first in a separate pan before transferring it to the slow cooker with the vegetables. The slow cooker will maintain that tender texture while developing the flavors.
What’s the best way to reheat leftovers?
Reheat in a covered pot with a splash of beef broth or water over medium-low heat until warmed through (165°F). For extra tenderness, add a few extra minutes of heating. The gravy will thicken as it cools, so thin it with a bit more broth if needed. Leftovers taste just as good reheated as they do fresh!
Can I substitute red wine in the recipe?
Yes! Use 1 cup beef broth + 1 tbsp balsamic vinegar for a similar depth of flavor. If you prefer a wine alternative, dry white wine works too, but the color will differ slightly. The important thing is maintaining the same acidity level to balance the rich beef flavors.
How do I know when the pot roast is done?
The roast is perfectly done when it reaches 203°F internal temperature and feels fork-tender. You should be able to easily pierce it with a fork in the thickest part. If you don’t have a meat thermometer, check after 3 hours – the meat should pull away from the bone with minimal resistance.

- Melting Pot Gorgonzola Port Sauce Recipe: Deep Umami Richness With Nutty Crisp - November 4, 2026
- Love Martini Melting Pot Recipe: Chilled Creamy Delight With Hidden Vodka Kick - November 4, 2026
- Crock Pot Canned Beans Recipe: Silky-Smooth Texture Without the Grain - November 4, 2026