
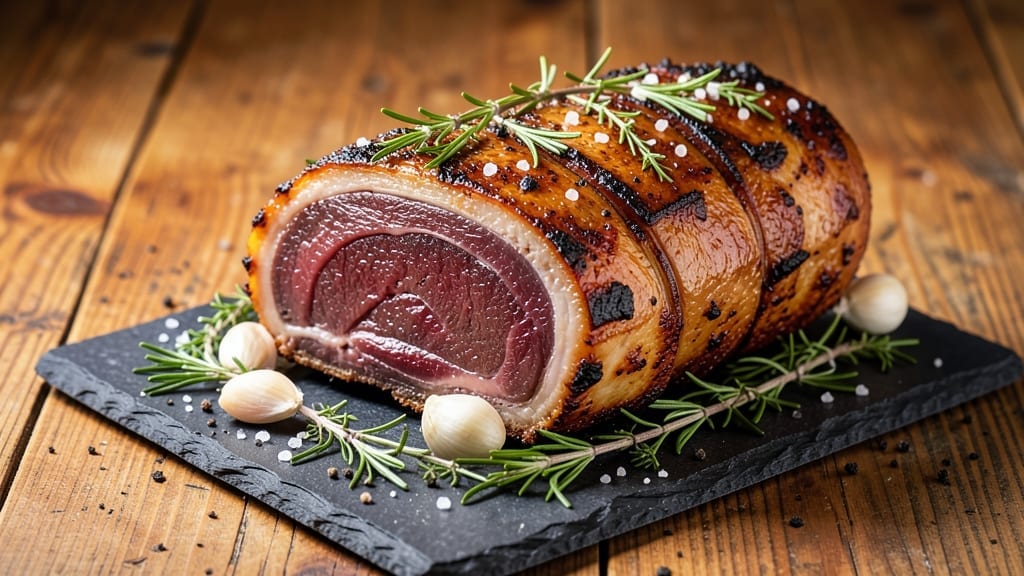
A 12 lb standing rib roast cooked to a juicy pink core is the centerpiece of any special occasion—whether it’s Thanksgiving, Christmas, or a celebratory Sunday dinner. The key to success lies in the reverse-sear method, which ensures a perfectly tender interior while developing a rich, caramelized crust.
This technique transforms a potentially intimidating cut into a showstopping main course that wows guests without requiring hours of fuss.
The process begins with a low-and-slow oven roast to gently cook the meat to just below your desired temperature, followed by a high-heat sear to achieve that coveted crust.
Seasoning is simple yet impactful: coarse salt and freshly cracked black pepper create an even flavor profile that enhances the beef’s natural richness. With precise temperature control and proper resting time, you’ll achieve a roast that’s fork-tender with a deep, savory crust.
What makes this recipe truly special is the balance of technique and simplicity—no fancy equipment or complicated steps, just a well-seasoned roast, careful temperature monitoring, and patience. The result is a juicy pink core surrounded by a beautifully browned exterior, ready to be carved and served with confidence.
Every slice will be moist, flavorful, and perfectly cooked, making it the star of your table.
Pair this roast with classic sides like garlic mashed potatoes, roasted root vegetables, or a fresh green salad to complete the meal. The leftovers reheat beautifully, offering delicious meals for days to come. Let’s get started on creating a roast that will have everyone asking for seconds.
Ingredients for 12 lb standing rib roast
Twelve pounds of premium beef and just eleven supporting ingredients transform into a showstopping centerpiece.
| Ingredient | Amount | Notes |
|---|---|---|
| Standing Rib Roast (Bone-In) 🥩 | 12 lb | Center-cut, 1.5-inch thickness preferred |
| Diamond Crystal Kosher Salt 🧂 | 2 tbsp | Coarse grain for even seasoning |
| Freshly Ground Black Pepper 🌶️ | 1 tbsp | Cracked directly over meat |
| Fresh Rosemary Sprigs 🌿 | 4 whole | Tied with kitchen twine |
| Fresh Thyme Sprigs 🍃 | 4 whole | Tied with kitchen twine |
| Garlic Cloves 🧄 | 6 cloves | Smashed, skin-on for aroma |
| Extra-Virgin Olive Oil 🫒 | 2 tbsp | High smoke point preferred |
| Yellow Onion 🧅 | 1 whole | Quartered, skin-on for flavor |
| Butter (Unsalted) 🧈 | ½ cup | Cold, cubed for searing |
| Beef Tallow or Duck Fat 🥓 | ¼ cup | For high-heat searing |
| Apple Cider Vinegar 🍎 | 2 tbsp | For pan deglazing |
| Red Wine (Dry, Bold) 🍷 | ½ cup | Cabernet Sauvignon preferred |
The standing rib roast must be center-cut with 1.5-inch thickness for even cooking—ask your butcher to trim excess fat. Costco’s pre-selected rib roasts consistently deliver quality, but Whole Foods offers organic options if preferred. Look for bright red color and good marbling—these indicators guarantee tenderness. Fresh herbs like rosemary and thyme elevate flavor; Trader Joe’s sells pre-tied bundles for convenience. The garlic cloves should be firm and unspotted, with skins intact for easy peeling later. Extra-virgin olive oil from California Olive Ranch (available at Williams Sonoma) provides the ideal smoke point for searing without overpowering the beef’s natural taste.
Substitutions are minimal for this recipe due to the precision of the reverse-sear method, but flexibility exists. No fresh rosemary? Use 1 tbsp dried rosemary (not the same as culinary rosemary) at half the quantity. Out of beef tallow? Duck fat or ghee works equally well for high-heat searing. The red wine can be swapped for beef broth if unavailable, though it lacks depth. Olive oil shortages? Avocado oil (with a high smoke point) is a suitable alternative. Pre-cut roasts? Ensure they’re center-cut—other sections yield uneven results. No apple cider vinegar? A splash of balsamic vinegar works in a pinch, though flavor differs slightly.
The roast should rest at room temperature for 1 hour before cooking to ensure even doneness. Fresh herbs keep best in the fridge for 5-7 days—wrap stems in damp paper towels for longevity. Unsalted butter remains fresh up to 6 months in the freezer, while beef tallow lasts 1 year unopened. Leftovers reheat beautifully—wrap tightly in foil and bake at 275°F for 20 minutes to preserve moisture. Portioning ahead saves time: slice against the grain into 1-inch medallions for easy serving. Sauces like red wine reduction or herb butter pair perfectly; store separately to avoid sogginess.
Why You’ll Love This Recipe
- Four-Hand Prep: I swear, the hardest part is lifting the roast into the pan—everything else takes 15 minutes. Just salt, pepper, and tuck in those rosemary sprigs while the oven heats. No chopping, no fuss, just pure set-it-and-forget-it.
- Rosemary-Pepper Magic: That first crack of crust when you pull it out? The rosemary’s piney bite cuts through the richness, and the pepper? It clings to every bite like a hug. Honestly, the flavor is so bold I’ve skipped sides more times than I’ll admit.
- Holiday or Tuesday Night: Between us, this roast is my secret weapon for Thanksgiving and lazy Sundays. Slice it thin for sandwiches the next day or serve it whole with crusty bread—same effort, different glory. (Yes, even on a Tuesday night.)
- Leftovers That Don’t Suck: I get it—12 lbs is intimidating. But the best part? The second day is better. Thin slices for tacos, shredded into pasta, or just reheated with a splash of broth. No sad, dry meat here—just pure, buttery satisfaction.
Step-by-step instructions for reverse-seared standing rib roast
This method guarantees a perfectly pink center while developing an irresistible crust.
Prepare and Season the Roast
Remove the 12 lb standing rib roast from the refrigerator and let it sit at room temperature for 1 hour. This ensures even cooking throughout the thickest sections. Pat the roast dry with paper towels, focusing on the bone side where moisture tends to collect.
In a small bowl, combine the 2 tbsp Diamond Crystal kosher salt and 1 tbsp freshly ground black pepper. Rub this mixture evenly over all surfaces of the roast, pressing firmly so the seasoning adheres. Tie the 4 whole rosemary sprigs and 4 whole thyme sprigs together with kitchen twine, then weave them under the roast, positioning them between the bones. This creates a flavorful barrier while allowing the meat to breathe.
Low-Temperature Roast to Medium Rare
Preheat your oven to 250°F with the rack positioned in the center. Place the seasoned roast fat-side up on a wire rack set inside a roasting pan. This elevated position allows heat to circulate evenly around the meat.
Roast for 4-5 hours until the internal temperature reaches 115°F at the thickest point. This slow cook transforms the tough connective tissue into tender gelatin while preserving the pink center. The exterior should appear lightly browned but not yet crusty—this comes later in the searing process.
Prepare the Searing Station
While the roast cooks, prepare your searing station. In a large oven-safe skillet, combine the 0.5 cup unsalted butter, 0.25 cup beef tallow or duck fat, and the 1 whole yellow onion (quartered with skin on). Heat over medium-high heat until the butter melts and the fat begins to shimmer.
Add the 6 smashed garlic cloves (skin-on) and cook for 1-2 minutes until fragrant but not browned. Remove from heat and set aside. This aromatic base will form the foundation for your pan sauce.
Reverse-Sear for Crispy Perfection
Transfer the roast to the preheated skillet with the fat mixture. Increase heat to high and sear for 4-5 minutes per side, basting frequently with the rendered fat. The roast should develop a deep mahogany crust while maintaining its pink interior.
For the final touch, pour in the 0.5 cup dry red wine and 2 tbsp apple cider vinegar. Scrape up any browned bits from the bottom of the pan to create a rich, flavorful sauce. Return to medium heat and cook for an additional 2 minutes until the wine reduces slightly.
Rest and Slice for Maximum Juiciness
Transfer the roast to a cutting board and tent loosely with aluminum foil. Let it rest for 20-30 minutes before slicing. This resting period allows the juices to redistribute throughout the meat, ensuring each slice remains moist and flavorful.
Slice the roast between the bones into 1-inch thick** portions, cutting against the grain for maximum tenderness. Serve immediately with the pan sauce spooned over the top. The result should be a perfectly pink center with a crispy exterior and rich, herby flavors throughout.
Pro Tips For Making 12 Lb Standing Rib Roast
- USE A MEAT THERMOMETER: I learned this the hard way—ribs from a 12-pound roast can read 20°F lower in the thickest part than your probe might show. Aim for 125-130°F internal temp (medium-rare) and pull it before you think it’s done. The residual heat will carry it to perfection while you rest it.
- SALT THE ROAST 48 HOURS EARLY: This isn’t the prettiest method, but it’s the tastiest. Generously coat the rib roast with kosher salt (about 1.5 teaspoons per pound) and let it sit uncovered in the fridge. The salt will penetrate deep, seasoning every bite—no dry crust or bland center afterward.
- SKIP THE CROWDED PAN: After burning three batches of rosemary and thyme, I finally figured out: Don’t overfill your roasting pan. Place the rib roast fat-side up in a pan just large enough to hold it snugly, with herbs tucked into the meat, not stuffed around it. This guarantees even heat and prevents steam from turning your crust to mush.
- REST IT UNDER FOIL: I was skeptical until I tried it—cover the roast loosely with foil for the first 20 minutes of resting. The residual heat will keep it warm while the juices redistribute, and the foil traps just enough moisture to keep the exterior from drying out. (Yes, even if you’re impatient like me.)
Creative variations of this 12 lb standing rib roast
Herb-Infused Red Wine Glaze
Swap the final sear for a herb-infused red wine glaze that adds depth and shine. After the low-temperature roast, brush the roast with a mixture of ½ cup dry red wine, 2 tbsp balsamic vinegar, 1 tbsp honey, and 1 tbsp chopped fresh rosemary.
Roast uncovered at 400°F for 20 minutes, basting every 5 minutes. The glaze caramelizes beautifully, creating a sticky, flavorful crust. 🍷
Smoked Chipotle Crust
For a smoky kick, add 2-3 chipotle peppers in adobo sauce blended with 1 tbsp olive oil to your searing fat mixture. After the reverse sear, brush this mixture over the roast and finish under a broiler for 2-3 minutes to create a smoky, slightly charred crust.
Garnish with chopped cilantro for freshness. This works especially well with grass-fed beef.
Honey-Balsamic Crust
Create a sweet-savory crust by mixing ¼ cup honey with 2 tbsp balsamic vinegar and 1 tbsp Dijon mustard. After the reverse sear, brush this mixture over the roast and broil for 3-4 minutes until bubbly and caramelized.
The contrast of sweet and tangy flavors elevates the rich beef. This variation pairs beautifully with roasted root vegetables or mashed sweet potatoes.
Garlic-Butter Baste
For a simpler but equally delicious variation, infuse your butter with 4 smashed garlic cloves and 1 tbsp chopped fresh parsley while it melts. After the reverse sear, baste the roast generously with this garlic butter and finish with a sprinkle of flaky sea salt.
The aromatic butter adds a luxurious touch without complicating the process. This is my go-to for weeknight dinners when I want something special but simple. 🧄
Spiced Coffee Crust
For a bold, unexpected twist, add 1 tbsp finely ground coffee and ½ tsp cinnamon to your searing fat mixture. After the reverse sear, brush the roast with a reduction of ¼ cup coffee and 1 tbsp brown sugar, then finish under the broiler.
The coffee deepens the beef’s flavor while adding a subtle warmth. This variation is perfect for holiday meals or when you want to impress guests. ☕
Beer-Braised Exterior
Replace the wine with ½ cup dark beer (like a stout or porter) and deglaze the pan after searing. Simmer the beer until reduced by half, then brush it over the roast before serving.
The malty, roasted notes of the beer complement the beef beautifully. This method works especially well with grass-fed or organic beef and adds a hearty, satisfying depth to the dish. 🍺
Nutrition facts
Frequently asked questions
How long should I let the 12 lb roast rest before carving?
Always allow the roast to rest for 20-30 minutes after cooking. This crucial step lets the juices redistribute throughout the meat, preventing them from running out when you slice. For a 12 lb roast, the longer rest time ensures every slice stays moist and flavorful.
Can I cook this roast in a smoker instead of the oven?
For a smoker, maintain a 225-250°F temperature until the internal temp reaches 115°F. Use mild wood like oak or hickory, then finish with a high-heat sear on a grill or in a cast-iron skillet. The smoky flavor adds depth while keeping the reverse-sear method intact.
What’s the best way to reheat leftovers?
Slice leftovers into 1-inch medallions and reheat in a 325°F oven for 15-20 minutes with a splash of beef broth. For quick reheating, use a skillet with medium heat and a pat of butter—just 3-4 minutes per side. Never microwave—it dries out the meat!
Why does my roast turn out dry?
Overcooking is the #1 cause. Use a meat thermometer to hit 115°F for medium-rare, then sear quickly. Another mistake? Skipping the rest time—juices need time to reabsorb. For extra moisture, baste with butter during the final sear and avoid cutting into it too soon.
How many people does this serve?
This 12 lb roast serves 12-15 people as the main course, assuming 6-8 oz per person with sides. For a crowd, add 2-3 extra pounds to account for bones and trimming. Leftovers make great sandwiches or hash the next day!

- 3 Cheese Pimento Cheese Recipe: Sharp Cheddar, Peppery Heat, and Creamy Spread Magic - October 10, 2026
- 7 Egg Cake Recipe: Fluffy Layers With Vanilla Bean Infusion - October 10, 2026
- 3 Musketeers Cookie Recipe: Crunchy Chocolate Shells With Gooey Caramel Centers - October 10, 2026