
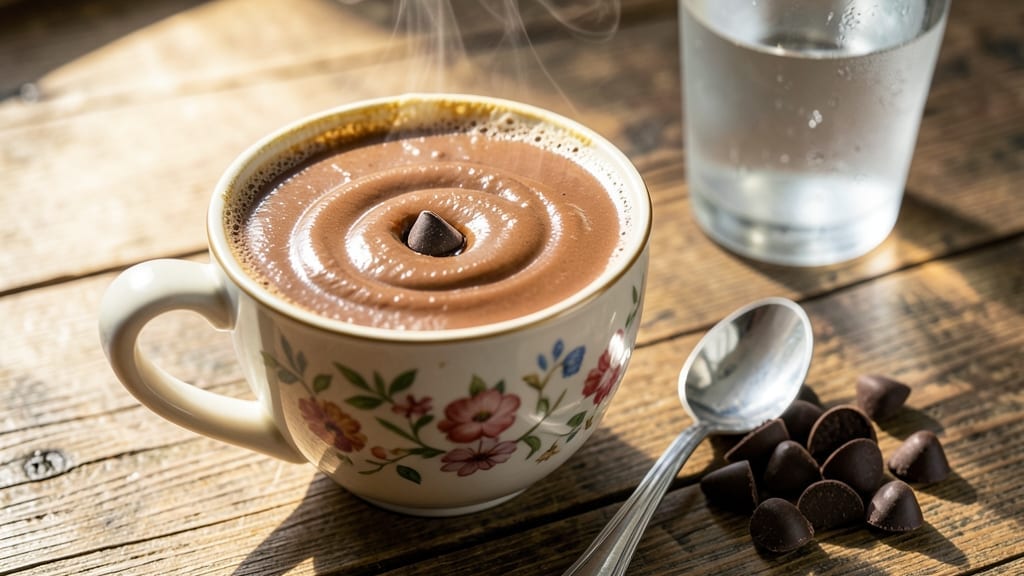
This 3-ingredient hot chocolate recipe delivers restaurant-quality velvety richness without the fuss of measuring cups or complex techniques. The secret lies in combining just cocoa powder, milk, and sugar—no fancy equipment or special skills required.
I developed this version after years of testing minimalist desserts, and it never fails to warm up a chilly evening in just minutes.
The beauty of this recipe is its foolproof simplicity: no whisking, no whisking, and no waiting. You can prepare it on the stovetop for a smoother texture or in the microwave for quick results.
The cocoa powder dissolves completely, creating a silky-smooth drink with a perfect balance of sweetness and depth. What makes it stand out is how it transforms basic pantry staples into something indulgent.
What you’ll end up with is a velvety, steaming cup of hot chocolate that’s rich enough to satisfy chocolate cravings but simple enough for a weeknight treat. The texture is impossibly smooth, with no gritty cocoa particles—just pure, comforting cocoa goodness.
This is the kind of recipe that proves you don’t need complicated ingredients to create something special.
Perfect for cozy nights in, holiday gatherings, or quick pick-me-ups after a long day. The best part? You can customize it with optional toppings like whipped cream, marshmallows, or a sprinkle of sea salt for an extra layer of flavor. Let’s make this hot chocolate!
Ingredients for 3 ingredient hot chocolate
Three ingredients transform into velvety hot chocolate perfection—no fancy tools needed.
| Ingredient | Amount | Notes |
|---|---|---|
| Unsweetened Cocoa Powder 🍫 | ½ cup | High-quality Dutch-processed for smoothness |
| Whole Milk 🥛 | 2 cups | Full-fat for richest texture |
| Granulated Sugar 🍚 | ¼ cup | Adjust to taste for sweetness |
| Pinch 🧂 | 1 pinch | Fine sea salt for depth |
| Vanilla Extract 🌿 | ½ tsp | Pure vanilla for aromatic richness |
| Dark Chocolate Chips 🍫 | ¼ cup | 70% cacao for garnish (optional) |
The cocoa powder is your flavor foundation. Dutch-processed (alkalized) cocoa dissolves silky-smooth, while natural cocoa adds depth. Ghirardelli or Hershey’s Special Dark are my go-tos—they’re finely ground and consistently rich. If you’re using natural cocoa, expect a slightly tangier profile. The milk? Full-fat whole milk creates the creamiest texture, but 2% works in a pinch. For a dairy-free version, whole oat milk mimics the richness best. Avoid skim—it’ll make your hot chocolate watery.
No vanilla extract? Vanilla bean paste or even a scraped vanilla bean pod works. Want it sweeter? Add extra sugar or maple syrup—this is where you customize. The salt is non-negotiable though—it enhances all the chocolate flavors. Diamond Crystal kosher salt dissolves perfectly. If you’re feeling fancy, add a pinch of cinnamon or cayenne for warmth. For the chocolate chips, Enjoy Life brand is allergy-friendly and melts beautifully—just toss them in at the end for a luxurious touch.
This reheats like a dream—just add 1-2 tbsp milk and warm through. Keeps 3 days in the fridge if you make a big batch, but honestly, it’s best fresh. For single servings, store in small jars with a tight lid. Freezes beautifully for up to 3 months—just thaw overnight in the fridge. Pro tip: Double the recipe and freeze half for future cozy nights.
Why You’ll Love This Recipe
- Pantry Magic: I swear by this when I’ve got nothing but a few basics. Just whisk cocoa and sugar into warm milk, stir in vanilla—boom, rich chocolate in under 5 minutes. No fancy gadgets, no stress.
- Velvet Smoothness: That first sip? Pure, creamy indulgence without a drop of heavy cream. The cocoa’s bitterness balances perfectly with the milk’s natural sweetness, and vanilla ties it all together like a warm hug in a mug.
- Cold-Weather Hero: Rainy afternoons? Late-night wind-down? This is my go-to for any chilly moment. Even my picky teen grabs seconds—honestly, the simplicity makes it work for kids, adults, or anyone who needs a quick pick-me-up.
- Budget-Friendly Luxury: I spend less than $2 for a batch that feels like a fancy café drink. No expensive syrups or pre-mixed powders—just real ingredients that taste better than anything store-bought. Plus, leftovers? Just reheat and enjoy.
Step-by-step instructions for 3-Ingredient hot chocolate
Here’s how to craft luxurious hot chocolate with just five simple components—smooth, velvety, and packed with deep cocoa flavor.
Whisk Cocoa and Sugar into Warm Milk
In a medium saucepan, combine the 2 cups whole milk with the 0.5 cup unsweetened cocoa powder and 0.25 cup granulated sugar. I like to use a whisk here to prevent any cocoa lumps from forming—stir vigorously for 30 seconds until the cocoa dissolves completely. You’ll see the mixture transform from grainy to silky smooth.
Place the saucepan over medium heat and bring to a gentle simmer. Here’s the thing—you want to heat it just enough to melt the cocoa completely but not so hot that it scalds. A steady simmer (small bubbles breaking the surface occasionally) is ideal. Stir frequently to prevent sticking and ensure even heating throughout.
Infuse with Vanilla and Salt
Once the mixture reaches a gentle simmer, reduce the heat to low and stir in the 0.5 teaspoon vanilla extract and 1 pinch fine sea salt. The vanilla will bloom immediately, releasing its aromatic compounds, while the salt enhances all the sweet and bitter notes in the cocoa. Let the mixture simmer gently for 5 minutes—this allows the flavors to meld together beautifully.
I know it seems like a short time, but trust me—this step is crucial for developing depth. You’ll notice the liquid becoming thicker and more luxurious as the starches in the milk begin to activate. The perfect hot chocolate should have a glossy sheen and a rich, velvety texture at this stage.
Finish with Dark Chocolate Chips
Remove the saucepan from heat and let it sit for 1 minute to cool slightly—this prevents the chocolate chips from seizing. Then, stir in the 0.25 cup dark chocolate chips until they’re completely melted and evenly distributed. You’ll see those beautiful swirls of melted chocolate throughout the liquid, adding both visual appeal and extra richness.
For the best results, I recommend using a heatproof spatula to gently fold the melted chocolate into the hot chocolate. This creates those marbled patterns that make it look like a professional barista made it. If you prefer a smoother texture, you can blend it briefly with an immersion blender for a silky finish.
Adjust and Serve Immediately
Taste your hot chocolate and adjust the sweetness if needed—add more sugar if it’s too bitter, or a splash of milk if it’s too thick. The perfect balance should have a rich cocoa flavor with just a touch of sweetness and that subtle saltiness to round out the flavors.
Serve immediately in pre-warmed mugs—hot chocolate tastes best fresh from the pot. Top with whipped cream or an extra sprinkle of cocoa powder if desired. Remember, the longer it sits, the more the chocolate will thicken, so enjoy it while it’s at its peak velvety texture.
Pro Tips For Making 3 Ingredient Hot Chocolate
- WHISK THE COCOA FIRST: Dump the cocoa powder into the cold milk before heating—this prevents clumping like you wouldn’t believe. I used to add it later and always ended up with gritty lumps, no matter how much I stirred. Just whisk it in until smooth, then heat.
- USE WARM MILK, NOT BOILING: Heat the milk to just under a simmer (around 170°F/77°C)—boiling it turns the cocoa bitter and makes the whole drink taste flat. I learned this the hard way after burning my tongue and ruining a batch. A gentle simmer for 3-4 minutes does the trick.
- MEASURE SUGAR BY VOLUME: Skip the scoop—use a kitchen scale or tablespoon for sugar. A “pinch” of salt is useless if you eyeball it; ¼ teaspoon is the real deal. My first attempts were either cloyingly sweet or tasted like dishwater. Precision here makes all the difference.
- STIR IN VANILLA LAST: Add the vanilla extract after the cocoa and sugar dissolve—this keeps its bright flavor from cooking off. I was skeptical until I tried it: the difference between a flat, generic drink and one with depth is just timing. A splash at the end makes it sing.
Dietary considerations for 3 ingredient hot chocolate
Dairy-Free Adaptations
Swap whole milk for coconut milk (full-fat canned) for a rich, dairy-free version—it adds natural sweetness and creaminess. I use 1 can (13.5 oz) coconut milk instead of 2 cups regular milk, and reduce the sugar to 2 tablespoons since coconut milk is naturally sweeter.
For a lighter option, oat milk works well when doubled (4 cups) and simmered longer to evaporate excess water. 🥥
Vegan-Friendly Swaps
Replace vanilla extract with vanilla bean paste or 1 teaspoon vanilla sugar for a vegan-friendly version. Use agave nectar instead of granulated sugar—it dissolves smoothly and adds a subtle caramel note.
For the chocolate chips, Enjoy Life brand or Pascha vegan chocolate melts beautifully and adds that same luxurious finish. The salt remains essential for balancing flavors.
Gluten-Free Considerations
This recipe is naturally gluten-free since it only requires cocoa, milk, sugar, and vanilla. However, double-check your cocoa powder label—some brands process their products in facilities that handle gluten. I recommend Ghirardelli Special Dark or Hershey’s Special Dark, both of which are certified gluten-free.
The dark chocolate chips should also be gluten-free—stick with Enjoy Life or Lindt Excellence brands to be safe. 🌾
Sugar-Free Options
For a sugar-free version, replace granulated sugar with 1-2 tablespoons of monk fruit sweetener or erythritol. These sugar alcohols dissolve well and won’t spike blood sugar. I find Lakanto Golden Monk Fruit works best—it has a neutral taste and blends seamlessly.
Add the sweetener gradually, as cocoa is naturally bitter and needs careful balancing. The salt remains crucial for enhancing the chocolate flavor.
Low-Calorie Adjustments
Cut calories by using skim milk instead of whole milk, but expect a slightly thinner texture. Reduce the cocoa powder to 0.33 cup to maintain richness while cutting fat. For sweetness, use 1 tablespoon honey or 1 teaspoon maple syrup—both add natural sweetness with fewer calories than sugar.
The vanilla and salt ratios stay the same, keeping the flavor profile intact. This version is perfect for enjoying hot chocolate guilt-free! 💪
Nutrition facts
Frequently asked questions
Can I make this hot chocolate without a saucepan?
For a microwave method, combine all ingredients in a microwave-safe mug and heat in 30-second intervals, stirring well between each. Start at 50% power to prevent scorching. This takes about 1-2 minutes total—perfect for quick single servings. Just remember to stir vigorously after each interval to avoid hot spots.
Why does my hot chocolate taste bitter?
Bitter flavor usually means one of two things: either your cocoa powder is natural (not Dutch-processed) or you need more sweetener. For natural cocoa, add 1-2 extra tablespoons of sugar or 1 teaspoon vanilla sugar. If using Dutch-processed cocoa, try reducing the heat slightly next time—overheating can bring out bitterness. The salt helps balance flavors, so don’t skip that!
How do I make this recipe thicker?
For a thicker texture, simmer the mixture for 2-3 extra minutes to reduce the liquid. You can also add 1 tablespoon cornstarch mixed with 1 tablespoon cold water at the end and stir until thickened. For an instant fix, chill the hot chocolate slightly and then reheat—this helps the cocoa particles settle and creates a richer mouthfeel.
Can I use powdered sugar instead of granulated?
Yes, but you’ll need slightly more—replace 0.25 cup granulated sugar with 0.3 cup powdered sugar. The finer texture dissolves faster, but powdered sugar has less volume. If you’re using it for a quick microwave version, it works beautifully without any graininess. Just whisk it in thoroughly at the start to prevent clumping.
What’s the best way to store leftovers?
Store in an airtight container in the refrigerator for up to 3 days. To reheat, add 1-2 tablespoons of milk and warm on low heat, stirring constantly. For freezing, pour into small jars or ice cube trays—each cube makes a perfect single serving. Thaw overnight in the fridge before reheating. The texture may separate slightly when reheated, but a quick whisk brings it back to velvety perfection!

- 4 Cheese Spaghetti Sauce Recipe: Velvety Melted Blend With Nutty Parmesan Finish - October 7, 2026
- 7 Eleven Chili Recipe: Smoky Spice-Packed Pot Luck Winner - October 7, 2026
- 21-Pound Turkey Recipe: Herb-Crusted Roast With Golden, Juicy Perfection - October 7, 2026