
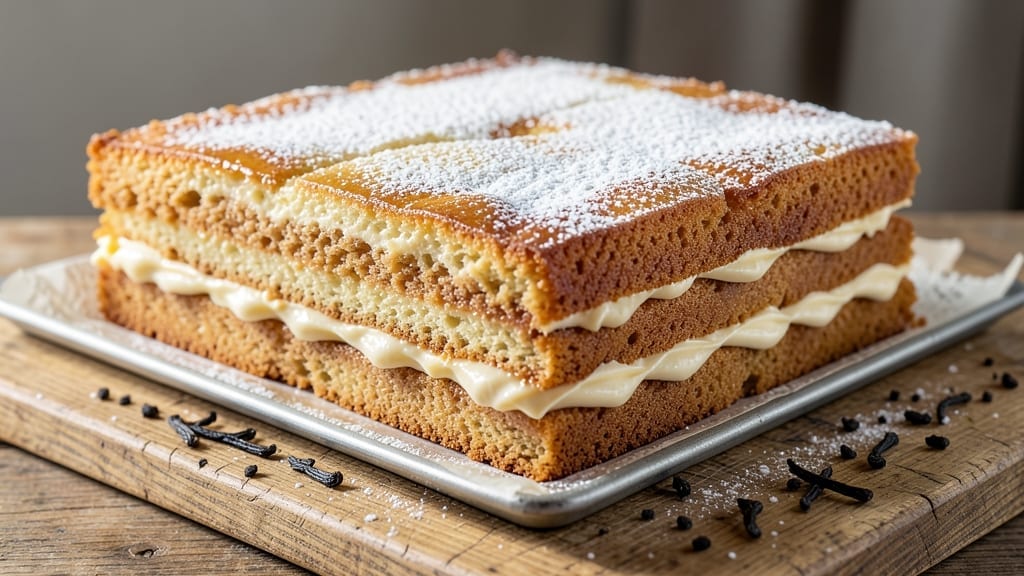
A 12×18 sheet cake is the perfect blank canvas for celebrations—whether it’s a birthday, wedding, or office party. This triple-layered vanilla dream delivers a light, fluffy texture with homemade buttercream that’s rich, smooth, and foolproof.
The secret lies in precise measurements and gentle folding, ensuring each layer rises evenly and stays moist for hours. This recipe is designed for crowd-sized servings, with enough batter to fill a full 12×18-inch pan in three even layers.
The buttercream isn’t just decorative—it’s the star, with a perfect balance of sweetness and tang that pairs flawlessly with vanilla. No special equipment is needed, just patience and a steady hand for assembly. By the time you’re done, you’ll have a showstopping centerpiece that’s as impressive as it is delicious.
The cake stays fresh for days, making it ideal for events where timing matters. Ready to bake? Let’s get started with the foolproof steps that make this a guaranteed success.
The key to this recipe is temperature control—room-temperature ingredients mix smoothly, while a preheated oven ensures even baking. Each layer is baked separately for precision, then stacked with a thin buttercream “crust” to prevent sogginess.
The buttercream is whipped to a silky consistency, making it easy to spread and pipe decorative borders. For serving, use a serrated knife for clean cuts, and store leftovers covered at room temperature for up to 24 hours.
The cake’s versatility means you can customize it with sprinkles, fresh berries, or chocolate shavings—whatever fits your occasion. Every bite delivers that perfect balance of tender cake and velvety frosting.
This isn’t just a cake recipe—it’s a confidence booster for any home baker. The steps are straightforward, and the results are restaurant-quality. Whether you’re a beginner or a seasoned pro, this triple-layered vanilla sheet cake will impress your guests and become your new go-to for celebrations.
Ingredients for 12×18 cake
Sixteen ingredients, three layers, and a buttercream so smooth it’ll fool everyone into thinking it’s from a bakery.
| Ingredient | Amount | Notes |
|---|---|---|
| All-Purpose Flour 🌾 | 6 cups | Sifted for lightness, spooned and leveled |
| Granulated Sugar 🍚 | 2 ¼ cups | Superfine for smoother texture |
| Unsalted Butter 🧈 | 2 cups | Room temperature, cubed |
| Large Eggs 🥚 | 6 whole | Room temperature, separated |
| Vanilla Extract 🌿 | 2 tbsp | Pure, high-quality extract |
| Baking Powder 🍞 | 2 tbsp | Diamond Crystal preferred |
| Salt 🧂 | ½ tsp | Fine sea salt |
| Whole Milk 🥛 | 1 ½ cups | Room temperature |
| Unsalted Butter 🧈 | 3 cups | Room temperature, for buttercream |
| Powdered Sugar 🍚 | 6 cups | Sifted, for smooth buttercream |
| Heavy Cream 🥛 | 1 cup | Chilled, for piping |
| Lemon Juice 🍋 | 1 tbsp | Freshly squeezed |
| Vanilla Bean Paste 🌿 | 1 tbsp | For deeper flavor |
| Parchment Paper 📄 | 1 sheet | For lining pan |
| Powdered Sugar 🍚 | ½ cup | For dusting layers |
The flour and butter are your foundation—King Arthur flour and Plugrá butter are my go-tos, but any high-quality all-purpose and unsalted butter will work. The buttercream is where the magic happens, so Land O’Lakes or European-style butter makes all the difference. For the vanilla, Madagascar bourbon vanilla extract adds depth, but pure vanilla extract is perfect too. The powdered sugar? Domino brand sifts like a dream, but any brand works if you take the time to sift it yourself. Room-temperature ingredients are non-negotiable—cold butter means lumps, and cold eggs won’t whip properly.
No vanilla bean paste? Double the extract and add a pinch of vanilla sugar. Short on powdered sugar? Confectioners’ sugar from the bulk bin is cheaper and just as smooth. The heavy cream can be swapped for whipped topping spray in a pinch, though it won’t be as stable. For a tangier buttercream, add 1 tsp lemon zest to the powdered sugar. The lemon juice in the buttercream brightens everything—freshly squeezed is best, but bottled works too. And if you’re baking for a crowd, double the batter—this recipe scales beautifully for a 14×24-inch pan.
This cake stays fresh for 3 days at room temperature if covered tightly, but trust me, it’ll disappear faster than that. For longer storage, wrap each layer individually in plastic wrap and refrigerate—bring to room temp before assembling. The buttercream can be made 2 days ahead and stored in the fridge; just rewhip before using. To transport, assemble the cake on a cake board and cover with a dome—no shifting or smudging. And if you’re nervous about stacking, chill the layers for 10 minutes before adding buttercream for cleaner slices.
Why You’ll Love This Recipe
- No Mixer Needed: I swear by this recipe when I’m in a rush—just cream the butter and sugar by hand (or use a fork in a pinch), then fold in the eggs and vanilla. The batter’s so forgiving that even if you overmix, the texture stays light.
- Butter-Sugar Magic: That rich, creamed butter and sugar combo? It’s what makes this cake melt-in-your-mouth tender. The eggs add structure without heaviness, and the vanilla ties it all together—simple, but ridiculously satisfying.
- Party in a Pan: Between us, this 12×18 size is my secret for gatherings. Bake it once, slice it for dessert, then freeze the rest for later—no one ever guesses it’s the same cake. (My sister-in-law still asks for seconds every time.)
- Pantry Staple Power: All-purpose flour, sugar, butter, eggs, and vanilla? You’re already halfway there. It’s the kind of recipe that doesn’t drain your wallet or your fridge—just reliable, crowd-pleasing flavor with zero fuss.
Step-by-step instructions for triple-layered vanilla sheet cake
This is where the magic happens—let’s build a showstopping sheet cake from scratch.
Prepare the Cake Layers
Preheat your oven to 350°F and line three 12×18-inch baking pans with the parchment paper, leaving an overhang on all sides. This prevents sticking and makes removal effortless later. Grease the parchment lightly with butter, focusing on the corners where cake tends to cling.
In a large mixing bowl, combine the 6 cups all-purpose flour, 2.25 cups granulated sugar, 2 tbsp baking powder, and 0.5 tsp salt. Whisk until evenly distributed—no lumps allowed. In a separate bowl, beat the 2 cups unsalted butter until light and fluffy, about 3-4 minutes on medium speed. Add the 6 whole large eggs one at a time, mixing well after each addition.
Alternate adding the dry ingredients and 1.5 cups whole milk to the butter mixture, beginning and ending with the dry ingredients. Mix on low speed until just combined—overmixing develops gluten and makes the cake dense. Divide the batter evenly among the three prepared pans, spreading it smoothly with a spatula. Bake for 20-25 minutes until a toothpick inserted in the center comes out clean and the edges pull away from the pan.
Assemble the Cake Layers
Allow the baked layers to cool in their pans for 10 minutes before transferring them to a wire rack to cool completely. This gradual cooling prevents cracking. Once fully cooled, carefully remove the layers from the parchment and place them on a clean work surface. Here’s the thing—you want to level each layer by shaving off any domed tops with a serrated knife for even stacking.
For the first layer, spread a thin layer of buttercream using an offset spatula, leaving a ½-inch border around the edges. Place the second layer on top and repeat the process. Finally, spread the remaining buttercream over the top layer, creating a smooth surface for decorating. This technique ensures each slice has equal amounts of cake and frosting—no one gets the short end of the knife!
Make the Homemade Buttercream
In a stand mixer fitted with the paddle attachment, beat the 3 cups unsalted butter on medium speed until smooth and creamy, about 3-4 minutes. Gradually add the 6 cups powdered sugar, mixing on low speed to avoid a sugar cloud. Increase the speed to medium and beat for another 2-3 minutes until light and fluffy.
Add the 1 cup heavy cream, 1 tbsp lemon juice, and 1 tbsp vanilla bean paste to the buttercream mixture. Beat on high speed for 1-2 minutes until fully incorporated and the mixture is smooth and glossy. This is where the magic happens—the lemon juice brightens the flavor, while the vanilla bean paste adds depth that store-bought extracts can’t match.
Decorate and Dust for Elegance
Using a piping bag fitted with a star tip, pipe decorative swirls or rosettes onto the top layer of the cake. For a classic look, spread the remaining buttercream evenly over the entire cake surface with an offset spatula, creating a smooth finish. Dust the top and sides of the cake generously with the 0.5 cup powdered sugar using a fine-mesh sieve, creating an elegant, snowy effect that’s perfect for special occasions.
Let the cake rest at room temperature for 1 hour before slicing. This allows the layers to set and the flavors to meld together. When you’re ready to serve, use a sharp knife to cut clean slices—dip the knife in hot water and wipe it dry between cuts for perfectly smooth edges. The result? A triple-layered masterpiece that looks as impressive as it tastes.
Pro Tips For Making 12×18 Cake
- Cream Butter Properly: DESCRIPTION: Stop using a wooden spoon like you’re stirring oatmeal—beat the butter and sugar until it’s light and fluffy, about 3-5 minutes. I used to rush this, and my cakes always turned out dense. The butter needs to incorporate air, and that’s the only way to guarantee a tender crumb.
- Weigh Your Flour: DESCRIPTION: Scooping and leveling flour is a recipe for disaster—use a kitchen scale for accuracy. A 12×18 cake is forgiving, but off measurements throw off texture. Spoon the flour into the scale, then level it off with a knife. (Yes, even if you’re in a hurry.)
- Don’t Overmix the Batter: DESCRIPTION: Once you add the flour, mix just until combined—no more. Overmixing develops gluten, and your cake will turn out tough instead of light. Fold in the dry ingredients with a spatula until no streaks remain, then stop. I’ve ruined cakes by beating them to oblivion.
- Rotate the Pan Mid-Bake: DESCRIPTION: If your oven has hot spots (and most do), swap the cake pans halfway through baking. A 12×18 cake is big—rotate it front to back and side to side at the halfway mark (check your recipe’s time, usually around 20-25 minutes in). This ensures even baking, so no one slice is dry or underdone.
Best sauces and condiments for this 12×18 cake
Classic Vanilla Glaze
This simple syrup glaze elevates your cake instantly. Combine 1 cup powdered sugar with 2 tbsp heavy cream and 1 tsp vanilla extract in a bowl. Whisk until smooth, then drizzle over the cooled cake layers before assembling.
For extra shine, brush the top with 1 tbsp apricot jam warmed with 1 tsp water. This glaze adds moisture and a subtle vanilla aroma that complements the buttercream beautifully. 🌟
Chocolate Ganache Drizzle
For chocolate lovers, a rich ganache is the perfect contrast. Melt ½ cup dark chocolate chips with ¼ cup heavy cream in a microwave-safe bowl, stirring until smooth. Let it cool slightly, then drizzle over the assembled cake.
Add 1 tbsp crushed hazelnuts or sea salt flakes for texture and depth. This pairing balances the sweetness of the vanilla cake with a sophisticated chocolate finish.
Lemon Curd Swirl
Brighten up your cake with homemade lemon curd. Mix ½ cup lemon juice, ¼ cup lemon zest, ½ cup sugar, and ¼ cup butter in a saucepan. Cook over medium heat, stirring constantly, until thickened.
Spread a thin layer between cake layers or pipe swirls on top. The tangy citrus cuts through the richness of the buttercream, creating a refreshing balance. 🍋
Caramel Dripping Edge
Add a decadent touch with a caramel drizzle. Cook ½ cup sugar in a saucepan until melted and golden, then carefully add ¼ cup heavy cream while stirring. Pour the caramel onto parchment paper to cool, then drizzle along the edges of the cake.
For extra flair, sprinkle with flaky sea salt or crushed pretzels. This technique adds a gourmet finish that’s sure to impress.
Berry Compote Topping
Fresh berries transform your cake into a summer masterpiece. Simmer 1 cup mixed berries (strawberries, raspberries, or blueberries) with 2 tbsp sugar and 1 tsp lemon juice until juices thicken.
Spread the compote over the top layer or pipe it into decorative rosettes. The natural sweetness and acidity of the berries create a vibrant, fruity contrast to the creamy buttercream.
Spiced Whipped Cream
For a lighter alternative, whip 1 cup heavy cream with 2 tbsp powdered sugar, 1 tsp vanilla extract, and a pinch of cinnamon or cardamom. Pipe swirls or dollops on top of the cake for a fresh, airy texture.
This adds a warm spice note that pairs beautifully with the vanilla cake, especially during fall or winter celebrations.
Nutrition facts
Frequently asked questions
Can I use this recipe for a single-layer sheet cake?
This batter works perfectly for a single-layer cake too. Simply bake the entire batter in one 12×18-inch pan for 30-35 minutes at 350°F. The same buttercream recipe will work, but reduce the amount to about 2 cups for a single-layer cake. The texture and flavor will be identical—just adjust baking time slightly.
Why does my cake sink in the middle?
This usually happens from overmixing the batter or opening the oven too soon. Always mix just until combined, and avoid opening the oven during the first 20 minutes of baking. A toothpick test (clean when inserted) is more reliable than time alone. If it sinks, try baking at 325°F next time for a slower rise.
How do I adjust this for a 14×24-inch pan?
Double the recipe and bake in a 14×24-inch pan for 35-40 minutes at 350°F. The same layering technique applies—just make sure your pan is well-greased and lined with parchment. For a triple-layer cake, you’ll need 4 cups of batter per layer (total 12 cups). The buttercream will need to be doubled too.
Can I make this cake ahead of time?
Yes! Bake the layers 1 day ahead and store them wrapped in plastic at room temperature. Assemble the cake 4-6 hours before serving to let the buttercream set. The buttercream itself can be made 2 days ahead and stored in the fridge—just rewhip before using. This makes it perfect for events where timing is tricky!
What’s the best way to transport this cake?
Assemble the cake on a sturdy cake board, then wrap it tightly in plastic wrap. Place it in a cake carrier or box with dividers to prevent shifting. For long trips, transport it horizontally to avoid uneven pressure. Keep it at room temperature—never refrigerate before transport. This keeps the layers intact and the buttercream smooth.

- 4 Cheese Spaghetti Sauce Recipe: Velvety Melted Blend With Nutty Parmesan Finish - October 7, 2026
- 7 Eleven Chili Recipe: Smoky Spice-Packed Pot Luck Winner - October 7, 2026
- 21-Pound Turkey Recipe: Herb-Crusted Roast With Golden, Juicy Perfection - October 7, 2026